Successfully establishing the Abyssinian gladiolus in your garden begins with the fundamental steps of proper planting and an understanding of its propagation methods. These initial actions set the stage for the entire growing season, directly influencing the health, vigor, and blooming potential of the plant. Timing is a critical factor; the corms should be planted in the spring after all danger of frost has passed and the soil has had a chance to warm up. Planting too early in cold, wet soil can lead to corm rot before they even have a chance to sprout. This process is not merely about burying a corm in the ground; it is about providing the ideal conditions for it to awaken from dormancy and thrive. By mastering the techniques for both planting these unique corms and propagating them for future seasons, you can ensure a continuous and expanding display of their elegant, fragrant flowers for years to come. This involves careful consideration of planting depth, spacing, and the different methods available for increasing your stock, from division to growing from cormels.
Optimal planting time and conditions
The timing of planting is paramount for the Abyssinian gladiolus. These corms are native to the warm climates of East Africa and are not frost-hardy, meaning they must be planted in the spring once the soil has warmed sufficiently. The ideal soil temperature for planting is around 13-15°C (55-60°F). Planting in soil that is too cold and damp is a primary cause of failure, as it encourages fungal diseases and can cause the corms to rot before they have a chance to initiate growth. A general rule of thumb for most temperate climates is to plant them two to three weeks after the last expected spring frost date, which typically corresponds with the time you would plant out tender summer annuals.
Beyond the timing, the conditions of the planting site are equally important. As sun-loving plants, they require a location that receives at least six hours of direct sunlight per day. Full sun encourages strong, sturdy stems and promotes the best possible flower production. The soil must be exceptionally well-draining. If you have heavy clay soil, it is essential to amend it with organic matter like compost and grit to improve its structure and prevent waterlogging. A raised bed can also be an excellent solution in areas with poorly draining soil, providing the sharp drainage these corms need to flourish.
Before planting, it is beneficial to prepare the soil by loosening it to a depth of at least 25-30 centimeters. This allows the roots to grow deeply and establish a strong anchor for the tall flower spikes. Incorporating a balanced, slow-release granular fertilizer or a good amount of bone meal into the bottom of the planting hole can provide the necessary nutrients for the initial stages of growth. This initial nutrient boost helps the corm to produce strong foliage, which is essential for photosynthesis and energy storage for the flowering period later in the summer.
When you are ready to plant, handle the corms gently. Inspect them to ensure they are firm and free from any signs of disease or rot. The corms have a distinct top and bottom; the top is usually pointed where the shoot will emerge, and the bottom is a flatter, slightly concave area known as the basal plate, where the roots will grow. It is crucial to orient the corm correctly in the planting hole, with the pointed side facing upwards. Planting them upside down will force the emerging shoot to expend a great deal of energy reorienting itself, which can delay growth and weaken the plant.
More articles on this topic
Planting depth and spacing guidelines
Achieving the correct planting depth is a critical factor in the successful cultivation of Abyssinian gladiolus. A general rule is to plant the corms at a depth that is approximately three to four times their own height. For most standard-sized corms, this translates to a planting depth of about 10-15 centimeters (4-6 inches). Planting them at this depth helps to anchor the tall, slender stems, providing natural support and reducing the likelihood that they will topple over once they are in full, heavy bloom. In lighter, sandy soils, you can plant them slightly deeper, while in heavier clay soils, a slightly shallower depth is advisable.
Proper spacing between the corms is also essential to ensure that each plant has adequate room to develop without competing for vital resources like light, water, and nutrients. Space the corms approximately 15-20 centimeters (6-8 inches) apart. This spacing allows for good air circulation around the foliage, which is important for preventing fungal diseases. It also gives the root systems enough space to expand and provides the leaves with sufficient access to sunlight for photosynthesis, which fuels the growth of the plant and the development of the flowers.
For a more naturalistic and visually appealing display, it is often recommended to plant Abyssinian gladiolus in groups or drifts rather than in formal, straight rows. Planting in clusters of five, seven, or more corms creates a much more impactful and aesthetically pleasing effect when they come into bloom. When planting in a group, you can dig a wider, flat-bottomed trench to the correct depth and then arrange the corms within that area, maintaining the recommended spacing between them. This method is often easier and more effective than digging individual holes for each corm.
After placing the corms in their holes or trench with the pointed side up, carefully backfill with the prepared soil. Gently firm the soil over the corms to ensure good contact and eliminate any large air pockets, but avoid compacting the soil too heavily. Once planted, water the area thoroughly. This initial watering helps to settle the soil around the corms and provides the moisture needed to encourage them to break dormancy and begin the rooting process. Do not water again until you see the first green shoots emerging from the soil.
More articles on this topic
Propagation through corm division
The primary method for propagating Abyssinian gladiolus is through the natural division of its corms. At the end of each growing season, the original “mother” corm that you planted in the spring will have shriveled and used up its energy reserves. In its place, on top of the old corm, a brand new, large corm will have developed. This process ensures the continuation of the plant for the following year. This new corm is essentially a clone of the parent plant and will produce flowers in the next growing season.
When you lift the corms from the ground in the autumn for winter storage, you will find this new, plump corm. The old, withered mother corm will be attached to its base and can be easily snapped off and discarded. This simple act of separating the new corm from the old one is the most basic form of propagation, ensuring you have a viable corm for the next season. If the plant was particularly healthy and vigorous, the new corm will be large and full of stored energy, promising a spectacular display the following year.
Occasionally, a very large and healthy parent corm may produce two or more large new corms instead of just one. These new corms will be clustered together and can be carefully separated after the curing process. You can gently break them apart by hand; they should separate quite easily. Each of these new, large corms is a viable plant that can be planted the following spring to produce a full-sized, flowering plant. This is an excellent and reliable way to slowly increase your stock of these beautiful flowers.
It is important to perform this division in the autumn after lifting the corms and before placing them into winter storage. This allows the separation points to dry and heal during the curing process, which reduces the risk of fungal infections taking hold during the storage period. Ensure that each divided corm has a portion of the basal plate at the bottom, as this is where the new roots will form. By following this simple process of division, you can multiply your Abyssinian gladiolus plants year after year, sharing them with friends or expanding their presence in your own garden.
Propagating from cormels
In addition to the large replacement corm, the Abyssinian gladiolus also produces numerous small, baby corms around the base of the main corm. These are known as cormels or cormlets. They are encased in a hard, protective shell and represent another excellent method for significantly increasing your stock of plants over time. When you lift the corms in the autumn, you will notice these small, bead-like structures attached to the base of the new corm. These can be easily detached and saved for propagation.
After harvesting the cormels, they should be stored along with the main corms over the winter in a cool, dry, and frost-free place. It is important to keep them from drying out completely, so storing them in a paper bag or a container with slightly damp peat moss or vermiculite is ideal. The hard outer shell of the cormels can sometimes inhibit germination, so some gardeners choose to soak them in warm water for a day or two before planting to soften the shell. This can help to speed up the sprouting process.
In the spring, these cormels can be planted out in the garden. Because they are so small, they will not produce flowers in their first year. The primary goal for the first season is to allow them to grow and develop their foliage, which will, in turn, help the cormel to grow larger. Plant the cormels about 5-8 centimeters deep in a well-prepared nursery bed or a designated section of your garden with good, fertile soil. Space them about 5-10 centimeters apart in rows to make them easy to care for and harvest later.
Treat the growing cormels as you would the mature plants, ensuring they receive adequate water, sunlight, and are kept free from weeds. At the end of the growing season, lift them just as you would the mature corms. You will find that they have grown significantly in size. Store them again over the winter, and plant them out the following spring. Depending on the growing conditions, these cormels will typically take two to three years to reach a flowering size. While it requires patience, this method is a highly effective and economical way to produce a large number of new plants.
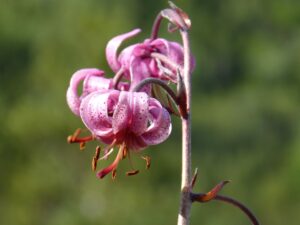
📷 Flickr / Szerző: Stefano / Licence: CC BY-NC-SA 2.0