Ensuring the survival of your bulbs through the coldest months of the year is a vital task for any dedicated gardener. You should take a proactive approach to winter protection, especially if you live in a region with unpredictable or extreme weather patterns. While these yellow-flowering bulbs are quite hardy, a little extra care can make a huge difference in their spring performance. A professional overwintering strategy involves both physical protection and a deep understanding of plant physiology.
The process of preparing for winter begins long before the first frost actually hits the ground in late autumn. You should focus on keeping your plants healthy and well-fed throughout the summer so they can store plenty of energy in their bulbs. A strong and well-prepared plant is much more likely to survive a harsh winter than one that has struggled through the growing season. Early preparation is the foundation of a successful overwintering plan for any professional landscape.
You should also pay close attention to the local microclimates within your own garden when deciding how much protection is needed. Some areas might be naturally sheltered by walls or hedges, while others are exposed to biting winds and deep frost. Mapping out these different zones will help you tailor your winter care to the specific needs of each part of your garden. A professional gardener knows that every square meter of land has its own unique set of environmental challenges.
Finally, remember that winter is a natural part of the life cycle for these bulbs and is actually necessary for their long-term health. The period of cold dormancy triggers the chemical changes inside the bulb that allow it to produce flowers in the spring. You should aim to protect the plants from extreme temperatures without completely insulating them from the cooling process. Finding the right balance between protection and natural exposure is the key to a successful winter.
Hardiness and protection
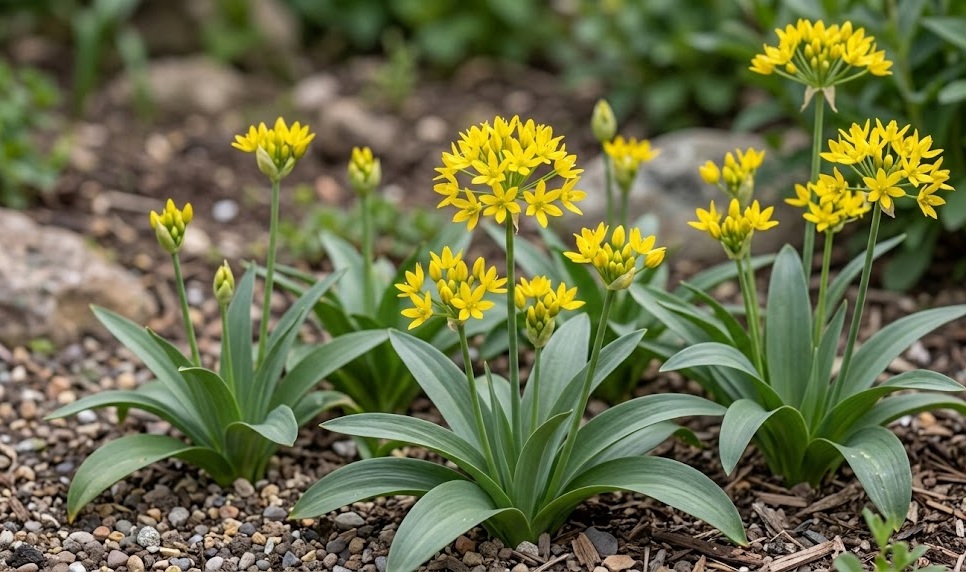
These yellow-flowering bulbs are generally hardy down to about minus fifteen degrees Celsius if they are planted in well-drained soil. You should check the hardiness zone of your specific location to see if your bulbs are at risk during a typical winter. If you are on the edge of their natural range, providing a thick layer of organic mulch is the best way to insulate the soil. A ten-centimeter layer of dry leaves or straw can keep the ground several degrees warmer than the surrounding air.
More articles on this topic
You should also consider the use of frost blankets or horticultural fleece during periods of exceptionally cold weather or sudden temperature drops. These lightweight materials can be draped over the bulb beds to trap a layer of warmer air close to the ground. You must be careful to secure the edges of the blankets so they don’t blow away in the wind and leave your plants exposed. Professional gardeners always keep a supply of fleece on hand for those unexpected winter emergencies.
The timing of when you apply and remove your winter protection is just as important as the materials you use. You should wait until the ground has started to cool down before applying mulch, as putting it down too early can trap warmth and encourage late growth. Conversely, you should remove the extra protection in the early spring as soon as the threat of deep frost has passed. This allows the soil to warm up quickly and gives the emerging shoots the light and air they need to thrive.
In areas with very wet winters, the primary danger to your bulbs is often rot rather than the actual cold temperature. You might need to provide a temporary cover to deflect heavy rain away from your most sensitive bulb beds. A simple piece of sloped wood or a clear plastic sheet can prevent the soil from becoming completely waterlogged during the dormant season. Protecting your bulbs from excessive winter moisture is a hallmark of an expert horticulturist.
Winter dormancy stages
Inside the dormant bulb, a complex series of physiological changes is taking place to prepare the plant for the coming spring. You should think of dormancy not as a state of “sleep,” but as a period of intense internal reorganization and development. The cold temperatures of winter are the signal that the plant needs to begin forming the embryonic flower and leaf tissues for the next year. Understanding this internal process helps you appreciate the importance of a proper and undisturbed winter rest.
More articles on this topic
As the temperature drops, the starches stored in the bulb are converted into sugars, which act as a natural antifreeze for the plant cells. This chemical shift allows the bulb to withstand freezing temperatures that would otherwise burst the delicate cell walls. You should avoid any activities that might wake the plant up prematurely, such as applying nitrogen-rich fertilizer in the late autumn. Keeping the plant in a steady and deep state of dormancy is the safest way to ensure its winter survival.
The depth of the dormancy can vary depending on the specific weather patterns and the history of the plant’s growth that year. A long and steady cooling period usually leads to a more robust and successful dormancy than a season with many temperature fluctuations. You should monitor the weather closely and be prepared to add extra protection if a sudden warm spell is followed by a deep freeze. Professional gardeners always watch the thermometer with a keen eye during the transitional months of the year.
Once the “chill requirement” of the bulb has been met, the plant enters a state of readiness where it is just waiting for the soil to warm up. You will not see any outward signs of this change, but the bulb is now primed and ready to grow at the first sign of spring. This is why you often see bulbs emerging so quickly once the snow melts and the sun begins to warm the earth. The invisible work of winter is the secret engine that drives the spectacular show of spring.
Pre-winter preparation
The final weeks of autumn are the perfect time to give your garden a thorough cleaning and preparation for the coming cold. You should remove all dead and decaying foliage from the bulb beds to prevent it from harborbing pests and diseases over the winter. This simple act of hygiene reduces the risk of fungal spores surviving and infecting the new shoots in the spring. A clean garden is a healthy garden, and professional habits in the fall lead to better results in the spring.
You should also take this opportunity to check the labels and markers in your garden to ensure they are still legible and firmly in place. Winter can be a long and messy season, and it is very easy to forget exactly where your bulb drifts are located. Having clear markers prevents you from accidentally digging in the area or stepping on the emerging shoots when you are doing early spring chores. Organization is a key part of the professional gardener’s toolkit during the quiet months of the year.
Providing a final, deep watering before the ground freezes can be very beneficial, especially if the autumn has been unusually dry. Moist soil holds heat better than dry soil and provides a more stable environment for the roots that are still slowly growing. You should aim to do this on a relatively warm day so the water has time to soak in before the temperature drops again at night. This “winter drink” helps the plant maintain its hydration levels during the long and dry dormant period.
Finally, consider the structural elements of your garden and how they might affect the bulbs during the winter months. You should check that any nearby shrubs or trees are not going to drop heavy branches on your bulb beds during a snowstorm. Trimming back any overhanging growth can prevent physical damage and ensure that the area remains safe and undisturbed. Taking a few hours to prepare your garden site in the fall will save you a lot of work and worry in the spring.
Post-winter recovery
As the days grow longer and the soil begins to thaw, your focus should shift toward helping your bulbs transition back into active growth. You should start by gently peeling back any heavy layers of mulch to allow the sun to reach the soil surface. Doing this in stages allows the plants to acclimate to the changing conditions without being shocked by a sudden exposure to the elements. A gradual and careful approach to spring cleaning is a hallmark of a professional gardener.
You should inspect the area for any signs of “frost heave,” which occurs when the freezing and thawing of the soil pushes the bulbs to the surface. If you find any exposed bulbs, you should gently press them back into the earth and cover them with a fresh layer of soil. Leaving them exposed can lead to drying out or damage from late-season frosts that can still occur in the early spring. Constant monitoring during the thaw is essential for protecting your investment in the garden.
Once the new green tips have emerged, you can provide a light application of a balanced fertilizer to support the rapid growth. You should be careful not to over-feed at this stage, as the plant is still relying on the energy it stored in the bulb over the summer. A gentle boost of nutrients is all that is needed to help the plant reach its full potential and produce those beautiful yellow flowers. Professional feeding is always about providing exactly what the plant needs at the right time.
Finally, take a moment to record the success of your overwintering strategy in a garden journal or a simple notebook. Note which areas performed the best and if any specific protection methods seemed to be particularly effective for your location. This information will be invaluable when you are planning your winter tasks for the following year. Learning from your own garden is the best way to become a truly expert and professional horticulturist.