Successfully establishing a sleeping hibiscus in your garden begins with a deep understanding of the proper techniques for both planting and propagation. This resilient tropical shrub is prized for its unique blossoms, but its long-term health is largely determined by how it is initially handled during the early stages of its life. Whether you are starting from a nursery-bought specimen or trying to create new plants from cuttings, precision is key to ensuring a high success rate. By following professional guidelines, you can ensure that your plants develop a strong root system and a healthy structure from the very beginning.
The process starts with selecting the right time of year to introduce the plant to its new environment or to begin the propagation process. Generally, the warm months of late spring and early summer provide the best conditions for root development and growth. During this time, the soil is warm enough to encourage rapid biological activity, and the plant is in its most active metabolic state. This natural momentum helps the plant overcome the stress of being moved or the challenge of forming new roots from a cutting.
Site selection is equally important, as the plant will likely remain in its chosen spot for many years if it is planted in the ground. You must consider not only the current size of the plant but also its potential mature dimensions to avoid future crowding issues. The soil must be prepared well in advance to ensure that the transition is as smooth as possible for the delicate root system. Taking these preparatory steps seriously will save you a lot of maintenance work and potential disappointment in the future.
For those interested in expanding their collection without buying new plants, propagation offers a rewarding and cost-effective method. The sleeping hibiscus is relatively easy to propagate if you use the correct type of wood and provide the right level of humidity. This article will guide you through the technical aspects of both planting and propagation to help you master these essential gardening skills. With the right approach, you can fill your garden with these beautiful shrubs or share them with fellow enthusiasts.
Choosing the right planting site
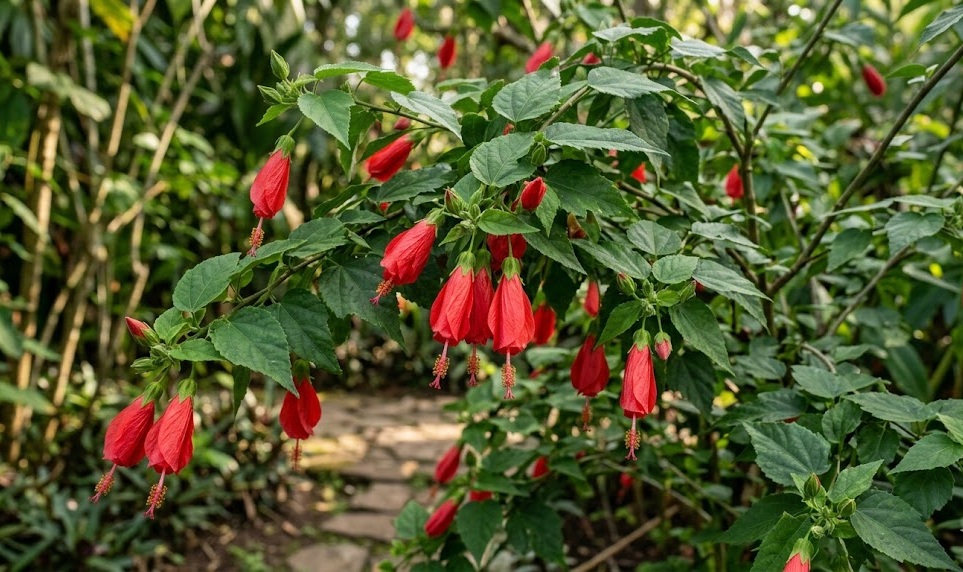
The ideal location for a sleeping hibiscus is one that receives plenty of sunlight but is also sheltered from the most aggressive environmental elements. While it can tolerate some partial shade, full sun exposure for at least six to eight hours a day is necessary for the most prolific flowering. A spot that gets morning sun and some afternoon relief can be perfect in regions with exceptionally high summer temperatures. Observe the movement of shadows in your garden throughout the day before making a final decision on the planting spot.
More articles on this topic
Soil conditions at the chosen site must be evaluated for both texture and chemical composition to ensure they meet the plant’s requirements. As mentioned previously, drainage is paramount, so avoid low-lying areas where water tends to collect after a heavy rain. If your garden has heavy clay soil, consider creating a raised bed or a large mound to improve the vertical drainage for the roots. This extra effort during the site preparation phase will prevent many common root-related diseases later on in the plant’s life.
Airflow is another critical factor that is often overlooked when choosing a location for a large shrub like the sleeping hibiscus. Good circulation helps keep the foliage dry and reduces the risk of fungal infections that thrive in stagnant, humid air. However, you should avoid placing the plant in a wind tunnel between buildings, as this can lead to physical damage and increased water loss. A balanced position that allows for a gentle breeze while providing a sturdy backdrop is the most effective choice for long-term health.
Finally, consider the proximity of other plants and structures when deciding where to dig your planting hole. The sleeping hibiscus can grow quite wide, and you don’t want it to be smothered by faster-growing trees or to interfere with walkways and fences. Giving the plant enough space to breathe and expand naturally will result in a more symmetrical and aesthetically pleasing shape. Planning for the future size of the shrub is a hallmark of a professional approach to garden design and installation.
The planting process step by step
Once you have selected the perfect spot, the actual planting begins with digging a hole that is significantly larger than the current root ball. A general rule of thumb is to make the hole twice as wide as the pot but no deeper than the root system itself. This wide area of loosened soil allows the new roots to spread out easily into their new environment without meeting immediate resistance. Breaking up the soil at the bottom and sides of the hole further assists this process and prevents the “pot-bound” effect in the ground.
More articles on this topic
Before placing the plant in the hole, it is beneficial to mix some organic compost or aged manure into the excavated soil. This provides an immediate boost of nutrients and improves the soil’s ability to hold moisture near the developing roots. You should also check the root ball of the plant and gently loosen any roots that have started to circle the inside of the nursery container. This encourages them to grow outward into the surrounding soil rather than continuing to grow in a tight, restrictive spiral.
Carefully place the plant in the center of the hole, ensuring that the top of the root ball is level with the surrounding ground surface. Planting it too deep can lead to stem rot, while planting it too shallow can cause the roots to dry out too quickly. Fill the hole halfway with the amended soil, then water it thoroughly to settle the earth and remove any large air pockets. Once the water has drained, finish filling the hole and gently firm the soil with your hands to provide stability for the shrub.
The final step in the planting process is to apply a thick layer of mulch around the base of the plant, keeping it a few inches away from the stem itself. This mulch will help retain moisture during the critical first few weeks while the plant is establishing itself in its new home. Give the plant another deep watering to ensure that the entire root zone is hydrated and ready for the transition. Regular monitoring over the next few weeks is essential to ensure that the plant does not show signs of stress or dehydration.
Propagation through stem cuttings
Propagating the sleeping hibiscus is most successful when using semi-hardwood cuttings taken during the peak of the growing season. Semi-hardwood refers to wood that is no longer soft and green but has not yet become fully woody and brown. These cuttings have enough stored energy to survive the transition but are still flexible enough to produce new roots quickly. Look for healthy, vigorous stems that have recently finished flowering for the best possible results in your propagation efforts.
Each cutting should be approximately ten to fifteen centimeters long and contain at least two or three nodes, which are the points where leaves emerge. Use a sharp, sterilized pair of pruning shears to make a clean cut just below a node, as this area contains a high concentration of growth hormones. Remove the lower leaves to prevent them from rotting in the rooting medium, leaving only a couple of leaves at the very top. If the remaining leaves are very large, you can cut them in half to reduce the amount of moisture the cutting loses through transpiration.
Using a rooting hormone can significantly increase your success rate, although it is not strictly necessary for this particular species. Dip the bottom end of the cutting into the hormone powder or liquid before inserting it into a well-draining rooting medium. A mixture of perlite and peat moss or a dedicated seed-starting mix works exceptionally well for this purpose. The medium should be damp but never soaking wet, as excess water will cause the base of the cutting to rot before roots can form.
To maintain the high humidity required for rooting, you can place the cuttings in a small propagation chamber or cover them with a clear plastic bag. Keep the cuttings in a warm, bright spot but out of direct sunlight, which could overheat the chamber and kill the tender tissues. Within four to six weeks, you should start to see new growth or feel resistance when you gently tug on the cutting, indicating that roots have formed. Once a solid root system is established, you can begin to acclimate the new plants to lower humidity levels.
Ensuring successful establishment
After planting or once your cuttings have been potted up, the establishment phase is the most critical time for the plant’s survival. During the first growing season, the hibiscus will focus most of its energy on building a root system rather than producing top growth or flowers. You must ensure that the soil stays consistently moist but not saturated, as the new roots are very sensitive to both drying out and overwatering. Check the soil moisture daily, especially during periods of high heat or low rainfall, to keep the plant on a steady growth path.
Avoid the temptation to heavily fertilize a newly planted sleeping hibiscus during its first few months in the ground. Too much nitrogen can encourage rapid top growth that the immature root system cannot yet support, leading to a weak and stressed plant. Instead, rely on the organic matter you added during planting to provide a gentle, steady supply of nutrients. Once you see significant new leaves and stems developing, you can gradually introduce a balanced, diluted fertilizer into your maintenance routine.
Staking might be necessary for taller plants or for those planted in areas that experience frequent breezes during the summer. Use soft ties that won’t cut into the bark and a sturdy stake driven into the ground outside the root ball area. The goal is to provide support while still allowing the plant to move slightly in the wind, which helps strengthen the main stem over time. Check the ties regularly to ensure they are not becoming too tight as the stem thickens and the plant grows larger.
Finally, keep the area around the base of the new plant free from weeds and grass, which compete for the same water and nutrients. A clean, mulched circle around the plant not only looks professional but also makes it easier to monitor the health of the lower stems. As the plant becomes more established over the next year or two, it will become increasingly self-sufficient and resilient to environmental fluctuations. With a strong start, your sleeping hibiscus will provide many years of tropical beauty and fascinating blooms for your garden.