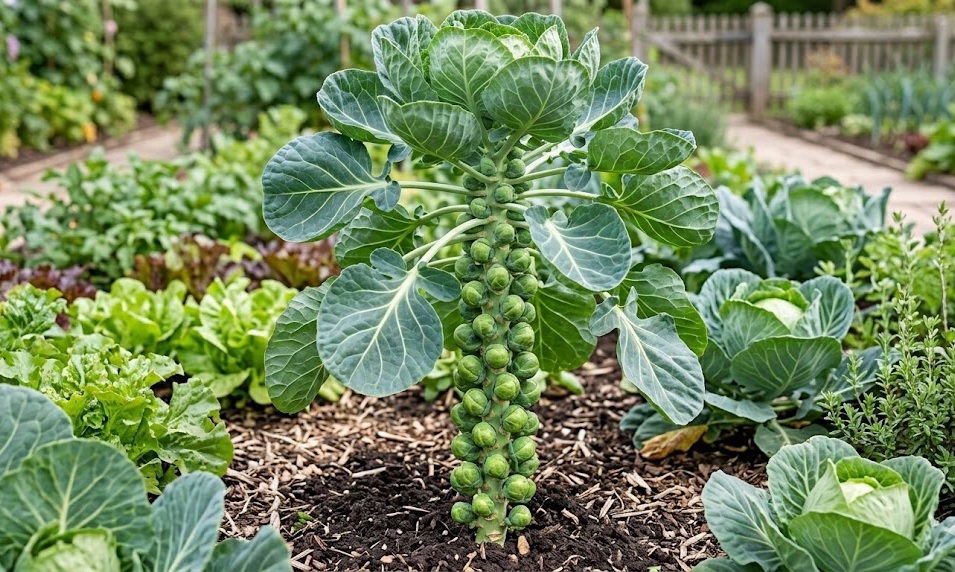
Pruning and cutting back are specialized maintenance tasks that can significantly improve the health and productivity of your Brussels sprouts crop. While many gardeners leave the plants to grow naturally, a professional approach involves strategic interventions to manage the plant’s energy and improve environmental conditions. You must learn the correct techniques for removing foliage and managing the growing tip to ensure that every sprout reaches its full potential. By incorporating these practices into your regular garden routine, you can produce a cleaner, more uniform, and higher-yielding harvest.
The primary reason for pruning is to improve air circulation and light penetration around the developing sprouts along the main stem. As the plant grows, the large lower leaves can become a barrier to fresh air, creating a humid microclimate that encourages rot and pests. By selectively removing these older leaves, you create a more open structure that allows the sprouts to dry quickly after rain or dew. This simple act of hygiene is one of the most effective ways to prevent disease without the use of chemical sprays.
Another important aspect of pruning is the removal of the growing tip, a practice often referred to as “topping.” This is typically done late in the season to signal the plant to stop growing taller and start investing all its energy into the existing sprouts. When you remove the apical meristem, the plant’s hormonal balance shifts, leading to a noticeable surge in the size and firmness of the buttons. Timing this intervention correctly is a skill that requires a good understanding of your local climate and the maturity of your specific variety.
Pruning also makes the task of harvesting much easier and more efficient, as it clears the way for you to reach the sprouts without fighting through a mass of foliage. You can see the maturity of the buttons more clearly and make better decisions about which ones are ready to be picked. A well-managed and pruned garden not only looks more professional but also functions more effectively as a food-producing system. Mastering these techniques is a vital step in your journey toward becoming an expert in brassica cultivation.
Strategic leaf removal for health and airflow
Removing the lower leaves of the Brussels sprout plant should be a gradual process that follows the development of the sprouts from the bottom up. As the sprouts in the lowest section of the stem reach about half their mature size, you can safely remove the leaves that are directly adjacent to them. This opens up the base of the plant where the air is often most stagnant and where pests like slugs are most likely to hide. You should use a pair of clean, sharp garden shears to make clean cuts as close to the main stem as possible.
More articles on this topic
You must be careful not to remove too many leaves at once, as the plant still needs a significant amount of foliage to perform photosynthesis. A good rule of thumb is to never remove more than the bottom third of the leaves at any one time. This ensures that the plant has plenty of energy to continue building the sprouts further up the stalk while still gaining the benefits of improved airflow. Observing the plant’s response to your pruning will help you find the right balance for your specific growing conditions.
Leaves that show signs of yellowing, spotting, or significant insect damage should be the first candidates for removal, regardless of their position on the plant. These aging or diseased leaves are often “energy sinks” that cost the plant more to maintain than they contribute in terms of sugar production. Removing them promptly prevents the spread of pathogens and allows the plant to focus its resources on healthy, productive tissue. Keeping the plant “clean” of dead and dying material is a fundamental principle of professional garden maintenance.
During the height of summer, you might choose to leave more foliage on the plant to provide natural shade for the soil and the developing roots. As the weather cools and the humidity rises in the autumn, you can become more aggressive with your pruning to counteract the increased risk of mold. This seasonal adjustment to your pruning strategy shows a professional level of responsiveness to the changing environmental pressures. Every cut you make should have a clear purpose and a positive impact on the health of the entire system.
Topping the plants for a concentrated harvest
Topping is a powerful technique used to ensure that the sprouts at the top of the stalk have enough time to mature before the winter becomes too severe. You should perform this task by cutting off the very top of the plant, including the small cluster of leaves and the growing point. This intervention is usually done about four to six weeks before you expect your final harvest of the season. By stopping the upward growth, you force the plant to direct its remaining resources into the swelling of the existing buttons.
More articles on this topic
The timing of this procedure is critical, as doing it too early can result in oversized, loose sprouts that lose their characteristic crunch. Conversely, doing it too late may not give the plant enough time to make use of the redirected energy before the growth slows down in the cold. You should monitor the development of the middle sprouts on the stalk to determine the best moment for this final intervention. A professional grower keeps a close eye on the calendar and the plant’s phenology to hit this window perfectly.
If you are growing a variety that is meant for a long, staggered harvest throughout the winter, you may choose not to top the plants at all. Leaving the growing tip intact allows the plant to continue developing new sprouts at the top as you harvest from the bottom. This method is excellent for home gardeners who want a continuous supply of fresh produce over several months rather than a single large harvest. Understanding the goals of your harvest will help you decide which pruning strategy is best for your specific needs.
After topping, you may notice that the plant becomes slightly more top-heavy, so ensure that your support system is in good repair. The sudden increase in the size of the top sprouts can place extra strain on the main stem during windy autumn days. A little extra attention to staking during this final phase will protect your investment and ensure that you can enjoy the full bounty of your labor. The result of a well-timed topping is a stalk covered in uniform, high-quality sprouts from bottom to top.
Post-harvest cleanup and plant disposal
Once the harvest is complete, the remaining stalks of the Brussels sprout plants are often large, woody, and difficult to manage. You should remove these stalks from the garden as soon as possible to prevent them from becoming a haven for overwintering pests and diseases. Leaving old plant material in the soil is a common mistake that can lead to increased pest pressure in the following season. A clean garden in the winter is the first step toward a successful garden in the spring.
Because the stalks are so fibrous, they do not break down quickly in a standard compost pile unless they are first shredded or chopped into small pieces. If you have a wood chipper or a heavy-duty shredder, these stalks make a high-carbon addition to your compost that will eventually become rich soil. Alternatively, you can use a sharp spade or an axe to break them down manually before adding them to the pile. This extra effort ensures that the nutrients captured by the plant are returned to the garden ecosystem in a useful form.
While you are clearing the stalks, you should also take the time to remove any fallen leaves or debris from the soil surface. This is a good moment to inspect the area for any signs of soil-borne issues like clubroot that might have been hidden by the foliage. If you suspect any disease, it is best to dispose of the plant material in the trash rather than the compost pile to avoid recycling the pathogen. Maintaining strict garden hygiene at the end of the season is a hallmark of an expert horticulturist.
Reflecting on your pruning and maintenance routine at the end of the year allows you to identify what worked well and what could be improved. Did the pruned plants have fewer pest issues? Was the harvest more uniform on the topped stalks? Keeping detailed records of these observations will help you refine your techniques and become a more effective grower every year. Your dedication to the “fine details” of plant care is what ultimately leads to the most impressive and rewarding results in the vegetable garden.