Starting your journey with these spectacular flowers begins with the careful selection and preparation of the tubers in early spring. You should look for tubers that are firm to the touch and show no signs of soft spots or mold on their surface. The best time to start the process is usually about eight to ten weeks before the last expected frost in your area. By giving them a head start indoors, you ensure a much longer and more robust flowering season once they move outside.
The first step in planting is to identify the correct orientation of the tuber, which has a distinct bowl-like indentation on one side. This hollow side should always face upwards, as this is where the new stems and leaves will eventually emerge. You should place the tubers in a shallow tray filled with moist potting mix or a blend of peat and perlite. Do not bury them completely at this stage; leave the tops slightly exposed to prevent moisture from collecting in the hollow and causing rot.
Maintaining a warm and humid environment is crucial during the initial sprouting phase to encourage the eyes to wake up. A consistent temperature of around twenty degrees Celsius will provide enough warmth to stimulate biological activity within the tuber. Keep the potting medium lightly moist but never saturated, as the lack of roots makes the tuber vulnerable to decay. You will soon see small, pinkish or green nubs appearing in the center of the indentation, signaling the start of growth.
Once the sprouts have reached a height of about five centimeters, it is time to move the tubers into their individual permanent pots. You should use a high-quality, free-draining compost and bury the tuber so that it is covered by about two centimeters of soil. Be very careful not to snap off the tender new shoots during this transplanting process, as they are extremely brittle. Place the pots in a bright location with indirect light to allow the leaves to develop without being scorched by the sun.
Techniques for successful stem cuttings
Propagating through stem cuttings is an excellent way to increase your collection while maintaining the exact characteristics of a favorite plant. You should select a healthy, non-flowering shoot that is about ten to fifteen centimeters long for the best results. Use a sharp, sterilized knife to make a clean cut just below a leaf node, where the concentration of growth hormones is highest. Removing the lower leaves will reduce moisture loss and provide a clear stem area for new roots to form.
More articles on this topic
To increase the chances of success, you can dip the base of the cutting into a rooting hormone powder before planting. Place the cutting into a small pot filled with a light, airy medium such as a mix of vermiculite and sterile potting soil. Firm the soil gently around the stem to ensure good contact and provide stability while the roots are developing. Covering the pot with a clear plastic bag or placing it in a propagator will help maintain the high humidity required for survival.
Keep the cuttings in a warm spot with bright, indirect light, and avoid placing them in direct sunlight which can cause overheating. You should see signs of new growth within three to five weeks, indicating that a functional root system has been established. Gently tugging on the base of the cutting can help you determine if roots have taken hold, but be very careful not to disturb them. Once the plant feels secure and shows new leaves, you can begin to treat it like a mature specimen.
It is important to remember that plants grown from cuttings will eventually develop their own tubers by the end of the first growing season. However, these first-year tubers will be relatively small and will require careful storage over the winter to ensure they survive. Labeling your cuttings by variety and color will help you keep track of your new plants as they develop. This method is a cost-effective way to fill your garden with high-quality plants that you have grown yourself from scratch.
Soil preparation and optimal planting depths
The quality of the soil you provide will directly influence the vigor and health of the plant throughout its entire lifecycle. You should aim for a mixture that is rich in organic matter but also contains enough inorganic material to ensure perfect drainage. A blend of leaf mold, well-rotted compost, and coarse grit creates the ideal structure for the delicate, fibrous roots to explore. Avoiding heavy garden soil is essential because it tends to compact in containers and restrict the flow of oxygen.
More articles on this topic
When you are ready for the final outdoor planting, the depth at which you set the plant into the soil is a critical factor. The top of the tuber should be situated roughly three to five centimeters below the surface of the growing medium. This depth provides enough stability for the heavy stems while still allowing the warmth of the sun to reach the root zone. If you plant them too deep, the stems might rot before they reach the surface, whereas planting too shallow can lead to drying out.
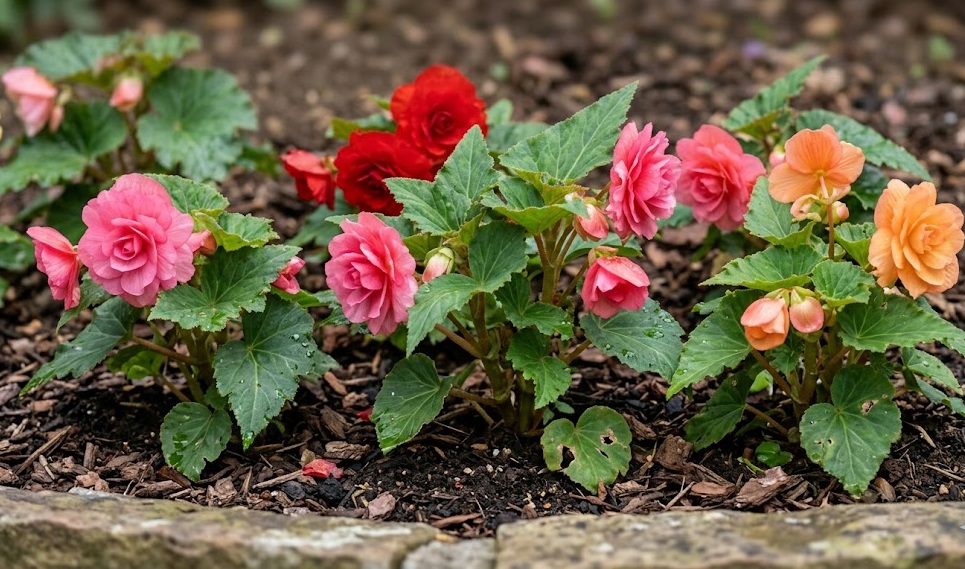
Proper spacing between plants is necessary to allow for adequate air circulation and to prevent the spread of foliar diseases. You should leave at least twenty to thirty centimeters between each begonia to give them room to expand their broad leaves. Overcrowding can lead to stunted growth and a higher likelihood of issues like powdery mildew in humid weather. A well-spaced garden bed or container arrangement looks more professional and allows each individual plant to showcase its beauty.
Adding a slow-release fertilizer to the soil at the time of planting will provide a steady supply of nutrients for the first few months. This ensures that the plant has everything it needs to build a strong skeletal structure before it begins the demanding task of flowering. You can also mix in some bone meal to encourage strong root development during the early stages of establishment. Taking the time to prepare the soil correctly will save you a lot of effort and troubleshooting later in the season.
Propagation through seed and tuber division
Growing these plants from seed is a challenging but rewarding task for the dedicated gardener who wants to try something different. The seeds are incredibly tiny, almost like fine dust, and require a very steady hand and specialized conditions to germinate. You should sow them on the surface of a fine, sterilized seed compost and avoid covering them, as they need light to sprout. A heated propagator and a consistent moisture level are essential to keep the delicate seedlings alive during their first few weeks.
Tuber division is another method you can use if you have an older, very large tuber with multiple growing points. You can carefully cut the tuber into two or more pieces using a sharp, clean knife, ensuring each piece has at least one healthy sprout. It is vital to let the cut surfaces dry and callus over for a day or two before replanting them in fresh soil. Applying a dusting of sulfur or charcoal to the wounds can help prevent fungal infections from entering the exposed tissue.
Divided tubers need to be monitored closely for any signs of rot during the first few weeks after the operation. You should keep them slightly drier than usual until you see active growth emerging from the soil surface. This method is best performed in the spring when the plant is just starting to wake up and has the most energy for recovery. While it carries more risk than other methods, it allows you to quickly multiply your favorite mature specimens without waiting for seeds.
Whichever method you choose, the key to success is patience and attention to the specific needs of the young plants. Propagation allows you to experiment with different varieties and expand your garden in a sustainable and rewarding way. Watching a small cutting or a tiny seed transform into a massive, blooming plant is one of the great joys of horticulture. Your expertise in these techniques will grow with every season, leading to even better results and a truly spectacular floral display.