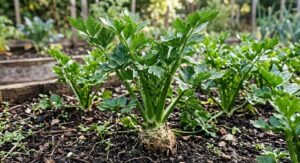
Establishing a new purple gromwell in your garden begins with meticulous preparation of the planting site to meet its specific needs. This plant is known for being somewhat sensitive to transplanting, so the process must be handled with care and precision. You should choose a period of mild weather, such as early spring or early autumn, to perform the planting. Taking the time to prepare the soil and position the plant correctly will pay dividends in the form of rapid establishment and healthy growth.
The initial hole should be dug significantly wider than the current root ball to allow for easy expansion into the surrounding soil. You should avoid planting too deeply, as the crown of the plant must remain at the same level as the soil surface. Filling the hole with a mixture of native soil and acidic organic matter creates a transition zone for the roots. Firm the soil gently around the base of the plant to remove any large air pockets without compacting the ground.
Propagation allows you to expand your collection of these beautiful shrubs without the cost of purchasing new nursery stock. The most reliable method for home gardeners is taking semi-ripe cuttings during the mid-summer months. You should select healthy, non-flowering shoots that have started to become slightly firm at the base. These cuttings root relatively easily when placed in a well-draining, sandy propagation medium.
You must provide the new plantings and cuttings with a high level of attention during their first few months of life. Consistent moisture is vital during the rooting phase, but you must be careful not to keep the soil too wet. Providing temporary shade for newly planted specimens can help them recover from the shock of moving. Once the root system is established, the plant becomes much more resilient and self-sufficient in the landscape.
Choosing the site
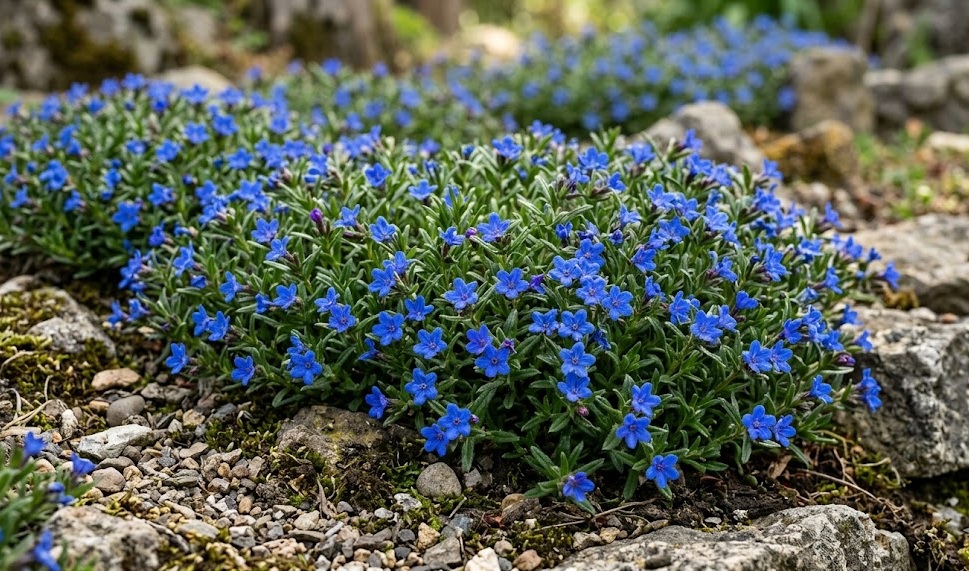
Identifying the perfect location is the first step toward a successful planting project for this evergreen groundcover. You should look for an area that receives full sun for at least six hours a day to ensure vibrant blooming. However, in regions with very hot summers, a spot with some afternoon shade is often more beneficial. The site must have excellent natural drainage, as the plant will not survive in areas where water collects after rain.
More articles on this topic
The slope of the land can be a major advantage when choosing a site for the purple gromwell. Planting on a slight incline or in a raised bed naturally improves the drainage of the root zone. This is particularly useful if your garden has clay-heavy soil that tends to retain too much moisture. Rock gardens are also ideal, as the stones can help regulate soil temperature and provide a rugged backdrop for the blue flowers.
Consider the existing vegetation in the area and how it might interact with your new plant over time. You should avoid planting under trees that drop heavy amounts of leaves or produce dense shade. Competitive root systems from large shrubs can also rob the purple gromwell of the moisture and nutrients it needs. Finding a relatively open space where the plant can spread its wings is the best strategy for long-term success.
Finally, think about the accessibility of the site for regular maintenance and watering during the establishment phase. You will need to reach the plant easily to check the soil moisture and perform light pruning. Avoiding high-traffic areas where the brittle stems might be stepped on or crushed is also a professional consideration. A well-chosen site minimizes the need for future intervention and allows the plant to reach its full potential.
Cuttings and rooting
Taking cuttings is a rewarding way to propagate the purple gromwell and ensure the genetic consistency of your plants. You should use a sharp, sterilized knife or shears to take four-inch cuttings from the current season’s growth. Removing the leaves from the bottom half of the cutting prevents rot and focuses energy on root development. Dipping the base of the cutting into a rooting hormone can increase the success rate, although it is not strictly necessary.
More articles on this topic
The rooting medium should be a specialized mix of perlite and peat or a fine-grit potting soil. You should insert the cuttings into the medium and firm them in place to ensure good contact. Placing the containers in a bright spot out of direct sunlight helps maintain a stable environment for the developing roots. A clear plastic cover can help retain humidity, but you must vent it daily to prevent fungal growth.
Roots typically begin to form within four to six weeks, depending on the temperature and humidity levels. You can check for progress by giving the cuttings a very gentle tug to see if there is any resistance. Once a strong root system has developed, the young plants can be moved into individual pots for further growth. This intermediate step allows the plants to become stronger before they face the challenges of the open garden.
Acclimatizing the young plants to outdoor conditions is a process known as hardening off. You should gradually increase their exposure to direct sunlight and wind over a period of ten to fourteen days. This transition prevents the tender new growth from being scorched or damaged by the elements. Once the plants are hardy enough, they can be installed in their permanent positions following the same planting guidelines as mature specimens.
Division and layering
While cuttings are common, simple layering is perhaps the easiest way for a gardener to propagate this creeping shrub. You can identify a flexible stem that is close to the ground and gently pin a section of it into the soil. Wounding the underside of the stem slightly where it touches the ground can stimulate the production of new roots. Over several months, the stem will develop its own root system while still being nourished by the parent plant.
Once the layered section has established a healthy set of roots, you can sever the connection to the original plant. It is best to wait a few more weeks after cutting before actually moving the new plant to its new location. This ensures that the young plant is fully capable of supporting itself through its own root system. This method is highly successful because it involves very little stress for the new plant during the process.
Division is less common for this species because of its woody nature, but it can be done with older, large mats. You should perform division in the early spring before the plant has put too much energy into new growth. Carefully lift a portion of the outer edge of the mat, ensuring you take a good amount of roots with the stems. Replant these sections immediately and water them thoroughly to help them settle into their new homes.
Using these various propagation techniques allows you to create a cohesive look throughout your garden design. Whether you choose cuttings for large-scale production or layering for a few extra plants, the results are equally satisfying. Understanding how the plant naturally spreads helps you work with its biology rather than against it. These professional methods ensure that your garden remains filled with the vibrant blue of the purple gromwell.