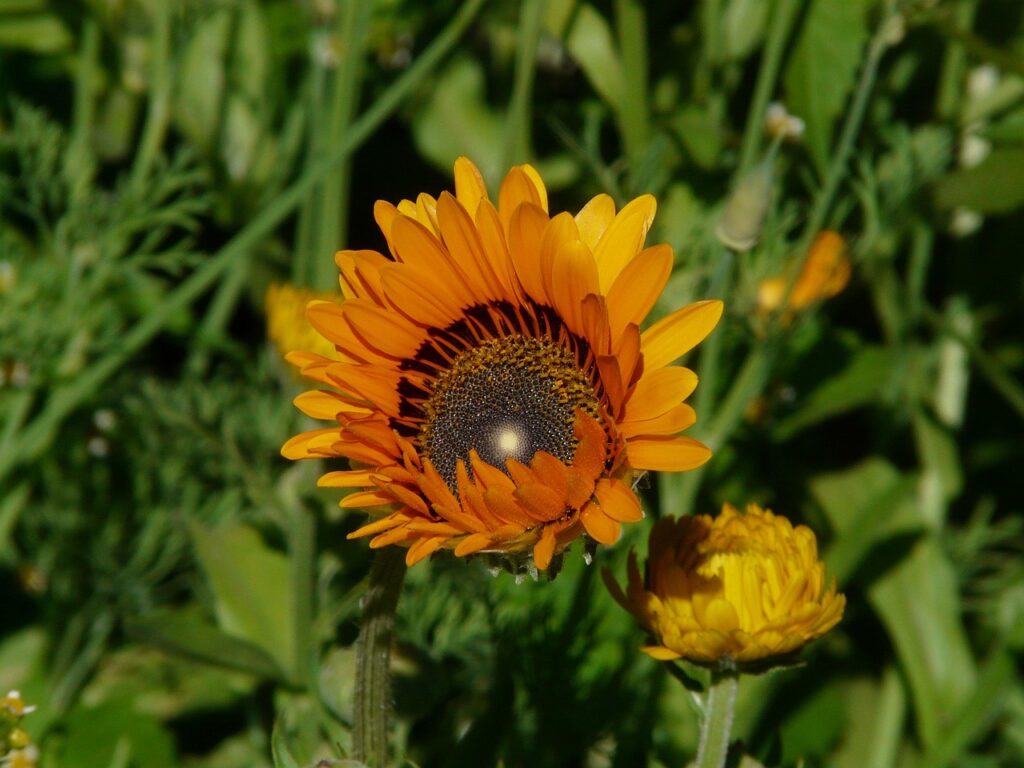
Starting a new generation of flowers is one of the most rewarding aspects of the gardening cycle for any enthusiast. The painted daisy is particularly easy to grow from seed, which makes it an ideal candidate for those looking to fill large areas of their garden economically. You will find that with a little bit of patience and the right environmental conditions, these seeds will quickly transform into a sea of color. Understanding the nuances of germination and early plant development is the first step toward a successful and vibrant floral display.
When you decide to plant these beautiful flowers, timing is perhaps the most important factor to consider for your local climate. You should generally wait until the danger of frost has completely passed before sowing seeds directly into the garden beds. If you want to get a head start on the season, you can begin the process indoors several weeks before the last expected frost. This allows the young plants to develop a strong root system in a controlled environment before facing the unpredictability of the outdoors.
The quality of the seeds you use will directly impact the success rate of your propagation efforts. You should always source your seeds from a reputable supplier to ensure a high germination rate and true-to-type flower colors. If you are collecting seeds from your own plants, make sure they are fully mature and have been stored in a cool, dry place. Using fresh, high-quality seeds is a professional habit that significantly reduces the frustration of failed germination attempts.
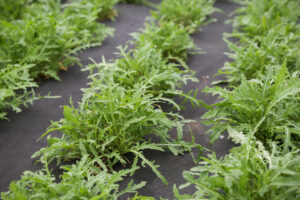
Preparing the planting site is just as important as the act of sowing the seeds themselves. You need to clear the area of any existing vegetation and break up the soil to create a fine, crumbly texture. This ensures that the small seeds have good contact with the soil, which is essential for moisture absorption and root development. Taking the time to prepare the ground properly will result in much more even and robust growth across your entire flower bed.
Sowing seeds for maximum success
When sowing the seeds, you should pay close attention to the recommended planting depth to avoid burying them too deep. Small seeds like those of the painted daisy often require a bit of light to trigger the germination process. You can simply press them firmly into the surface of the moistened soil rather than covering them with a thick layer of earth. This “surface sowing” technique mimics how seeds would naturally fall and sprout in the wild.
More articles on this topic
Spacing is another critical consideration that will affect the health and appearance of your mature plants. You should try to spread the seeds as evenly as possible to avoid overcrowding, which can lead to stunted growth and disease. If the seedlings emerge too thickly, you will need to thin them out once they develop their first set of true leaves. Providing enough space for each plant ensures that they don’t have to compete for light, water, and essential nutrients.
Consistent moisture is the key to getting your seeds to sprout quickly and uniformly. You should use a fine mist or a gentle spray to water the area, being careful not to wash the seeds away or bury them under displaced soil. The surface of the ground should stay damp but not waterlogged during the entire germination period, which usually takes about ten to fourteen days. If the soil dries out even once during this critical time, the delicate germinating seeds may perish.
Once the seedlings have emerged, they will need plenty of bright light to grow strong and avoid becoming leggy. If you are growing them indoors, a south-facing window or specialized grow lights may be necessary to provide the intensity they require. You will notice the tiny plants stretching toward the light source if it is not strong enough for their needs. Rotating your seed trays regularly will help ensure that the stems grow straight and sturdy as they reach for the sun.
Successful transplanting techniques
Moving young plants from their initial containers to their permanent home in the garden requires a gentle and professional touch. You should “harden off” your seedlings by gradually exposing them to outdoor conditions over a period of about a week. This process allows the plants to adjust to the wind, direct sunlight, and temperature fluctuations they will encounter in the open garden. Skipping this step often leads to transplant shock, which can severely set back the growth of your daisies.
More articles on this topic
The best time to transplant is during a cloudy day or in the late afternoon when the sun is not at its most intense. This reduces the immediate stress on the plants and gives them a whole night to begin settling into their new environment. You should dig a hole that is slightly larger than the root ball of the seedling to allow for easy placement. Being careful not to damage the delicate roots during this process is essential for a quick recovery and continued growth.
After placing the plant in the hole, you should fill in the gaps with loose soil and firm it down gently with your fingers. You must avoid pressing too hard, as this can compact the soil and make it difficult for new roots to penetrate the surrounding earth. Once the transplanting is complete, give each plant a generous drink of water to help settle the soil around the roots. This initial watering also eliminates any large air pockets that could cause the roots to dry out and die.
Monitoring the transplants for the first few days is vital to ensure they are adapting well to their new surroundings. You might see some minor wilting initially, but the plants should perk up as they begin to draw moisture from the garden soil. If the weather is particularly hot or windy, providing some temporary shade can help the young daisies through the transition. Once you see new growth appearing at the center of the plant, you can be confident that the transplant was a success.
Propagation through specialized methods
While seeds are the most common way to grow painted daisies, you can also experiment with other professional propagation techniques. Cuttings can sometimes be taken from healthy, non-flowering stems during the early part of the growing season. You should use a sharp, sterilized knife to take a four-inch cutting and remove the lower leaves before planting it in a rooting medium. This method allows you to create exact clones of a particularly beautiful or vigorous plant you already have.
Division is another option for those who want to manage the size of established clumps while also creating new plants for the garden. You can carefully lift a large, healthy plant from the ground in the early spring and separate it into smaller sections. Each new section must have a good portion of the root system and at least one or two growing points to survive. Replanting these divisions immediately will give them the best chance to establish themselves before the summer heat arrives.
Using rooting hormones can increase your success rate when working with stem cuttings in a professional or home setting. These products stimulate the plant to produce new roots more quickly and can help protect against fungal infections at the cut site. You should dip the end of the cutting into the hormone powder or liquid before placing it into a moist, well-draining potting mix. Providing a humid environment by covering the cuttings with a clear plastic dome can also be very beneficial.
Layering is a less common but still effective way to propagate certain types of garden plants, including some daisies. You can bend a flexible stem down to the ground and partially bury a section of it in the soil, leaving the tip exposed. Over time, roots will form at the buried node, and you can eventually cut the new plant away from the parent. This method is very safe because the new plant remains attached to the mother plant until it has its own functional root system.
Ensuring long term root health
The success of any propagation method ultimately depends on the health and vigor of the root system being developed. You should focus on providing an environment that encourages deep, extensive root growth rather than just superficial surface roots. Deep roots make the plant much more resilient to drought and provide better physical stability in the garden. Avoiding over-watering is one of the best ways to encourage roots to grow deeper into the soil in search of moisture.
Using a high-quality propagation mix is essential when starting seeds or cuttings in trays or small pots. These mixes are designed to be sterile and have a very fine texture that is perfect for delicate young roots. You will find that standard garden soil is often too heavy and may contain pathogens that can kill off young seedlings. Investing in a professional-grade starting mix is a small expense that pays off in much higher success rates.
Regularly checking the root development of your young plants will help you decide when it is time to move them to larger pots or the garden. You can gently tip a plant out of its container to see if the roots have reached the edges and are starting to circle. If a plant becomes “root-bound,” its growth will slow down, and it may have difficulty establishing itself after transplanting. Moving the plants at the right stage of development is a hallmark of an experienced and attentive gardener.
Finally, you should always keep your propagation tools and containers clean to prevent the spread of diseases. Sterilizing your shears, knives, and even old plastic trays with a weak bleach solution is a simple but effective professional practice. Fungal issues like “damping off” can quickly destroy an entire tray of seedlings if the environment is not kept clean. By maintaining high standards of hygiene, you ensure that your propagation efforts lead to healthy, vigorous plants every time.