The journey of a sweet potato begins long before it ever touches the soil of your outdoor garden beds. Most growers start by propagating their own slips, which are the small green shoots that grow out of a mature tuber from the previous harvest. This process requires warmth, moisture, and a significant amount of light to produce strong, healthy plants that can survive the transition to the field. By starting your own slips, you have complete control over the variety and the health of the starting material for your upcoming season.
To begin the propagation process, you should select a healthy, unblemished sweet potato that shows no signs of rot or disease. You can place the tuber in a jar of water with the bottom half submerged, or bury it halfway in a container of moist sand or potting soil. Within a few weeks, you will see small purple and green buds starting to emerge from the eyes of the potato. These buds will quickly grow into long, leafy vines that are essentially clones of the parent plant, carrying all the same genetic traits.
Once the shoots reach about six to eight inches in length, they are ready to be detached and rooted as independent plants. You should gently snap them off at the base where they meet the mother tuber and place them in a glass of fresh water. In just a few days, you will notice white root filaments beginning to grow from the submerged nodes of the stem. This rooting phase is crucial because it gives the slip a head start, allowing it to begin absorbing nutrients the moment it is planted in the ground.
Keeping the slips in a bright, warm location during this rooting phase prevents them from becoming “leggy” or weak. You should change the water every couple of days to keep it oxygenated and to prevent the growth of bacteria that could lead to stem rot. Many gardeners find that adding a very diluted liquid seaweed extract to the water can help stimulate even more vigorous root development. When the root system is about an inch long and looks robust, the slips are finally ready for their permanent home in the garden.
Soil preparation and site selection
Before you move your slips outside, you must ensure that the garden site is perfectly prepared to meet the needs of these heavy feeders. Sweet potatoes prefer loose, well-draining soil that is rich in organic matter but not overly saturated with high-nitrogen fertilizers. You should spend some time tilling or broad-forking the area to break up any large clumps and to incorporate aged compost. Creating long, raised mounds or ridges is a common practice that helps improve drainage and provides more room for the tubers to expand.
More articles on this topic
The location you choose should receive at least eight to ten hours of direct sunlight every day to facilitate rapid growth. Sweet potatoes are essentially sun-powered factories, and any shade will significantly reduce the size and quality of the final harvest. Check the area for any perennial weeds or grasses that might compete with the young slips during their first few weeks in the ground. Clearing the site thoroughly before planting saves you a tremendous amount of labor later in the summer when the vines are spreading.
Testing the soil pH is a professional step that can help you avoid many common growing problems before they even start. Sweet potatoes thrive in slightly acidic to neutral soil, typically within the range of 5.8 to 6.2 on the pH scale. If your soil is too alkaline, you might need to add elemental sulfur or peat moss to bring the levels down to a more suitable range. Understanding the chemistry of your garden allows you to tailor your amendments specifically to the crop you are growing, rather than guessing.
Finally, consider the temperature of the soil before you even think about putting your tender slips into the ground. The earth should be consistently above sixty-five degrees Fahrenheit, as cold soil can stunt the growth of the plants or even kill them. Many experienced growers use black plastic mulch to pre-warm the soil for a week or two before the planned planting date. Patience is a virtue here, as planting too early into cold ground often results in slower growth than if you had waited for the warm summer weather.
Transplanting techniques for success
When the day finally arrives to transplant your slips, you should aim for a cloudy afternoon or an early morning to minimize transplant shock. Dig a hole deep enough to cover the slip up to the first couple of sets of leaves, as more roots will grow from the buried nodes along the stem. Press the soil down firmly but gently around the base of the plant to eliminate any air pockets that could dry out the roots. Spacing the plants about twelve to eighteen inches apart gives them plenty of room to grow without overcrowding each other.
More articles on this topic
Watering the slips immediately after planting is perhaps the most critical step in the entire transplanting process. You want to settle the soil around the roots and provide a boost of hydration to help the plant recover from being moved. Using a gentle watering can or a soft spray nozzle prevents the soil from washing away and exposing the delicate new roots to the air. Some gardeners like to use a transplant solution containing a bit of phosphorus to encourage quick root establishment in the new environment.
If the weather is particularly sunny or windy on your planting day, you might want to provide some temporary shade for the first few days. Upside-down flower pots or shingles stuck into the ground can act as a shield against the harshest rays of the sun until the roots start functioning. You will know the transplant was successful when you see new, bright green leaves starting to emerge from the center of the slip. This sign of life indicates that the plant has successfully connected with the soil and is beginning its growth journey.
Be careful not to over-fertilize during this initial phase, as the young roots can be easily burned by concentrated salts in chemical fertilizers. It is much better to rely on the compost you incorporated during the preparation phase or to use very diluted organic liquids. The goal is to encourage the roots to reach out and explore the soil in search of nutrients rather than making them lazy with an overabundance of easy food. A strong, expansive root system built early in the season is the foundation for a massive harvest in the fall.
Post-planting care and establishment
The first two weeks after transplanting are the most vulnerable time for your sweet potato crop, and they require your close attention. You should check the moisture levels daily, ensuring that the soil remains consistently damp but never waterlogged or soggy. If the slips begin to look yellow or stunted, it may be a sign that the soil is too wet and the roots are struggling to breathe. Adjusting your watering schedule based on the actual conditions of the soil will help the plants transition smoothly into their active growth phase.
Keeping the area around the young plants free of weeds is essential while they are still small and unable to compete. You should use a light mulch of straw or dried grass clippings to suppress weed germination and to keep the soil surface from crusting over. This mulch also helps maintain a more even soil temperature, which the sweet potatoes will appreciate during the cooler nights of early summer. As the vines begin to run, they will naturally take over the job of weed suppression, but until then, it is your responsibility.
Watch for any early-season pests that might be attracted to the tender, succulent leaves of the new transplants. Flea beetles and aphids are common visitors that can cause significant damage if their populations are allowed to explode. You can often manage these minor infestations by simply washing the leaves with a gentle stream of water or using an organic soap spray. Encouraging beneficial insects like ladybugs into your garden will provide a natural long-term solution to these common pest problems.
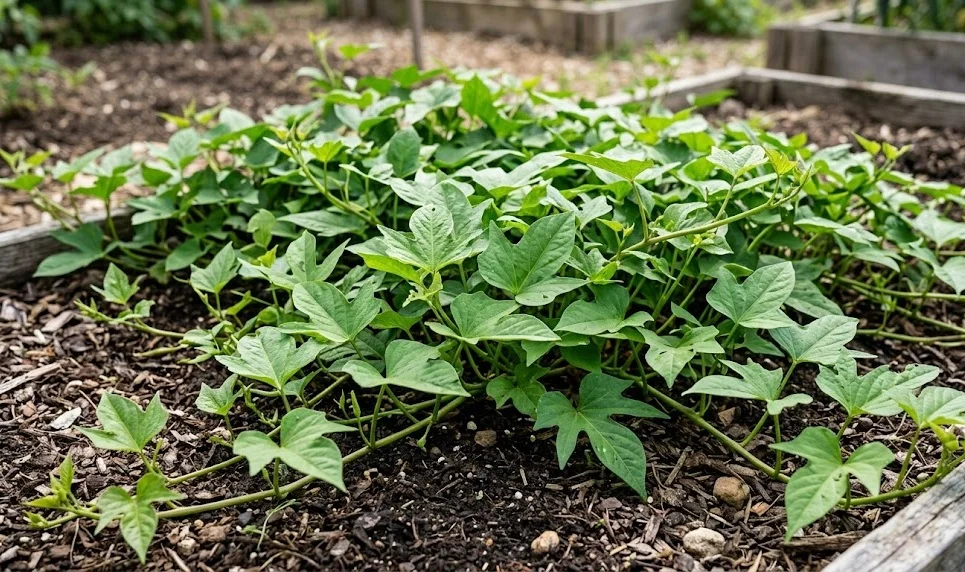
As the vines start to lengthen and creep across the mounds, you can celebrate the fact that the hardest part of the process is over. The plants are now established and will soon begin the rapid growth phase that characterizes the middle of the sweet potato season. You should continue to provide consistent care, but the plants will become increasingly resilient as their root systems grow deeper into the earth. Successful planting and propagation set the stage for a rewarding experience that culminates in a pantry full of home-grown tubers.