Selecting the perfect planting location
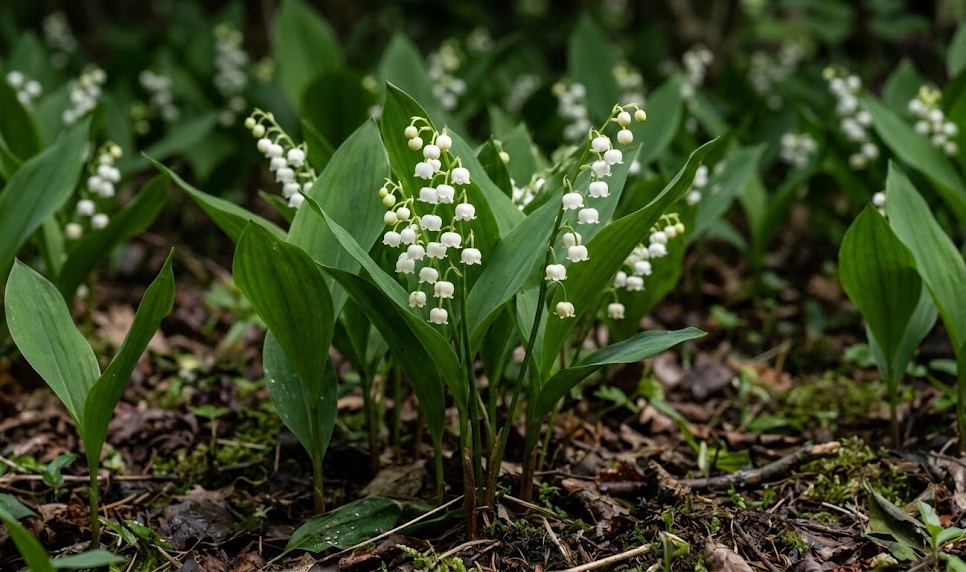
The success of your planting project begins with identifying the most suitable location in your landscape. You should look for a spot that offers partial to full shade throughout most of the day. These plants are naturally adapted to woodland settings and do not tolerate the harsh afternoon sun well. Finding an area under the canopy of large trees or on the north side of a building is ideal.
Soil quality at the chosen site must be evaluated before you begin any planting activities. The earth should be rich in organic matter and capable of retaining moisture without becoming swampy. You can test the drainage by digging a small hole and filling it with water to see how fast it disappears. If the water sits for a long time, you may need to amend the soil with sand or grit.
Accessibility for maintenance is another factor you should consider when planning your new flower bed. You will need to reach the plants for occasional watering, weeding, and thinning as they grow. Placing them near a garden path or the edge of a wooded area makes these tasks much easier. Proper planning now will save you a significant amount of effort and time in the future.
You should also think about the proximity of the planting site to your home or outdoor living areas. The intense fragrance of the flowers is one of their best features and should be enjoyed fully. Planting them near a window or a patio allows the scent to drift into your living spaces. This thoughtful placement enhances the overall experience of gardening with these fragrant perennials.
Preparing the soil for new rhizomes
Preparing the ground thoroughly is essential for giving the new plants the best possible start in life. You should begin by removing all existing weeds and grass from the designated planting area. It is important to get the roots of the weeds out to prevent them from coming back later. A clean starting point allows the young rhizomes to establish themselves without any outside competition.
More articles on this topic
Once the area is clear, you should dig in a generous amount of organic soil conditioner. Well-rotted manure, leaf mold, or high-quality compost are all excellent choices for this specific purpose. These materials provide the essential nutrients and improve the overall texture of the native soil. Working the amendments into the top six inches of the earth creates a fertile root zone.
The soil should be loosened to a crumbly consistency to allow for easy root penetration and growth. You can use a garden fork or a tiller to break up any large clumps of clay. If your soil is naturally very heavy, adding some horticultural grit can help improve the internal drainage. A fine, even soil texture makes the actual planting process much faster and more effective.
After the soil is prepared, you should water the area lightly to settle the earth before planting. This helps you identify any low spots where water might collect and allows you to level them out. You want the planting bed to be smooth and even to ensure uniform growth across the patch. Taking the time to prepare the soil correctly is an investment in the plant’s health.
Techniques for planting the pips
The individual growing points of the rhizomes are commonly referred to as pips in the gardening world. You should inspect each pip before planting to ensure they are firm, healthy, and free of rot. It is often beneficial to soak the pips in lukewarm water for a few hours before putting them in the ground. This simple step rehydrates the tissue and encourages faster root development after the planting is complete.
More articles on this topic
When you are ready to plant, space the pips about four to six inches apart in all directions. You should place them in the ground so that the tips are just barely covered by the soil. Digging a shallow trench is often the easiest way to plant a large number of pips at once. Ensure that the roots are spread out naturally and pointing downwards as you cover them up.
Firm the soil gently around each pip to remove any large air pockets that could dry out the roots. You do not want to pack the earth too tightly, but it needs to be in contact with the plant. Watering the bed thoroughly immediately after planting is crucial for settling the soil and pips. This initial hydration helps the plants recover from the stress of being moved and handled.
Adding a thin layer of mulch over the top of the bed will protect the new pips from drying out. You can use shredded bark or fine compost to provide a protective barrier against the wind and sun. This mulch also helps to keep the soil temperature stable while the roots are beginning to grow. Consistent moisture is the most important factor for success during the first few weeks of growth.
Propagation through division of mature clumps
Dividing established clumps is the most reliable and efficient way to propagate your existing plants. You should perform this task in either early spring or late autumn when the plants are dormant. Digging up a large section of the colony allows you to see the network of rhizomes clearly. Use a sharp spade or garden knife to cut the rhizomes into smaller, healthy sections.
Each new division should contain at least one healthy pip and a good amount of attached roots. You should discard any old or woody parts of the rhizome that no longer produce vigorous growth. Keeping only the strongest sections ensures that your new plantings will be healthy and productive. This process of rejuvenation is beneficial for the parent colony as well as the new plants.
Replant the divisions as soon as possible to prevent the roots from drying out in the air. You should follow the same soil preparation and planting steps as you would for new pips. If you cannot plant them immediately, keep the divisions in a cool, damp place for a short time. Covering them with moist burlap or peat moss will protect the delicate tissues from environmental stress.
Water the newly transplanted divisions regularly until you see signs of active new growth emerging. It usually takes a few weeks for the plants to re-establish their connection with the surrounding soil. Once they start growing, they will quickly begin to expand and fill in the new garden space. Propagation through division is a cost-effective way to create a large and beautiful woodland garden.