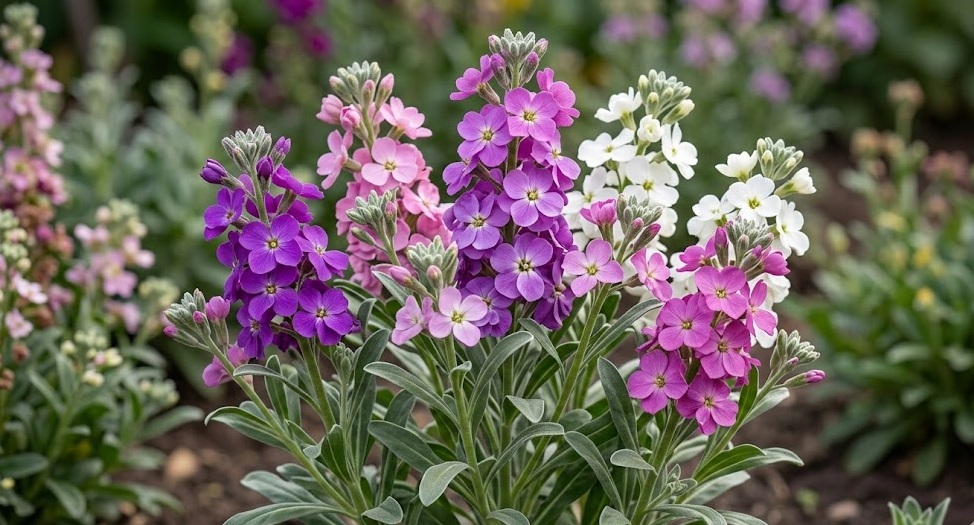
Successful propagation and planting are the cornerstones of a thriving garden filled with the fragrant beauty of hoary stock. Whether you are starting from seed or handling young transplants, the initial stages of development dictate the future resilience and flowering potential of the plant. Professionals understand that the transition from a controlled environment to the open garden is a critical moment that requires precision. By mastering these foundational techniques, you can ensure a high success rate and a spectacular floral display.
Starting from seed for professional results
Beginning your journey with high-quality seeds is the most cost-effective and rewarding way to grow hoary stock. You should start the seeds indoors about six to eight weeks before the last expected frost in your area. Use a sterile seed-starting mix that is fine-textured and well-draining to provide the perfect environment for delicate new roots. Surface-sowing is often recommended because these seeds sometimes require a bit of light to trigger the germination process.
Maintaining a consistent temperature is vital for uniform germination across your seed trays. A steady warmth of around 18 to 20 degrees Celsius is ideal, and using a heated propagation mat can provide this stability. You should cover the trays with a clear plastic dome to maintain high humidity, but remember to ventilate daily to prevent fungal growth. Once the first green shoots appear, the covers should be removed and the light intensity increased to prevent the seedlings from becoming leggy.
Watering seedlings requires a gentle touch to avoid washing away the seeds or damaging the tiny stems. You should use a fine mist or water from the bottom by placing the seed trays in a shallow basin of water. This ensures the growing medium is evenly moist without disturbing the surface where the seeds are nestled. Overwatering is a common mistake that can lead to “damping off,” a fatal fungal condition for young plants.
Thinning out the seedlings is a necessary step that ensures the strongest individuals have enough space to grow. You should select the most vigorous plants and remove the smaller, weaker ones using a pair of sharp scissors. This prevents root competition and allows for better air circulation even at this early stage of development. Investing time in these early details pays off significantly when it comes time to move the plants outdoors.
More articles on this topic
Preparing the site and transplanting techniques
The success of your transplants depends heavily on the preparation of the final planting site. You should dig over the soil to a depth of at least 30 centimeters, breaking up any large clods and removing stones or weeds. Incorporating a balanced, slow-release organic fertilizer at this stage provides a nutrient reservoir for the young plants. The goal is to create a welcoming environment that allows the roots to transition from the pot to the ground with minimal shock.
Hardening off your young plants is a non-negotiable step for any professional gardener. You should gradually expose the seedlings to outdoor conditions over a period of seven to ten days before permanent planting. Start by placing them in a sheltered spot for a few hours a day and slowly increase their time in the direct sun and wind. This process toughens the plant tissues and prepares them for the realities of the garden environment.
When it is finally time to plant, choose a cloudy day or late afternoon to minimize transplant stress. Dig a hole that is slightly larger than the root ball and place the plant at the same depth it was growing in its container. Avoid burying the stem too deep, as this can lead to rot, but ensure the roots are well-covered and in good contact with the soil. Firm the earth gently around the base and water immediately to settle the soil and eliminate air pockets.
Spacing is a critical factor that influences the long-term health and appearance of the flower bed. You should space hoary stock approximately 25 to 30 centimeters apart to allow for their mature width and adequate airflow. Correct spacing reduces the risk of disease and ensures that each plant receives its fair share of sunlight and nutrients. A well-planned layout results in a full, lush appearance without the overcrowding that can lead to problems later in the season.
More articles on this topic
Soil science for successful establishment
The chemical and physical properties of the soil act as the primary life support system for your newly planted stock. You should aim for a soil that is rich in calcium, as this mineral is particularly important for the cell wall strength of these plants. If your soil is naturally deficient, adding a small amount of crushed eggshells or dolomitic lime can be beneficial. Understanding the specific mineral needs of the species allows you to tailor your soil preparation for maximum effect.
Microbial life in the soil helps to break down organic matter into forms that the plants can easily absorb. You can boost this natural process by adding a high-quality compost tea or liquid seaweed extract during the first few weeks after planting. These biological stimulants encourage rapid root development and help the plant establish itself more quickly. A living, active soil is the best defense against many common soil-borne pathogens.
Moisture management during the establishment phase requires careful observation and frequent intervention. You need to keep the soil consistently moist but never saturated while the roots are expanding into their new home. Mulching the area with a light layer of straw or shredded bark can help maintain this delicate balance by reducing evaporation. Once the plants show signs of new growth, you can slowly begin to reduce the frequency of watering.
Soil temperature also plays a role in how quickly the plants settle into their new environment. Planting too early when the ground is still cold can stunt growth and leave the plants vulnerable to rot. You can use black plastic sheeting to pre-warm the soil for a week or two before you intend to transplant. This professional trick gives the plants a “head start” and encourages faster metabolic activity in the root zone.
Alternative propagation methods and timing
While starting from seed is most common, some gardeners experiment with cuttings to replicate specific plant characteristics. You should take softwood cuttings in the late spring from healthy, non-flowering stems for the best chance of success. Use a rooting hormone and place the cuttings in a sterile, sandy medium under high humidity. While more challenging than seeds, this method allows you to preserve a particular color or fragrance that you find especially appealing.
Timing your propagation activities is essential for maintaining a continuous cycle of beauty in the garden. You can sow seeds in successive batches every few weeks to ensure that you always have fresh plants ready to bloom. This “staggered planting” approach is a professional secret for avoiding a gap in the floral display. It also spreads the risk of crop failure due to unpredictable weather events or pest outbreaks.
Collecting your own seeds at the end of the season is a great way to close the loop on your gardening activities. You should wait until the seed pods have turned brown and brittle before harvesting them on a dry day. Store the seeds in a cool, dark, and dry place in paper envelopes to ensure they remain viable until the next spring. This practice allows you to develop a strain of plants that is perfectly adapted to your specific garden conditions over several years.
Understanding the reproductive cycle of the hoary stock helps you become a more intuitive and successful gardener. Whether you are working with seeds, transplants, or cuttings, the principles of cleanliness and consistency remain the same. Professional propagation is as much an art as it is a science, requiring both technical knowledge and a “feel” for the needs of the living plant. By mastering these techniques, you ensure that your garden remains a vibrant and fragrant sanctuary year after year.