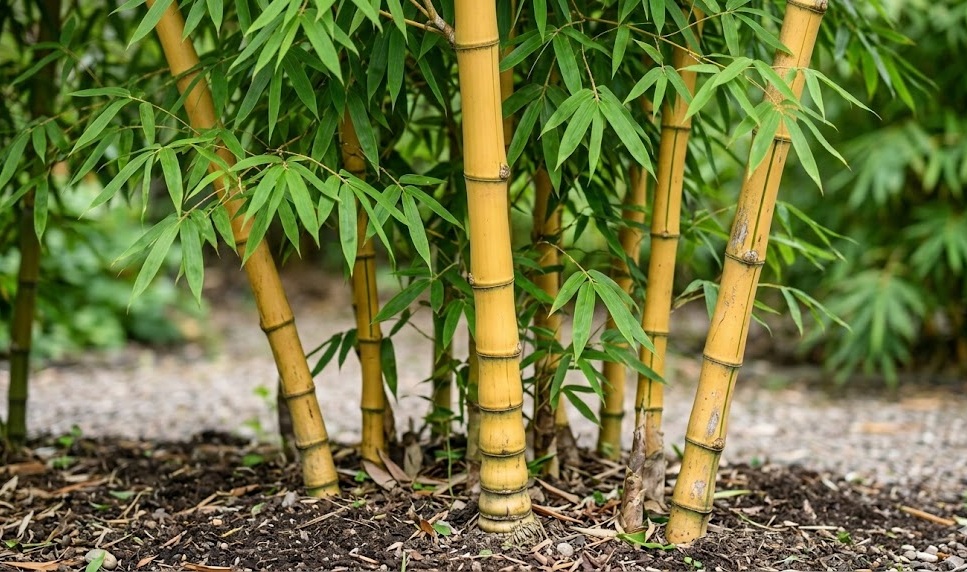
Establishing a new stand of golden bamboo is a rewarding project that begins with careful planning and the right environmental conditions. This species is known for its versatility, but it requires a strategic approach to planting to ensure it thrives without becoming a management challenge. Whether you are looking to create a dense privacy screen or a focal point in your landscape, understanding the fundamentals of rhizome growth and soil preparation is essential. Success starts with selecting the best site and using proper techniques to give your bamboo the strongest possible start in its new home.
Site selection and soil preparation
The first step in planting golden bamboo is identifying a location that receives ample sunlight while offering some protection from the most intense winds. While this plant can tolerate partial shade, it achieves its most vibrant golden color when exposed to at least six hours of direct sun each day. You should also consider the adult size of the plant, which can reach significant heights and widths over time. Ensuring there is enough vertical and horizontal space will prevent future conflicts with buildings, power lines, or other large trees.
Soil quality is the foundation of a healthy bamboo grove, and preparing the ground before planting is highly recommended for the best results. Golden bamboo prefers a loamy, well-draining soil that is rich in organic matter to support its rapid growth cycles. If your garden has heavy clay or very sandy soil, you should incorporate generous amounts of well-rotted compost or manure into the planting area. This improves the soil structure, enhances moisture retention, and provides an immediate source of nutrients for the establishing roots.
Before you dig your first hole, it is critical to address the issue of containment for this spreading variety of bamboo. Installing a high-quality rhizome barrier is the most effective way to keep the plant within its designated boundaries for years to come. This barrier should be made of a durable material like high-density polyethylene and buried at least sixty centimeters deep into the ground. Leaving a small portion of the barrier above the soil surface allows you to spot any “jumping” rhizomes that might try to escape over the top.
Drainage must be evaluated carefully, as bamboo roots will rot if they are forced to sit in waterlogged soil for extended periods. If your chosen site tends to hold water after a heavy rain, you might consider creating a raised bed or installing a drainage system. A slightly elevated planting position can provide the necessary aeration for the rhizomes while still allowing the plant access to deep moisture. Taking the time to get the site conditions right before planting will save you a tremendous amount of effort and frustration later on.
More articles on this topic
The planting process
When you are ready to plant your golden bamboo, start by digging a hole that is twice as wide as the root ball but no deeper than the original container. This encourages the roots to spread horizontally into the loosened soil, which is their natural growth pattern. It is a common mistake to plant bamboo too deep, which can lead to culm rot and poor oxygen exchange for the root system. Place the plant in the center of the hole and ensure it is standing perfectly upright before you begin backfilling with soil.
As you fill the hole back in, use a mixture of the native soil you removed and some additional organic compost to enrich the area. It is important to firm the soil gently with your hands or feet to remove large air pockets, but avoid packing it so tightly that you crush the delicate roots. You should leave a small depression around the base of the plant to act as a watering basin during the initial establishment phase. This helps direct water toward the root ball where it is needed most during the first few months.
Immediately after planting, give the bamboo a deep and thorough watering to settle the soil and hydrate the roots. This initial soaking is crucial for reducing transplant shock and helping the plant adjust to its new environment. You should continue to water the plant regularly, keeping the soil consistently moist but not saturated, until you see signs of new growth. A layer of organic mulch applied around the base will help retain this moisture and keep the roots cool as they begin to explore the surrounding soil.
Timing is also an important factor when planting bamboo to ensure the highest success rate for your new addition. The best time to plant golden bamboo is in the early spring or late autumn when the weather is mild and there is natural rainfall to assist the process. Planting during the height of summer heat or the middle of winter can put unnecessary stress on the plant and may lead to a slower establishment period. By choosing a window of moderate weather, you give the bamboo the best chance to focus its energy on root development.
More articles on this topic
Propagation through division
Propagating golden bamboo is most commonly and successfully achieved through the division of an existing, healthy clump. This process involves separating a portion of the rhizome system, along with several attached culms, to create a new independent plant. You should choose a mature plant that is at least three years old to ensure it has enough energy and root mass to survive the separation. The best time for this procedure is in the early spring, just before the new shoots begin to emerge from the ground.
To begin the division, use a sharp spade or a specialized bamboo saw to cut through the tough rhizomes around the section you wish to remove. It is important to take a substantial piece of the root system, ideally with at least three to five healthy culms attached for the best results. Be careful to minimize damage to the small feeder roots that are essential for the plant’s ability to take up water and nutrients. Once the section is free, lift it carefully from the ground, keeping as much soil around the roots as possible.
The newly divided section should be moved to its new location or a temporary pot as quickly as possible to prevent the roots from drying out. If you cannot plant it immediately, keep the root ball wrapped in wet burlap or submerged in a bucket of water in a shaded area. When planting the division, follow the same steps as you would for a nursery-bought plant, ensuring proper depth and soil preparation. Pruning back the foliage by about one-third can help the new plant balance its water loss while the roots are recovering from the move.
Success with bamboo divisions requires diligent follow-up care, especially regarding irrigation and protection from environmental stress. The new plant will be particularly vulnerable during its first growing season and will need more frequent watering than an established grove. You might also notice that the culms on the division do not grow much in the first year as the plant focuses its energy underground. Once the root system is firmly established, the bamboo will begin to produce new, vigorous shoots that reflect the characteristics of the parent plant.
Propagation from rhizome cuttings
Another method for propagating golden bamboo is using rhizome cuttings without any attached culms, though this requires a bit more patience and care. This technique involves taking healthy segments of the underground stems and encouraging them to develop their own roots and shoots in a controlled environment. You should look for sections of rhizome that are relatively young, firm, and possess several viable buds or “eyes.” These buds are the points from which new growth will eventually emerge if the conditions are right.
Cleanly cut the selected rhizome into segments that are about twenty to thirty centimeters long, ensuring each piece has at least two or three healthy buds. You can treat the cut ends with a rooting hormone if you wish to speed up the process, although bamboo often roots well on its own in good conditions. Place the segments horizontally in a tray or pot filled with a light, well-draining propagation mix, such as a blend of peat and perlite. Cover the cuttings with about five centimeters of the medium and water them thoroughly to settle everything in place.
Maintaining a humid and warm environment is key to encouraging the rhizome cuttings to “wake up” and begin growing. You can cover the propagation trays with a clear plastic lid or a plastic bag to trap moisture and maintain a consistent temperature. Place the trays in a bright spot with indirect sunlight, as direct sun can overheat the cuttings and cause them to rot before they can establish. Check the moisture levels regularly and ensure the medium stays damp but never soggy, as excess water is the primary cause of failure with this method.
It can take several months for rhizome cuttings to produce visible shoots above the soil surface, so patience is a vital part of the process. Once the new shoots have reached a height of ten to fifteen centimeters and have developed their own leaves, you can begin to harden them off gradually. At this stage, they can be moved into individual pots with a richer potting soil to continue their development. After a full growing season in containers, these young plants will usually be strong enough to be moved to their permanent locations in the garden.