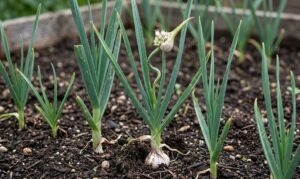
Propagation through seed sowing
Starting these plants from seeds is a rewarding process that allows for a wide variety of colors and forms in the garden. It is vital to use fresh seeds, as their viability drops significantly within just a few months of harvest. Professionals recommend sowing the seeds in a sterile, fine-textured seed-starting mix to prevent damping-off disease. The seeds should be pressed lightly into the surface of the soil rather than buried deeply, as they require some light to trigger germination.
Maintaining a consistent temperature of around 21 to 23 degrees Celsius is crucial for a successful germination rate. Using a heating mat underneath the seedling trays can provide the steady warmth needed to speed up the process. The humidity should be kept high by using a clear plastic dome or covering the tray with a thin layer of plastic wrap. It usually takes between one and two weeks for the first green shoots to emerge from the substrate.
Watering at this stage must be done with extreme care to avoid washing away the tiny seeds or damaging the fragile sprouts. A fine misting bottle is the best tool for keeping the surface of the mix damp without saturating it completely. If the soil stays too wet, the seeds may rot before they have a chance to take root. Once the seedlings have developed their first set of true leaves, the humidity cover can be gradually removed to allow them to acclimate.
Thinning the seedlings is often necessary to ensure that the strongest plants have enough space to grow without competition. It is best to use small scissors to snip off the weaker seedlings at the soil line rather than pulling them out. This prevents disturbing the delicate root systems of the remaining plants that you intend to keep. Providing bright, indirect light immediately after germination prevents the seedlings from becoming leggy and weak.
Division of mature clumps
Dividing established plants is the most reliable way to produce clones that are identical to the parent specimen. This process is best performed in the early spring when the plant is just beginning to wake up from its winter rest. A healthy, mature plant will often develop multiple crowns over time, making it an ideal candidate for division. Using a sharp, sterilized knife is essential to ensure clean cuts that heal quickly and resist infection.
More articles on this topic
Carefully lift the entire plant from the ground or its container, taking care to preserve as much of the root mass as possible. Gently shake off the excess soil so that the structure of the crowns and the root connections are clearly visible. Identify the natural points of separation where each crown has its own set of healthy roots attached. Each new division must have at least one strong growing point to be successful in its new location.
Once the plant is divided, the sections should be replanted immediately to prevent the roots from drying out in the air. The new planting holes should be prepared in advance with fresh, high-quality soil that is well-draining. Position the division so that the crown is slightly above the soil surface, just as it was in the original plant. Burying the crown too deep is a common mistake that almost always leads to crown rot and the eventual death of the division.
Watering the new plants thoroughly right after planting helps to settle the soil around the roots and eliminates air pockets. It is a good idea to keep the newly divided plants in a somewhat shaded area for a few days to reduce transplant stress. Avoid applying heavy fertilizers for the first few weeks, as the roots need time to recover before they can process high levels of nutrients. Within a month, you should see new growth indicating that the division has successfully established itself.
Soil preparation for planting
Preparing the perfect environment for the roots is the first step toward a long-lived and productive flowering plant. These species thrive in a medium that is rich in organic matter but still provides excellent drainage for excess water. If planting in the garden, incorporating leaf mold or compost can help loosen heavy clay soils or improve water retention in sandy ones. The goal is to create a loamy texture that crumbles easily when squeezed in the palm of your hand.
More articles on this topic
Testing the soil before planting provides valuable information about the nutrient levels and the acidity of the ground. These plants are quite particular about the Ph level, preferring a range that is slightly on the acidic side of neutral. If the test shows that the soil is too alkaline, adding elemental sulfur can help bring the level down over time. It is much easier to adjust the soil chemistry before the plants are in the ground than it is afterward.
Adding a slow-release fertilizer during the preparation stage ensures that the young plants have access to nutrients as they grow. Look for a balanced formula that includes essential micronutrients like magnesium and iron to support healthy foliage. The fertilizer should be mixed thoroughly into the top six inches of soil to avoid direct contact with the roots. This provides a steady supply of food that will last for several months during the initial establishment phase.
Proper drainage is perhaps the most important physical characteristic of the planting site or the container mix. If the area tends to hold water after a rain, consider building a raised bed to lift the root zone out of the saturated ground. In containers, always check that the drainage holes are not blocked and that the water can flow out freely. A layer of coarse material at the bottom of the pot can further enhance the movement of water away from the roots.
Post-planting establishment
The first few weeks after a plant is put into its permanent home are the most critical for its long-term survival. During this period, the plant is focusing all its energy on repairing damaged roots and exploring the new soil. It is normal for the foliage to look a bit wilted for a day or two, but it should recover quickly with proper care. Keeping the soil consistently moist but never soggy is the main task for the gardener at this stage.
Protection from the afternoon sun can help reduce the amount of moisture the plant loses through its leaves while the roots are still weak. Using a temporary shade cloth or placing the container in a protected spot can make a significant difference in recovery time. As the plant begins to show signs of new growth, you can gradually increase its exposure to more intense light. This hardening-off process builds up the plant’s resilience to the outdoor environment.
Mulching around the base of the plant is an excellent way to maintain soil moisture and keep the root zone cool. Use a light, organic mulch like straw or shredded bark, making sure to keep it away from the crown itself. The mulch also helps to suppress weeds that would otherwise compete with the young plant for water and nutrients. Over time, the mulch will break down and contribute to the organic matter in the soil, further improving its structure.
Monitoring for pests is especially important during the establishment phase, as young plants are less able to withstand an attack. Insects like aphids and thrips are attracted to the soft, new growth that appears shortly after planting. Catching an infestation early allows for less aggressive treatments that are easier on the developing plant. Once the plant has a robust root system and several sets of mature leaves, it will be much more capable of handling minor stresses.