Establishing a successful garlic crop begins long before the first green shoots appear above the soil line. The process of planting and propagation is a foundational skill that determines the health and productivity of the garden for the entire year. By understanding the specific needs of different varieties and the mechanics of clove development, a grower can ensure a robust start. This guide outlines the professional standards for multiplying garlic and setting the stage for a bountiful harvest.
Selecting and preparing the planting material
Choosing the right cloves for propagation is the first and most vital step in the planting process. Only the largest and healthiest bulbs should be selected for seed stock, as they contain more energy reserves for early growth. Avoid using garlic from grocery stores, as these are often treated with growth inhibitors to prevent sprouting. Instead, source high-quality planting garlic from reputable nurseries or specialized agricultural suppliers.
When preparing the cloves, they should be carefully separated from the bulb shortly before planting. It is important to leave the thin, papery skin intact on each individual clove to provide a layer of protection against soil pathogens. Any cloves that show signs of mold, soft spots, or physical damage should be discarded immediately. Professional growers often treat their cloves with a natural disinfectant soak, such as a mixture of water and hydrogen peroxide, to ensure they are clean.
The size of the individual clove directly influences the final size of the harvested bulb. Larger cloves have a more significant head start, allowing them to establish a stronger root system before the winter dormancy begins. If you are propagating your own stock, always set aside the very best bulbs for replanting rather than consuming them. This selective process leads to a gradual improvement in the quality and resilience of your local garlic strain over several years.
Propagation through cloves is a form of cloning, meaning the offspring will be genetically identical to the parent plant. This allows gardeners to maintain the specific characteristics of a variety that performs well in their particular microclimate. Whether you prefer the spicy kick of a hardneck variety or the long storage life of a softneck, consistent selection is key. Understanding the genetic stability of your planting material ensures predictable results every single season.
More articles on this topic
Optimal timing and soil preparation for planting
Garlic is unique because it requires a period of cold temperatures, known as vernalization, to trigger bulb formation. In most regions, this means planting in the autumn, usually a few weeks before the ground freezes solid. This timing allows the cloves to develop a root system without producing significant top growth that could be damaged by heavy frost. Proper timing is a balance between giving the plant enough time to anchor itself and preventing excessive foliage.
Preparing the soil involves more than just digging a hole; it requires creating a nutrient-dense and well-drained environment. Garlic is a heavy feeder that thrives in soil enriched with organic matter like well-rotted compost or aged manure. The soil should be tilled to a depth of at least twenty centimeters to ensure there is no resistance for the developing roots. Removing large stones and debris helps prevent the bulbs from becoming deformed as they grow.
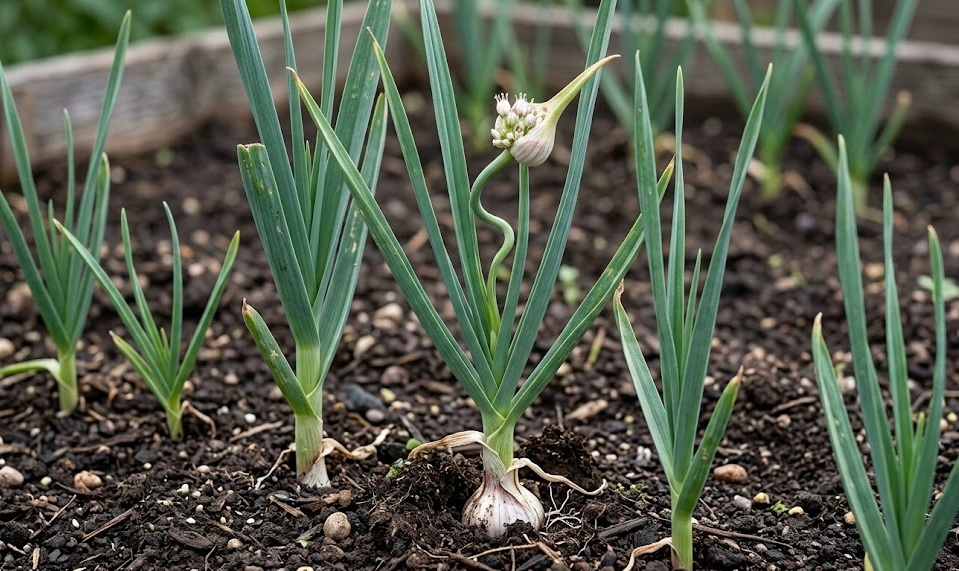
The depth of planting is a critical factor that affects both winter survival and spring emergence. Generally, cloves should be planted about five to eight centimeters deep, measured from the base of the clove to the soil surface. In colder climates with severe winters, planting slightly deeper can provide extra insulation against the freezing temperatures. Placing the clove with the pointed end facing upward is essential, as this is where the green shoot will eventually emerge.
Soil moisture at the time of planting must be managed carefully to prevent the cloves from rotting before they can sprout. The ground should be moist but not waterlogged, providing just enough hydration to stimulate root development. If the autumn is particularly dry, a light watering after planting may be necessary to settle the soil around the cloves. A professional approach to soil preparation sets the foundation for everything that follows in the growth cycle.
More articles on this topic
Spacing and organization of the garlic bed
Proper spacing is essential to ensure that each garlic plant has enough room to expand and access light and nutrients. In a standard row system, cloves should be spaced about ten to fifteen centimeters apart within the row. The rows themselves should be separated by at least thirty centimeters to allow for easy weeding and maintenance. This configuration maximizes the use of space while preventing overcrowding, which can lead to disease outbreaks.
Using a grid system is an alternative for those growing in raised beds or limited spaces. In this method, cloves are planted in a staggered pattern with equal distance in all directions, often about fifteen centimeters apart. This intensive planting style can produce a high yield per square meter if the soil fertility is managed correctly. However, it requires more careful attention to airflow and moisture levels to prevent fungal issues.
Marking the rows or individual planting spots helps maintain a professional and organized garden layout. Clear labeling is also important if you are growing multiple varieties of garlic in the same plot. Keeping different strains separated ensures that you can track their performance and prevent mixing during the harvest and storage phases. A well-organized bed not only looks better but also makes every subsequent gardening task more efficient.
The orientation of the rows can also play a role in how much sunlight the plants receive. North-to-south rows are generally preferred because they allow for even sun exposure on both sides of the plants throughout the day. In sloping areas, rows should follow the contours of the land to prevent soil erosion and water runoff. These structural decisions during the planting phase have long-lasting effects on the health of the entire crop.
Post-planting protection and initial care
Immediately after the cloves are tucked into the soil, a thick layer of mulch should be applied to the entire bed. Straw, shredded leaves, or wood chips are excellent choices for providing winter insulation and suppressing spring weeds. A mulch layer of ten to fifteen centimeters deep protects the soil from the cycles of freezing and thawing that can push cloves out of the ground. This protective blanket also helps maintain a more consistent soil temperature throughout the winter.
Monitoring the bed for pests like birds or rodents is necessary in the weeks following the planting. Some animals may be tempted to dig up the freshly planted cloves, especially if the soil is loose and easy to move. Using a temporary mesh cover or bird netting can deter these visitors until the soil has settled and the plants are established. Once the ground freezes, the risk of animal disturbance usually decreases significantly until the spring thaw.
While the garlic is dormant during the winter, the gardener’s role shifts to observation and planning. It is important to check the mulch layer periodically to ensure it hasn’t been blown away by strong winds. If a particularly dry winter occurs, some growers may apply a light watering during a thaw to keep the roots from desiccating. However, in most climates, the natural winter precipitation is sufficient for the plant’s needs during this quiet phase.
As spring approaches and the first green tips emerge through the mulch, the propagation cycle is officially complete. These young plants are the result of careful selection, precise planting, and a well-prepared environment. The success of this initial phase ensures that the garlic has the best possible chance of reaching its full potential. From a single clove, a whole new bulb will soon develop, continuing the ancient tradition of garlic cultivation.