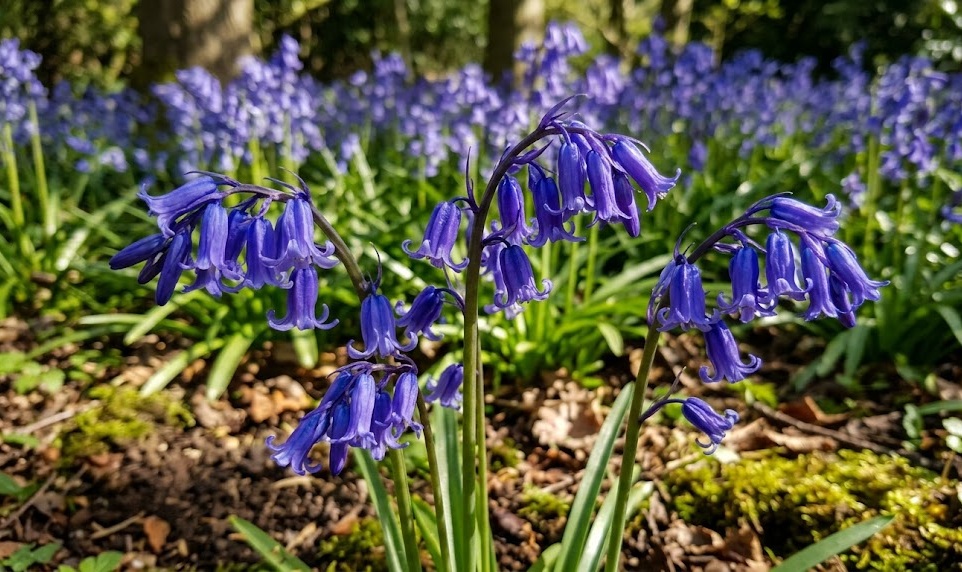
Planting and propagation are the most critical phases in establishing a successful colony of English bluebells in your landscape. These bulbs are uniquely adapted to specific soil depths and environmental triggers that dictate their survival and spreading potential. For a professional result, one must consider the timing, the quality of the starting material, and the long-term goal of naturalization. This article explores the technical aspects of bringing these woodland gems into your garden through proper planting techniques and various propagation methods.
Site selection and soil preparation
The first step in any successful planting project is identifying the location that best mimics the native woodland habitat. English bluebells thrive in areas that receive filtered sunlight during the spring and remain relatively shaded during the summer. Underneath deciduous trees is the gold standard, as the falling leaves provide a natural mulch and nutrient source. Avoid areas with standing water, as constant saturation will quickly rot the bulbs during their dormant phase.
Before the bulbs arrive, you should prepare the soil to ensure it is loose, friable, and rich in organic matter. Digging in a generous amount of well-rotted leaf mold or compost will improve the soil structure significantly. This preparation allows the young roots to penetrate the soil easily and establish a strong anchor. If your soil is naturally compacted, consider using a broadfork to aerate the deeper layers without completely turning the soil over.
It is also important to clear the area of aggressive perennial weeds and thick grass before planting. Bluebells can struggle to compete with established turf or deep-rooted weeds during their first few years. Removing these competitors gives the bulbs a “head start” and ensures they have exclusive access to the available nutrients. Once the bluebells are established, they will form a dense enough carpet to naturally suppress most annual weeds.
Professional gardeners often test the soil drainage by digging a small hole and filling it with water. If the water drains away within an hour, the site is likely suitable for bulb planting. If the water lingers for several hours, you may need to create a raised bed or incorporate grit to improve drainage. Getting the site conditions right before the first bulb touches the ground is the secret to long-term success.
More articles on this topic
Technical bulb planting techniques
The timing for planting bluebell bulbs is usually in the autumn, allowing them to establish roots before the ground freezes. It is highly recommended to plant “in the green” as well, which involves transplanting them just after they have finished flowering. This method often results in a higher success rate because the bulbs are actively growing and less likely to dry out. Regardless of the method, the bulbs should be handled with care to avoid bruising the delicate scales.
Proper planting depth is essential for the survival and flowering performance of the English bluebell. As a general rule, the bulbs should be planted at a depth of at least 10 to 15 centimeters. If they are planted too shallowly, they may be prone to drying out or being dug up by squirrels. Deep planting also encourages the bulbs to develop the contractile roots they use to pull themselves to the ideal depth over time.
Spacing the bulbs correctly will determine how quickly the area looks “filled in” and established. For a natural effect, aim for a density of about 50 to 75 bulbs per square meter. Instead of placing them in a grid, try scattering them by hand and planting them where they land for a more organic appearance. This technique avoids the artificial look of a commercial flower bed and mimics the random drifts found in ancient woods.
When placing the bulb in the hole, ensure the pointed end is facing upwards and the base is in firm contact with the soil. Gently firm the soil over the bulbs to remove any large air pockets that could trap moisture and cause rot. Watering the area immediately after planting helps to settle the soil and initiates the root growth process. A light layer of mulch over the top will protect the site from erosion and temperature fluctuations during the winter.
More articles on this topic
Propagation through bulb division
The most common way to increase your stock of bluebells is through the natural process of bulb division. Over several years, a single bulb will produce “offsets” or daughter bulbs that eventually grow to flowering size. When these clumps become too crowded, the plants may produce fewer flowers and smaller leaves. This is a clear signal to the professional gardener that it is time to lift and divide the colony.
The best time to divide bluebells is during the “in the green” stage, typically in late April or May. This allows you to see exactly where the plants are and helps them settle into their new locations before summer dormancy. Use a garden fork to lift the entire clump carefully, making sure to dig deep enough to get underneath the bulbs. Shake off the excess soil so you can clearly see the individual bulbs and their root systems.
Carefully pull the bulbs apart by hand, ensuring that each division has a portion of the basal plate and some roots. Small bulbs that are not yet flowering size should still be replanted, as they will reach maturity in a year or two. Avoid leaving the bulbs exposed to the air for too long, as they lack the protective outer skin found on tulips or daffodils. Keep them in a shaded spot or wrapped in a damp sack while you prepare the new planting holes.
Replant the divided bulbs immediately at the same depth they were growing previously. Water them thoroughly to reduce transplant shock and ensure good soil contact with the roots. Dividing your bluebells every few years not only increases your plant count but also rejuvenates the original drift. This practice ensures a healthy, vigorous population that continues to expand across your garden for decades.
Growing bluebells from seed
Propagation from seed is a slower but highly rewarding method for those looking to create large-scale naturalized areas. English bluebells produce copious amounts of black, shiny seeds in late summer as the seed pods dry and split. Collecting these seeds at the right moment is crucial, as they are often dispersed quickly by the wind or gravity. Look for pods that have turned brown and are just beginning to open at the top.
Freshly collected seeds have the highest germination rate and should ideally be sown immediately. You can sow them directly into a prepared seedbed in a shaded part of the garden or in pots for more control. Use a compost mix that is high in organic matter and keep it consistently moist but not waterlogged. The seeds require a period of cold stratification during the winter to break their dormancy and trigger growth in the spring.
During the first year, the seedlings will only produce a single, needle-like leaf as they focus on developing a tiny bulb. It is vital to protect these young plants from being overwhelmed by weeds or disturbed by garden maintenance. They will not flower for several years, usually taking between four and six years to reach maturity. Patience is required, but the result is a genetically diverse population that is perfectly adapted to your garden’s specific conditions.
For professional-level seed propagation, consider using deep seed trays or “root trainers” to encourage long root development. This makes transplanting the young bulbs much easier when they are finally ready to move to their permanent home. Label your seed trays clearly with the date and source of the seeds to track their progress. This systematic approach ensures that you have a steady supply of new plants to expand your woodland displays.