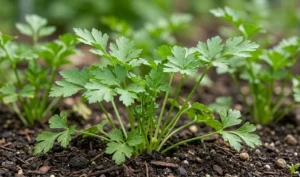
Successfully planting and propagating curly leaf parsley requires patience and a deep understanding of the seed’s unique physiological requirements. This herb is notorious for its slow germination rate, which can often take up to four or five weeks under less-than-ideal conditions. To achieve a high success rate, you must focus on creating the perfect micro-environment from the very moment the seed touches the soil. Professional propagation techniques involve careful temperature control and consistent moisture levels to wake the seeds from their natural dormancy.
The timing of your planting is the first critical decision you will make in the life cycle of your parsley crop. You should aim to start your seeds indoors about eight to ten weeks before the last expected frost in your area. This gives the slow-growing seedlings enough time to develop a strong root system before being moved to the challenging outdoor environment. If you prefer direct sowing, wait until the soil has warmed up to at least 10 degrees Celsius to avoid seed rot.
Soil preparation for planting involves creating a fine, crumbly seedbed that is free of large clods or stones. Curly leaf parsley seeds are very small and can easily become lost or buried too deeply in rough soil. You should incorporate a balanced starter fertilizer into the top few centimeters of the earth to provide immediate nutrition for the emerging roots. Ensuring that the planting site is well-drained but capable of holding moisture is the primary goal of your preparation efforts.
Light plays an interesting role in the germination of parsley seeds, as they benefit from being near the surface. You should only cover the seeds with a very thin layer of fine soil or vermiculite, no more than three millimeters deep. If the seeds are buried too far down, they may run out of stored energy before they can reach the light and begin photosynthesis. Maintaining a consistent light source, whether natural or artificial, will help guide the young shoots upward.
Masterful seed preparation and sowing
Before you even think about putting seeds in the ground, you can significantly improve your results with a pre-soaking treatment. Place your curly leaf parsley seeds in a bowl of lukewarm water for about twenty-four hours before you plan to sow them. This process helps to leach out the naturally occurring germination inhibitors found in the seed coat. You will find that pre-soaked seeds often emerge a full week earlier than those planted dry.
More articles on this topic
Sowing the seeds requires a steady hand and a clear strategy for spacing to avoid future overcrowding issues. If you are planting in rows, aim for a spacing of about five centimeters between seeds to allow for easy thinning later. You can mix the tiny seeds with a bit of dry sand to make them easier to distribute evenly across the soil surface. This professional trick prevents “clumping,” which can lead to competition and stunted growth among the young seedlings.
Once the seeds are sown, the most important task is to maintain a constant level of surface moisture. You should use a fine mist sprayer to water the area, as a heavy stream can wash the tiny seeds away or bury them too deeply. If you are starting seeds indoors, covering the trays with a clear plastic dome can help retain the necessary humidity. You must be vigilant during this period, as even a single day of the soil drying out can be fatal to the germinating embryos.
The ideal temperature for germination is around 21 degrees Celsius, which often necessitates the use of a heating mat in cooler climates. You should monitor the soil temperature closely, as excessive heat can be just as damaging as cold temperatures. Once the first green hooks appear above the soil, you can slightly reduce the temperature to encourage stockier growth. Consistent environmental monitoring is what separates successful propagation from a failed attempt.
Nurturing young seedlings through the early stages
When the first true leaves appear, which will have that characteristic curly shape, it is time to begin the thinning process. You should select the strongest, most vigorous seedlings and remove the smaller ones to create a final spacing of about twenty centimeters. Instead of pulling the unwanted plants, use small scissors to snip them off at the soil line to avoid disturbing the roots of the keepers. This ensures that the remaining plants have all the resources they need to thrive.
More articles on this topic
Light requirements become much more intensive as the seedlings begin to grow rapidly and develop their photosynthetic capacity. If you are growing indoors, you should provide at least twelve to fourteen hours of bright light each day to prevent leggy growth. Keep the light source close to the tops of the plants, adjusting the height as they grow taller to maintain intensity. Strong light at this stage leads to thick, sturdy stems that can support the heavy, ruffled foliage.
Fertilization should be introduced gradually once the seedlings have established a few sets of true leaves. You should use a high-quality water-soluble fertilizer at half the recommended strength to avoid burning the delicate new roots. Focus on a balanced formula that provides equal parts nitrogen, phosphorus, and potassium to support overall development. Applying this weak solution every two weeks will provide a steady stream of nutrients without causing a growth surge that the plant cannot support.
Hardening off is the final and most dangerous step in the propagation process before the plants enter the garden. You must slowly introduce your indoor-grown seedlings to the outdoor elements over a period of seven to ten days. Start by placing them in a sheltered, shady spot for an hour or two and gradually increase their exposure to direct sun and wind. This process allows the plant tissues to thicken and prevents the shock that often leads to transplant failure.
Advanced propagation via root division
While most curly leaf parsley is grown from seed, it is possible to propagate existing healthy plants through careful root division. This method is best performed in the early spring just as the plant is beginning its new growth cycle. You should select a large, established plant that has multiple crowns or growing points visible at the soil level. Root division provides you with a “head start” on the season, as you are working with a mature root system.
To begin the division, carefully dig up the entire root ball, trying to keep as much of the surrounding soil intact as possible. Use a sharp, sterilized knife or a dedicated root saw to slice through the main taproot and crown, ensuring each section has plenty of roots and at least one healthy shoot. You must work quickly during this process to prevent the exposed roots from drying out or being damaged by the air. Sterilizing your tools between cuts is a professional practice that prevents the spread of soil-borne pathogens.
Replanting the divisions should happen immediately into pre-prepared holes that are rich in organic matter and have been thoroughly watered. You should set the new plants at the same depth they were growing previously, as burying the crown too deep can lead to rot. Firm the soil gently around the roots to remove any large air pockets but avoid heavy compaction. Providing a temporary shade cover for the first few days will help the divisions recover from the stress of the operation.
Aftercare for divided plants involves very careful monitoring of moisture levels for the first two to three weeks. Since the root system has been significantly disrupted, the plant will have a reduced ability to take up water and nutrients. You should avoid fertilizing for at least a month to give the roots time to heal and establish themselves in their new location. If the division is successful, you will see new green growth appearing from the center of the crown within a few weeks.
Choosing the right location and transplanting
The final success of your planting efforts depends heavily on the site you choose for your curly leaf parsley. You should look for a spot that receives at least six hours of direct sunlight but is protected from the harshest afternoon heat. The soil must be deep and loose to accommodate the long taproot that the plant will eventually develop. Avoid areas where water tends to pool after a rain, as this will almost certainly lead to root issues.
When you are ready to transplant your nursery-grown or home-started plants, handle the root balls with extreme care. Parsley has a sensitive taproot system that does not like to be disturbed, so try to keep the soil around the roots together. Dig a hole that is twice as wide as the root ball but only as deep as the container it is currently in. This allows the roots to spread out into loose soil easily while keeping the crown at the correct level.
Watering immediately after transplanting is essential to settle the soil and ensure good contact between the roots and the earth. You should use a gentle stream of water to avoid washing away the top layer of soil or damaging the foliage. Adding a liquid seaweed extract to the first watering can help reduce transplant shock and encourage rapid root development. This professional additive provides hormones and minerals that help the plant adjust to its new environment.
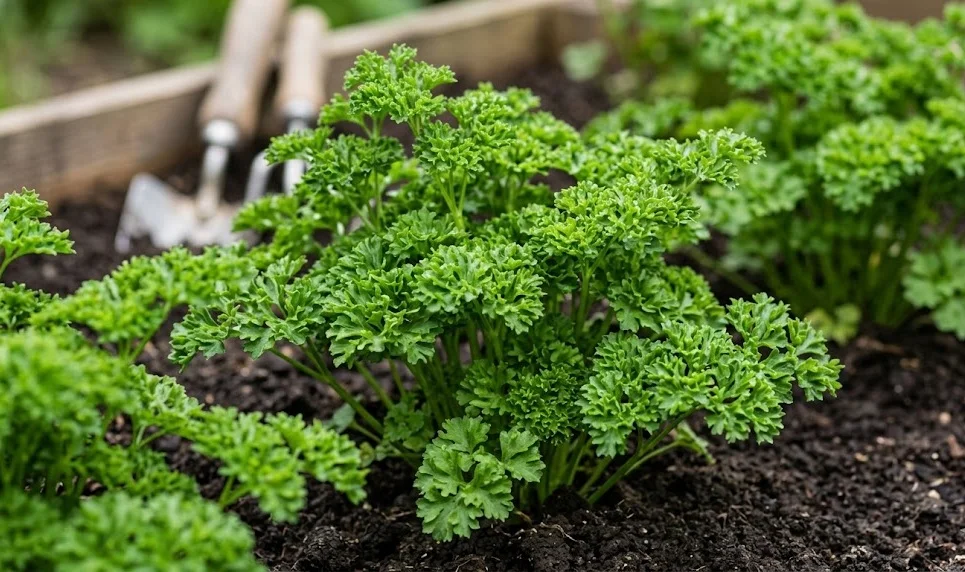
Spacing between the final plants should be maintained at twenty-five to thirty centimeters to allow for the full expansion of the curly leaves. This distance ensures that air can circulate freely through the garden bed, reducing the risk of disease and promoting even growth. If you are planting in a container, ensure it is at least twenty centimeters deep to give the taproot enough room to grow. A well-placed and properly spaced planting is the key to a bountiful and healthy parsley harvest.