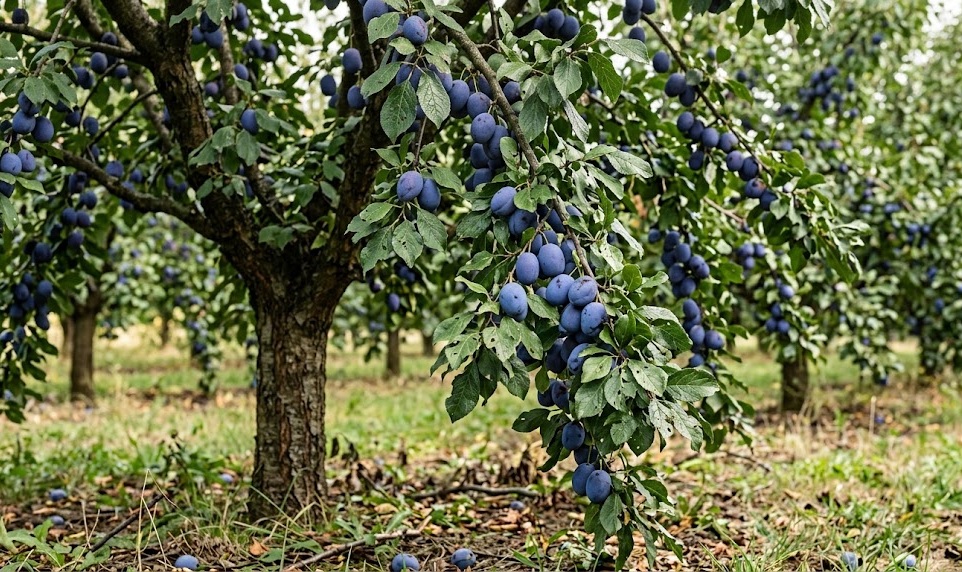
Establishing a new plum orchard begins with careful planning and a deep understanding of the planting process. Choosing the right location and the correct propagation method can determine the success of your trees for decades to come. Whether you are starting with a young sapling from a nursery or trying your hand at grafting, precision is key to ensuring a healthy start. This article explores the essential steps involved in bringing new plum trees into your landscape and expanding your collection.
Selecting the ideal site and preparing the ground
The first step in planting a plum tree is identifying a location that meets its specific biological requirements for growth. Plums need full sun exposure for at least six to eight hours a day to produce high-quality fruit and maintain strong immune systems. Avoid low-lying areas in your garden where cold air tends to settle, as these “frost pockets” can destroy spring blossoms. A site with a slight slope can often provide the necessary air drainage to protect the tree during cold snaps.
Soil preparation should begin several months before the actual planting takes place to allow for structural improvements. Dig a hole that is twice as wide as the root ball but no deeper, ensuring the soil at the bottom remains firm. Incorporating organic matter into the surrounding soil helps improve drainage and provides a slow-release source of nutrients for the young roots. If your soil is particularly heavy, you might consider mixing in some coarse sand or grit to prevent compaction.
A competition-free zone is vital for the establishment of a young plum tree during its first few years. Clear all grass and weeds within a three-foot radius of the planting site to ensure the tree doesn’t have to fight for water. Weeds can also harbor pests and diseases that might easily jump to a vulnerable young sapling. Maintaining a clean circle of mulch around the base of the tree is an excellent way to keep the area tidy and moist.
Before placing the tree in the ground, inspect the root system for any damaged or circling roots that might hinder growth. Trim off any broken tips with clean shears to encourage the development of new, healthy feeder roots. If the tree is bare-root, soak the roots in a bucket of water for a few hours prior to planting to ensure they are fully hydrated. These small preparation steps can make a significant difference in how quickly the tree recovers from transplant shock.
More articles on this topic
The technical process of planting the tree
When you are ready to plant, place the tree in the center of the hole and check its depth relative to the ground level. The graft union, which is the bump on the lower trunk where the variety meets the rootstock, must remain above the soil line. Planting the tree too deep can lead to rot and may cause the upper variety to grow its own roots, negating the benefits of the rootstock. Use a straight stick or shovel handle across the hole to verify that the depth is perfectly level with the surrounding soil.
Begin backfilling the hole with the original soil, gently tamping it down as you go to remove any large air pockets. Air pockets around the roots can cause them to dry out and die, which significantly slows the establishment of the tree. Avoid adding high-concentration fertilizers directly into the planting hole, as these can burn the sensitive new roots. The goal is to create a firm but not compacted environment where the roots can easily spread into the surrounding landscape.
Once the hole is filled, create a small basin of soil around the edge of the planting area to hold water. Give the new tree a deep, thorough watering immediately after planting to further settle the soil and hydrate the root system. This initial watering is the most important one the tree will receive, as it bridges the gap between the nursery and the garden. If the weather is dry, you will need to monitor the soil moisture daily for the first few weeks.
Staking the tree may be necessary if you live in a particularly windy area or if the sapling is quite tall and thin. Use soft ties made of rubber or fabric to secure the trunk to a sturdy stake driven into the ground outside the root ball. The ties should be loose enough to allow the tree some movement, which actually helps strengthen the trunk over time. Check the stakes and ties regularly during the first year to ensure they are not rubbing against the bark or becoming too tight.
More articles on this topic
Propagation through grafting and budding
Grafting is the most common professional method for propagating plum trees, as it allows for the combination of a desired fruit variety with a hardy rootstock. This process involves joining a piece of one plant, the scion, onto the root system of another, the rootstock. For plums, the “whip and tongue” graft is often used in late winter while the plants are still dormant. Success depends on the precise alignment of the cambium layers, which are the green growing tissues just beneath the bark.
Budding is a variation of grafting that is typically performed in late summer when the bark is “slipping” or easy to peel. A single bud from the desired variety is inserted into a T-shaped slit in the bark of the rootstock. This method is often more efficient than traditional grafting and has a high success rate when done correctly. Once the bud has fused with the rootstock, the original top of the rootstock is removed the following spring to allow the new bud to grow.
The choice of rootstock is critical because it determines the ultimate size of the tree and its resistance to soil-borne diseases. Dwarfing rootstocks are popular for home gardens because they keep the tree at a manageable height and often encourage earlier fruiting. Stronger, more vigorous rootstocks might be preferred for poor soils or where a large, traditional orchard tree is desired. Understanding the interaction between the scion and the rootstock is a fundamental skill for any advanced plum propagator.
After grafting or budding, the union must be protected from drying out using specialized grafting wax or waterproof tape. Keeping the newly joined plants in a protected environment, such as a nursery bed or a cold frame, can improve the chances of a successful union. It takes several weeks for the vascular tissues to knit together and begin transporting water and nutrients. Patience and meticulous attention to detail are the hallmarks of a successful propagator.
Propagation from cuttings and seeds
While less common for commercial production, propagating plum trees from hardwood cuttings is a fascinating project for the home gardener. Cuttings should be taken in late autumn or early winter from healthy, one-year-old wood that is about the thickness of a pencil. Dip the base of the cuttings in a rooting hormone to encourage the development of roots before planting them in a well-drained medium. It can take several months for roots to form, and the success rate is generally lower than with grafting.
Growing plum trees from seeds is possible, but it is important to remember that the resulting tree will not be identical to the parent. Most plums are hybrids, and their seeds will produce a “wild” type of tree with unpredictable fruit quality. However, growing from seed can be an excellent way to produce hardy rootstocks for future grafting projects. The seeds require a period of cold stratification, mimicking winter, before they will germinate in the spring.
To stratify plum seeds, place them in a container of damp sand or peat moss and store them in the refrigerator for three to four months. Once the seeds begin to crack open or show a small root, they can be planted into individual pots. Keep the seedlings in a bright, protected area and ensure they receive consistent moisture as they grow. It will take several years for a seedling to reach a size where it can be used as a rootstock or allowed to fruit on its own.
Propagating your own trees provides a deep sense of connection to the orchard and allows you to preserve rare or heirloom varieties. It is also a cost-effective way to expand your garden if you have the time and patience required for the process. Whether through the technical precision of grafting or the natural cycle of seeds, propagation is a rewarding endeavor. Each new tree you create is a living legacy that can provide fruit for generations.