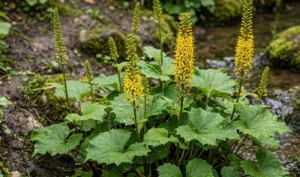
Establishing a successful stand of black salsify begins with a deep understanding of its unique germination requirements and growth habits. This cool-season vegetable is typically grown from seed, as its sensitive taproot does not respond well to the disturbances associated with transplanting. You must pay close attention to the timing of your sowing, ensuring that the soil has reached the appropriate temperature to support early development. Providing the right start is the most effective way to guarantee a healthy and productive crop by the end of the year.
Seed selection and quality assessment
The quality of the seeds you choose is the primary determinant of the eventual success of your planting efforts. You should always source your seeds from reputable suppliers who specialize in heirloom or professionally bred varieties designed for your specific climate. Because salsify seeds have a relatively short viability period, using fresh stock from the current year is highly recommended for the best germination rates. Older seeds often exhibit poor vigor, leading to uneven stands and weak plants that are more susceptible to environmental stress.
When examining the seeds, look for those that are plump, uniform in color, and free from any obvious physical damage or mold. The seeds are naturally elongated and somewhat fragile, so they must be handled with care during the counting and planting process. You might consider performing a simple germination test at home by placing a few seeds between damp paper towels in a warm location. This allows you to calibrate your sowing density based on the actual percentage of seeds that successfully sprout.
Variety selection also plays a significant role in how the plants will perform in your specific garden environment. Some cultivars are bred specifically for longer, more slender roots, while others focus on disease resistance or resistance to bolting. You should research the characteristics of different varieties to find one that matches your soil type and culinary preferences. Consulting with local agricultural experts or fellow gardeners can provide valuable insights into which types have historically performed well in your region.
Storing any leftover seeds correctly is essential if you plan to use them for a second planting later in the season. Seeds should be kept in a cool, dark, and dry place, preferably in an airtight container with a small desiccant pack to absorb excess moisture. High temperatures and humidity are the enemies of seed longevity and can quickly render a high-quality batch useless. By treating your seeds as a valuable biological resource, you ensure that you always have the best possible starting material for your garden.
More articles on this topic
Determining the optimal planting window
Timing is everything when it comes to sowing black salsify, as the plants require a long growing season to develop their signature roots. In most temperate regions, the best time to plant is in early to mid-spring, as soon as the soil can be worked without becoming a muddy mess. While the seeds can germinate in relatively cool soil, they will progress much faster once the ground temperature reaches at least ten degrees Celsius. Planting too early in cold, wet soil can lead to seed rot and poor emergence.
You must also consider the length of your local growing season, as salsify typically requires between one hundred and twenty to one hundred and fifty days to reach maturity. If you live in an area with a very short summer, you may need to use cold frames or floating row covers to gain a few extra weeks of growth. Conversely, in regions with very hot summers, an early spring start allows the plants to establish a robust root system before the extreme heat arrives. Balancing these environmental factors requires a deep knowledge of your local microclimate.
Succession planting is another strategy you can use to extend the harvest period and ensure a steady supply of fresh roots. By sowing small batches of seeds every two to three weeks, you can avoid having the entire crop reach maturity at the exact same time. This approach is particularly useful for home gardeners who want to enjoy the vegetable throughout the autumn and early winter. However, keep in mind that the latest plantings must still have enough time to develop before the ground freezes solid.
Monitoring weather forecasts during the planting window helps you avoid sudden heavy rains or unexpected late frosts that could disrupt the seedlings. A gentle, steady rain after sowing is often beneficial, but a localized deluge can wash away the seeds or cause soil crusting that prevents emergence. If a hard frost is predicted shortly after the first sprouts appear, a light covering of fleece can provide the necessary protection. Being proactive during this vulnerable phase of the life cycle pays dividends in the form of a uniform and healthy crop.
More articles on this topic
Executing the sowing process with precision
The physical process of sowing requires a steady hand and careful attention to the depth and spacing of the seeds. You should create shallow furrows approximately two centimeters deep, maintaining a distance of thirty centimeters between the rows. Sowing the seeds too deeply can prevent the delicate sprouts from reaching the surface, while planting too shallowly leaves them vulnerable to drying out. Consistent depth across the entire bed ensures that all the seedlings emerge at roughly the same time.
Because the seeds are small and can be difficult to handle, you might find it helpful to mix them with a small amount of dry sand before sowing. This technique helps to distribute the seeds more evenly and makes it easier to see where you have already planted. You should aim for a density of about one seed every two to three centimeters, knowing that you will thin the plants later. Covering the furrows with fine soil and tamping it down gently ensures good seed-to-soil contact, which is vital for moisture absorption.
Watering immediately after sowing is a critical step that you should never skip, especially in dry spring conditions. Use a watering can with a fine rose or a gentle misting attachment to avoid displacing the seeds or washing them out of the furrows. The goal is to moisten the soil to the depth of the seeds without creating puddles or causing the surface to seal over. Keeping the soil consistently damp during the ten to twenty days required for germination is one of the most important tasks in the early season.
If you are planting in a large agricultural setting, specialized seed drills can be calibrated to handle the unique shape of salsify seeds. These machines ensure a high level of precision and can cover large areas much more efficiently than manual labor. Regardless of the scale, the principles of depth, contact, and moisture remain the same for every successful propagation effort. Investing the effort to plant correctly the first time reduces the need for reseeding and ensures a more predictable harvest.
Monitoring early seedling development
The period immediately following germination is when the young plants are at their most vulnerable to environmental stressors and pests. You should check the planting site daily for the first signs of the thin, grass-like cotyledons breaking through the soil surface. This is the time to be particularly vigilant against slugs and snails, which can decimate a newly emerged crop in a single night. Using organic barriers or evening patrols can help protect the tender greens during these critical first weeks.
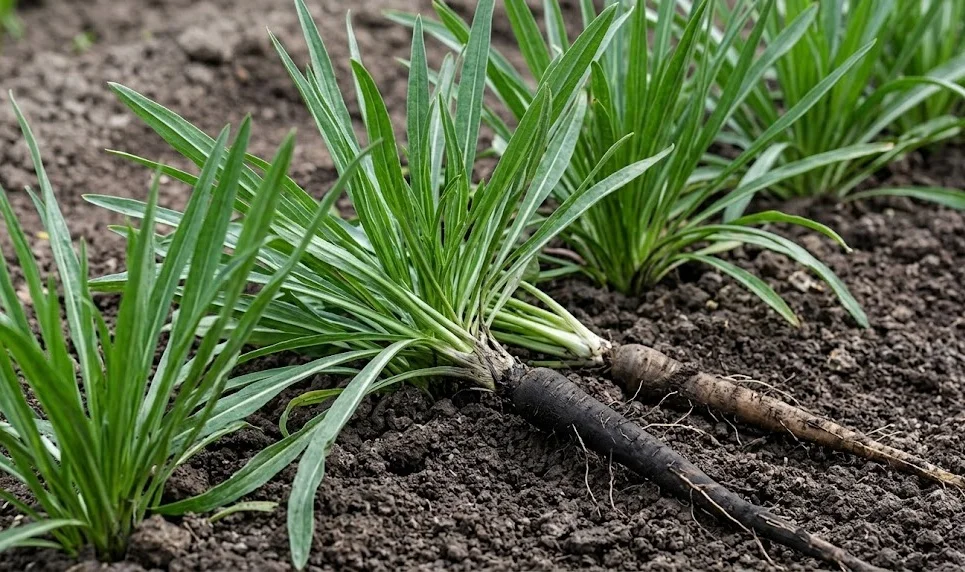
As the first true leaves begin to appear, the plants will start to establish the taproot that will eventually become the harvestable crop. You will notice that the growth is initially quite slow as the plant prioritizes underground development over leaf expansion. It is important to resist the urge to over-fertilize at this stage, as excessive nitrogen can lead to lush foliage at the expense of root quality. Instead, focus on maintaining consistent moisture and keeping the area free of weeds that could compete for resources.
Observing the color and turgidity of the seedlings provides immediate feedback on the health of the soil environment. Pale or spindly growth often indicates a lack of sunlight or poor soil nutrition, while wilting can be a sign of either too little or too much water. If you notice patches where seeds have failed to emerge, it may be necessary to do a quick re-sowing to fill in the gaps. Maintaining a full stand is important for maximizing the use of your garden space and ensuring a high total yield.
Once the seedlings have reached a height of about ten centimeters, they are generally robust enough to handle the first round of thinning. This transition from the propagation phase to the main growing phase marks a significant milestone in the life of the crop. You can now begin to implement the long-term care strategies that will sustain the plants through the summer and into the autumn harvest. Success in propagation provides the essential foundation upon which all subsequent gardening efforts are built.