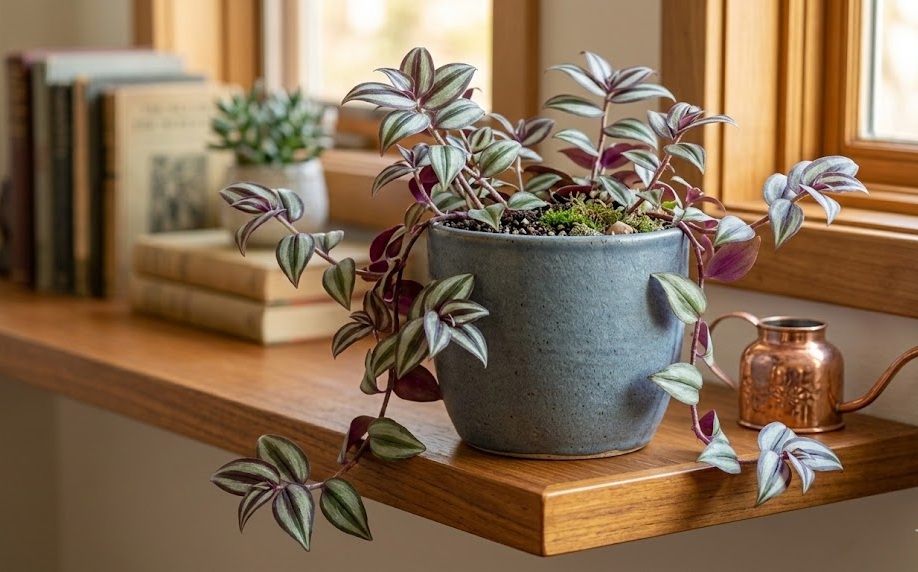
Successful propagation of this versatile species allows you to expand your indoor garden effortlessly while maintaining the health of your original mother plant. The process is remarkably simple and serves as an excellent introduction for those who are new to the world of plant cultivation. You can choose between water and soil methods, both of which yield high success rates if you follow the basic biological requirements. By understanding the timing and techniques involved, you can ensure that every cutting develops into a strong and independent individual.
Selecting the right material for propagation is the first step toward creating a healthy new plant. You should look for vigorous, healthy stems that have at least three or four distinct leaf nodes along their length. It is best to avoid stems that are currently flowering or those that show any signs of stress, such as yellowing or drooping. Using a sharp, sterilized pair of scissors or a craft knife will ensure a clean cut that heals quickly and minimizes the risk of infection.
Preparing the cuttings requires a small amount of detail-oriented work to give them the best chance of survival. You should remove the lower leaves from the stem, leaving at least two centimeters of bare vine that will be submerged in water or buried in soil. The nodes, which are the points where the leaves were originally attached, are the locations where new roots will eventually emerge. Make sure the remaining leaves at the top of the cutting are healthy and capable of performing photosynthesis to provide energy for root development.
Timing your propagation efforts can significantly impact how quickly the new roots begin to form and grow. While you can take cuttings at any time of the year, the spring and early summer provide the most favorable conditions for rapid development. The increased light and warmer temperatures during these seasons stimulate the plant’s natural growth hormones and accelerate the healing process. This proactive approach ensures that your new plants are well-established and strong before the slower growth period of winter arrives.
Mastering the water propagation method
Water propagation is perhaps the most popular method for this species because it allows you to watch the roots develop in real-time. You should place your prepared cuttings into a glass or jar filled with clean, room-temperature water, ensuring that at least one node is submerged. Avoid using deep containers where the leaves might touch the water, as this can lead to rot and foul the environment for the new roots. Placing the jar in a spot with bright, indirect light will provide the energy needed for the biological transformation to occur.
More articles on this topic
Changing the water regularly is essential for keeping the environment oxygenated and free from harmful bacteria or algae. You should aim to refresh the liquid every few days, or whenever it begins to look slightly cloudy or discolored. Rinsing the submerged portion of the stem gently during each water change can also help keep the developing root zone clean. This consistent maintenance prevents the buildup of organic waste that could otherwise suffocate the delicate new tissues as they emerge.
You will typically see the first signs of root growth within a week or two, depending on the ambient temperature and the health of the cutting. The roots will initially appear as small white bumps on the nodes before lengthening into fine, hairy filaments that branch out. You should wait until the roots are at least three to five centimeters long before you consider moving the plant into a more permanent soil-based home. This ensures that the root system is robust enough to handle the transition and begin absorbing nutrients from a solid medium.
The transition from water to soil can be a sensitive time for the plant, as the roots must adapt to a different way of acquiring moisture. You should use a very light and airy potting mix to make the transition as smooth as possible for the new root system. Keep the soil consistently moist for the first two weeks after planting to help the “water roots” adjust to the new environment. Once you see new leaf growth at the tip of the cutting, you can gradually move to a more standard watering routine.
Techniques for direct soil propagation
Propagating directly in soil is a more traditional approach that eliminates the need for a transition phase between mediums. You should fill small pots with a mixture of peat and perlite, ensuring the substrate is pre-moistened but not dripping wet. Use a pencil or a small stick to create a hole in the soil before inserting the cutting to avoid damaging the delicate stem tissues. Firm the soil gently around the base of the cutting to ensure good contact between the nodes and the moist earth.
More articles on this topic
Maintaining the right moisture level is the biggest challenge when using the direct soil method for propagation. If the soil stays too wet, the stem will likely rot before it has a chance to produce any functional roots. On the other hand, if the soil dries out completely, the cutting will wilt and lose the energy it needs to sustain itself. You can create a mini-greenhouse effect by placing a clear plastic bag over the pot to trap humidity and reduce the frequency of watering.
Rooting hormones are not strictly necessary for this species, but they can certainly help speed up the process and increase the success rate. You can dip the cut end and the lower nodes into a rooting powder or gel before placing them into the soil. These products contain synthetic versions of natural plant hormones that encourage the cells to switch from leaf production to root production. This is particularly helpful if you are trying to propagate during the less ideal autumn or winter months.
You will know that the soil propagation has been successful when the cutting resists a gentle tug and begins to show new growth. This resistance indicates that roots have successfully anchored themselves into the substrate and are beginning to expand. Once the plant is established, you can treat it like a mature specimen and begin a regular care routine. Starting several cuttings in a single pot is a great way to create a full and bushy plant right from the very beginning.
Best practices for successful planting
When you are ready to plant your established cuttings, choosing the right container size is crucial for their future development. You should avoid using a pot that is too large, as the excess soil will hold onto more water than the small root system can process. A small pot helps the soil dry out at an appropriate rate, which is the best defense against the development of root rot. As the plant grows and the roots fill the container, you can then move it to a larger home as part of your regular maintenance.
The quality of the potting mix you use during planting will dictate the health of the plant for its first few months of life. A blend that includes organic matter for nutrition and inorganic materials like perlite for drainage is the ideal combination. You should avoid using garden soil, as it is often too heavy for indoor use and may contain pests or diseases that can harm young plants. Investing in a high-quality indoor potting mix is one of the best things you can do for your new botanical additions.
Positioning the stems correctly during the planting process ensures that the resulting plant has an attractive and balanced shape. You should plant several cuttings around the edges of the pot and one or two in the center to create a dense cluster of foliage. Ensure that the soil level remains about a centimeter below the rim of the pot to make watering easier and prevent overflow. Gently patting the soil down ensures there are no large air pockets that could cause the roots to dry out prematurely.
After planting, give the new arrangement a thorough watering to settle the soil around the roots and provide immediate hydration. Place the newly potted plant in a bright location but out of direct sunlight for the first few days to allow it to recover from the stress of the move. You may notice a slight period of wilting or halted growth, which is a normal reaction as the plant adjusts to its new surroundings. With a little patience and consistent care, your new silver inch plant will soon begin to thrive and grow.
Rejuvenating older plants through division
Division is another method of propagation that is particularly useful for older, overgrown plants that have become too large for their containers. You can carefully remove the entire plant from its pot and gently tease the root ball apart into two or more smaller sections. Each section must have a healthy amount of both roots and foliage to ensure it can survive as an independent plant. This technique not only gives you new plants but also revitalizes the original specimen by providing it with more space and fresh soil.
When dividing the root ball, you might need to use a clean knife to cut through particularly dense or matted areas of the root system. Try to minimize the amount of damage to the fine feeder roots, as these are responsible for absorbing most of the plant’s water and nutrients. Once the sections are separated, you should prune back any excessively long or damaged vines to balance the foliage with the reduced root mass. Planting the divisions into fresh soil immediately will help them recover quickly from the shock of the procedure.
The recovery period after division is slightly longer than it is for simple stem cuttings because the entire root system has been disturbed. You should keep the newly divided plants in a stable environment with high humidity and consistent temperatures for the first few weeks. Avoid fertilizing immediately, as the roots need time to heal before they can effectively process additional nutrients. Once you see new leaves appearing, it is a clear sign that the division was successful and the plant has re-established itself.
Regularly propagating and dividing your collection ensures that you always have young, vigorous plants to replace those that may eventually lose their luster. It is a natural part of the lifecycle for these trailing species to become thin and leggy over time, so mastering these skills is essential for any serious gardener. By sharing your extra plants with friends and family, you also contribute to a community of plant lovers and spread the joy of indoor gardening. Propagation is not just a technical task; it is a way to celebrate the resilience and abundance of nature in your own home.