The successful establishment of the common liverwort in your garden begins with meticulous planning and a clear understanding of its propagation methods. Whether you are starting with nursery-bought specimens or attempting to grow your own from seeds or division, precision is required. These plants are slow-growers by nature, meaning that any mistakes made during the initial planting phase can take years to correct. A professional approach ensures that your efforts result in a healthy, long-lived colony that will grace your garden for decades.
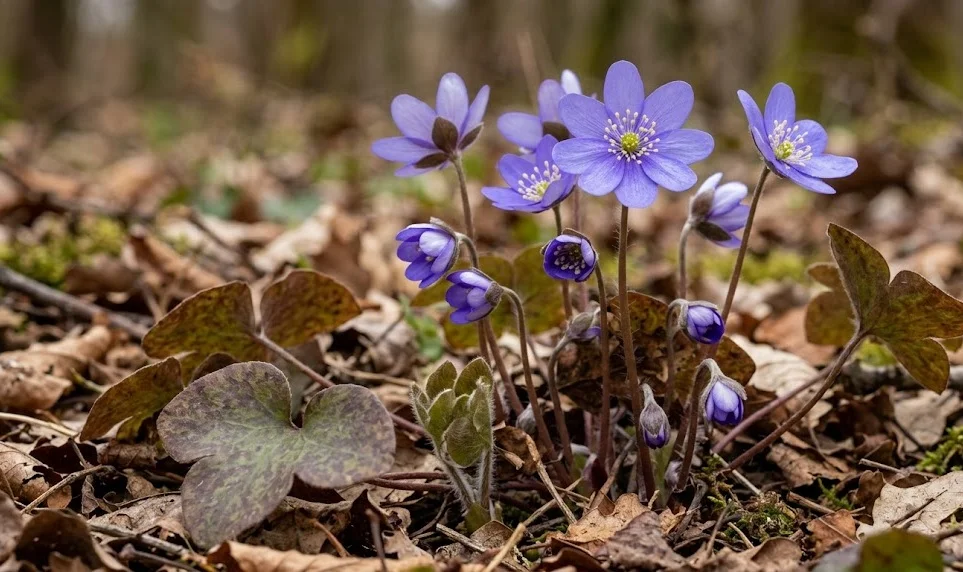
Site selection is the foundational step that will determine the ultimate success of your planting project. You must look for a location that mimics the dappled light and moist environment of an ancient deciduous woodland. Avoid areas that are prone to standing water or those that receive the intense, direct rays of the afternoon sun. The north or east-east side of a building, or the area under a mature tree, often provides the perfect conditions for these woodland beauties.
Preparing the planting hole involves more than just digging a space in the ground; it requires soil engineering for optimal growth. Dig a hole that is at least twice as wide as the root ball but no deeper than the height of the container. Incorporate plenty of organic leaf mold and a handful of grit to ensure the soil is both fertile and well-draining from the start. This preparation creates an inviting environment for the new roots to explore and settle into without encountering resistance.
When removing the plant from its nursery pot, handle the root system with extreme care to avoid breaking the delicate fine roots. Place the plant in the center of the hole, ensuring that the crown sits exactly at the same level as the surrounding soil surface. Firm the earth gently around the roots with your hands rather than your feet to avoid excessive soil compaction. Once planted, a thorough but gentle watering will help settle the soil and eliminate any large air pockets.
Selecting the right propagation method
Propagation through division is the most common way for home gardeners to increase their stock of mature liverwort plants. This process is best performed in late summer or early autumn when the plant’s active growing season is beginning to wind down. You should only attempt to divide well-established clumps that have at least several years of healthy growth. Professional division requires a sharp knife and a steady hand to separate the rhizomes into smaller, viable sections.
More articles on this topic
Growing these plants from seed is a rewarding but much slower process that requires a great deal of patience and attention to detail. The seeds must be sown while they are still fresh, as they lose their viability very quickly once they dry out. You will need to provide a period of cold stratification to mimic the natural winter cycle and trigger the germination process. It can often take two or more years before the first true leaves appear, and even longer for the first flowers to bloom.
Using root cuttings is another specialized technique that can be successful for experienced propagators looking for a challenge. This involves taking small sections of the healthy rhizome and placing them in a specialized growing medium under controlled conditions. You must maintain high humidity and consistent temperatures to encourage the development of new shoots from the cutting. This method allows for the production of exact clones of the parent plant, preserving specific color or leaf characteristics.
Purchasing young plants from reputable nurseries is often the most reliable way to start a new collection for your garden. Look for specimens that have a strong root system and show no signs of pests or yellowing in the foliage. It is often better to buy smaller, younger plants that will adapt more quickly to your garden’s specific soil and climate. Avoid plants that appear pot-bound, as their roots may be permanently damaged or stunted from spending too much time in a small container.
Technical steps for successful seed starting
The first step in seed propagation is collecting the seeds at exactly the right moment before they are dispersed by ants. You will notice the seed heads turning a yellowish-green color and becoming slightly soft to the touch when they are ready. Place the harvested seeds immediately into a damp medium to prevent them from entering a deep, difficult-to-break dormancy. Professional growers often use a mix of peat-free compost and perlite to provide a sterile and well-aerated environment.
More articles on this topic
Sowing the seeds thinly on the surface of the compost allows them to receive the light cues they need for eventual germination. You should cover them with a very fine layer of grit or sieved leaf mold to protect them while still allowing air to reach the seeds. Keep the seed trays in a sheltered, shaded spot where they will not be disturbed by birds or heavy rainfall. Consistent moisture is the most important factor during this long waiting period, so check the trays regularly and mist them as needed.
Overcoming seed dormancy requires a natural cycle of temperature changes that can be simulated in a cold frame or unheated greenhouse. The seeds need the chill of winter to break down the chemical inhibitors that prevent them from sprouting prematurely. You must be patient, as germination is often erratic and may take place over several months or even different years. Mark your trays clearly so that you do not accidentally reuse the space before the slow-moving seedlings have had a chance to emerge.
Once the seedlings finally appear, they are incredibly small and vulnerable to damping-off diseases and physical damage. You should avoid transplanting them until they have developed at least two or three sets of true leaves and a sturdy root system. Handle them only by the leaves, never the stems, to prevent crushing the delicate vascular tissue that carries water and nutrients. Gradually hardening off the young plants will prepare them for the more challenging conditions they will face in the open garden.
Mastering the art of clump division
Preparation for division begins a few days before the actual process by watering the parent plant thoroughly to ensure it is fully hydrated. Use a garden fork to lift the entire clump out of the ground, taking as much of the root ball as possible. Shake or wash away the excess soil so that you can clearly see the structure of the rhizomes and the individual growing points. This visual clarity is essential for making precise cuts that will result in healthy new independent plants.
Using a sterilized, sharp garden knife, carefully slice through the rhizome, ensuring that each new section has at least one healthy bud and several strong roots. Avoid tearing the roots apart with your hands, as this creates jagged wounds that are much more susceptible to infection. You should aim for divisions that are large enough to support themselves but small enough to encourage new, vigorous growth. Treat any large cut surfaces with a dusting of charcoal or a fungicide to protect the new plants during their recovery.
Replanting the divisions as quickly as possible is vital to prevent the exposed roots from drying out and dying. Follow the same planting procedures as you would for a new plant, paying close attention to the depth of the crown. Provide some temporary shade for the newly moved plants if the weather is particularly sunny or warm in the days following the division. A regular watering schedule will help the roots re-establish themselves in their new location before the arrival of winter.
Monitoring the progress of your new divisions will tell you if your propagation efforts have been successful. You may not see much top growth in the first few months, as the plant focuses its energy on repairing and expanding its root system. This is a normal part of the process and is actually a good sign of long-term health and stability. Within a year, the new plants should be fully established and ready to produce their own beautiful flowers in the spring.