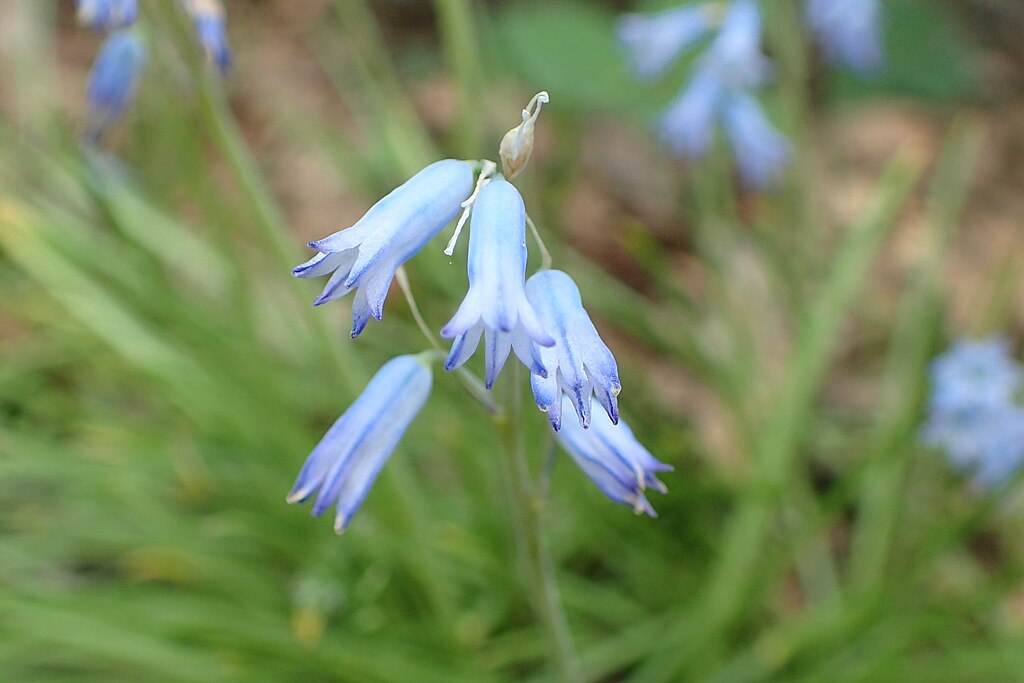
Successfully establishing and multiplying Brimeura amethystina, the amethyst hyacinth, is a rewarding process that begins with proper planting techniques and an understanding of its reproductive cycles. This charming bulbous perennial, known for its delicate, sky-blue to violet bell-shaped flowers, thrives when its specific needs are met from the very beginning. The initial placement of the bulbs is a critical step that dictates the future health and vigour of the plant. Choosing the right location, preparing the soil meticulously, and planting at the correct time of year are the foundational pillars upon which a beautiful display is built. Propagation, whether through division of offsets or by seed, offers straightforward methods to increase your stock and spread its subtle beauty throughout the garden.
Selecting the ideal planting site
The success of Brimeura amethystina is heavily dependent on choosing the correct location in the garden. These plants require a position that receives full sun to partial shade. In cooler climates, a full sun location is often ideal as it ensures the bulbs receive enough light to photosynthesize effectively and store energy for the next season. In hotter regions, however, a spot that offers some light afternoon shade can be beneficial, as it protects the delicate foliage and flowers from the harshest rays of the sun, preventing scorch and stress. Observing the path of the sun across your garden throughout the day is a crucial first step in identifying the perfect spot.
Beyond light, the most critical factor for a planting site is the quality of the soil drainage. Brimeura amethystina is native to rocky slopes and well-drained woodlands, and it will not tolerate waterlogged conditions, especially during its summer dormancy. A site where water puddles after rain is entirely unsuitable and will inevitably lead to bulb rot. Ideal locations include rock gardens, the tops of raised beds, or sloped areas where water naturally runs off. Before planting, it is wise to test the drainage by digging a hole and filling it with water; if it takes more than a few hours to drain away, the site’s drainage needs significant improvement.
Consider the plant’s small stature when selecting a site. Growing to only about 15-20 centimetres in height, the amethyst hyacinth can be easily overwhelmed and hidden by larger, more boisterous perennials. It is best planted towards the front of a border, along the edge of a pathway, or in pockets within a rock garden where its delicate beauty can be appreciated up close. Planting in drifts or small groups, rather than as single specimens, will create a much more impactful and natural-looking display when the plants come into bloom in late spring.
Finally, think about the plant’s life cycle in relation to its neighbours. Brimeura amethystina has a relatively short period of interest above ground, with its foliage dying back by early summer. Planting it among later-emerging perennials, such as hostas or ferns, can be a strategic choice. As the amethyst hyacinth’s foliage begins to fade, the emerging leaves of its companions will grow to cover the space, ensuring the area remains visually appealing throughout the summer months. This symbiotic planting strategy maximizes garden space and provides a continuous and evolving display of texture and form.
More articles on this topic
Preparing the soil for planting
Thorough soil preparation is a non-negotiable step for the successful cultivation of Brimeura amethystina. The primary goal of this preparation is to ensure the soil has the sharp drainage that these bulbs demand. Start by clearing the chosen area of all weeds and debris, digging over the soil to a depth of at least 20-25 centimetres. This initial loosening of the soil will break up any compaction and improve aeration, creating a more hospitable environment for root development. It is a foundational task that pays dividends in the health of the plants for years to come.
If you are working with heavy clay soil, significant amendment is required. The most effective way to improve drainage is by incorporating generous amounts of organic and inorganic materials. Add several inches of well-rotted compost or leaf mould to enrich the soil, and an equal amount of horticultural grit, coarse sand, or fine gravel to improve its porosity. Mix these amendments thoroughly into the native soil, ensuring they are evenly distributed. The end result should be a soil that feels friable and crumbles easily in your hand, a clear indicator of a well-draining and healthy medium.
While Brimeura amethystina is not a particularly heavy feeder, ensuring the soil has adequate nutrients from the outset will support strong establishment. The addition of organic matter like compost will provide a slow release of essential nutrients. For an extra boost, you can incorporate a small amount of a balanced, slow-release bulb fertilizer or bone meal into the planting hole at the time of planting. It is important to avoid high-nitrogen fertilizers, as these can promote lush, weak foliage at the expense of flowers and may even make the bulbs more susceptible to disease.
Before placing the bulbs, it is beneficial to rake the prepared soil surface level. This creates a uniform planting depth and ensures that the area looks tidy and professional. If you are planting a large drift, preparing the entire bed at once is more effective than digging individual holes. This approach ensures that the soil conditions are consistent throughout the planting area, promoting even growth and a cohesive display. Once the soil is prepared, it is ready to receive the bulbs, providing them with the best possible start in their new home.
More articles on this topic
The process of planting bulbs
The optimal time to plant Brimeura amethystina bulbs is in the autumn, typically from September to November. Planting during this period allows the bulbs ample time to develop a strong root system before the ground freezes, setting them up for vigorous growth in the spring. The bulbs themselves should be small, firm, and free from any signs of mould or damage. A healthy bulb is the first step towards a healthy plant, so it is worth sourcing them from a reputable supplier to ensure their quality and viability.
A general rule for planting depth is to place the bulbs two to three times their own height deep. For the small bulbs of Brimeura amethystina, this usually translates to a depth of about 5-8 centimetres. This depth protects the bulbs from surface temperature fluctuations and minor disturbances. Spacing is also important for creating a natural look and preventing overcrowding. Plant the bulbs approximately 5-10 centimetres apart. For a more naturalistic effect, you can gently toss the bulbs onto the prepared soil and plant them where they land, creating an organic, scattered drift rather than a rigid, formal pattern.
When placing the bulb in the hole, ensure it is oriented correctly, with the pointed end facing upwards. This is where the shoot will emerge, and while many bulbs will find their way to the surface even if planted upside down, correct orientation saves the plant valuable energy. Once the bulb is in place, backfill the hole with the prepared soil, gently firming it down to eliminate any large air pockets. Be careful not to compact the soil too heavily, as this could impede drainage and root growth.
After planting, it is essential to water the area thoroughly. This initial watering helps to settle the soil around the bulbs, removing air pockets and providing the necessary moisture to initiate root growth. Unless the autumn is exceptionally dry, further watering is usually not required. The natural rainfall should be sufficient to keep the soil adequately moist. Marking the planted area with a label is a good practice, especially in a mixed border, to avoid accidentally digging up the dormant bulbs during other gardening activities.
Propagation methods
The most common and straightforward method for propagating Brimeura amethystina is through the division of its bulbs. Over several years, a single parent bulb will produce numerous small offsets, or daughter bulbs, around its base. This multiplication process eventually leads to the formation of a dense clump. While this creates a fuller display, it can also lead to competition for resources, resulting in diminished flowering. Dividing these clumps every three to four years not only rejuvenates the original planting but also provides a generous supply of new bulbs to plant elsewhere.
The best time to divide the clumps is in late summer or early autumn, when the plant is fully dormant and the foliage has completely died back. Carefully lift the entire clump from the ground using a garden fork, taking care to dig deeply enough to get under the bulbs without damaging them. Once the clump is out of the ground, gently crumble away the soil and separate the individual bulbs by hand. The offsets should detach easily from the parent bulb. Discard any bulbs that appear soft, diseased, or damaged, and select the healthiest ones for replanting.
These newly separated bulbs, both the original parent bulbs and the larger offsets, can be replanted immediately in a new, prepared location. Follow the same planting guidelines regarding depth and spacing as you would for new bulbs. Smaller offsets may not have enough energy stored to flower in their first year after division, but they will produce foliage and, with good care, will mature and bloom in subsequent seasons. This method is the fastest way to increase your stock and guarantees that the new plants will be identical to the parent.
While less common for the home gardener, Brimeura amethystina can also be propagated from seed. Collect the seeds after the flowers have faded and the seed pods have ripened and started to dry. The seeds can be sown in autumn in pots filled with a well-draining, gritty compost. Cover the seeds with a thin layer of grit and place the pot in a cold frame or a sheltered spot outdoors. Germination can be slow and erratic, and it will take several years for the resulting seedlings to grow to a flowering size. This method requires patience but can be a rewarding way to produce a large number of plants.
📷: Krzysztof Ziarnek, Kenraiz, CC BY-SA 4.0, via Wikimedia Commons