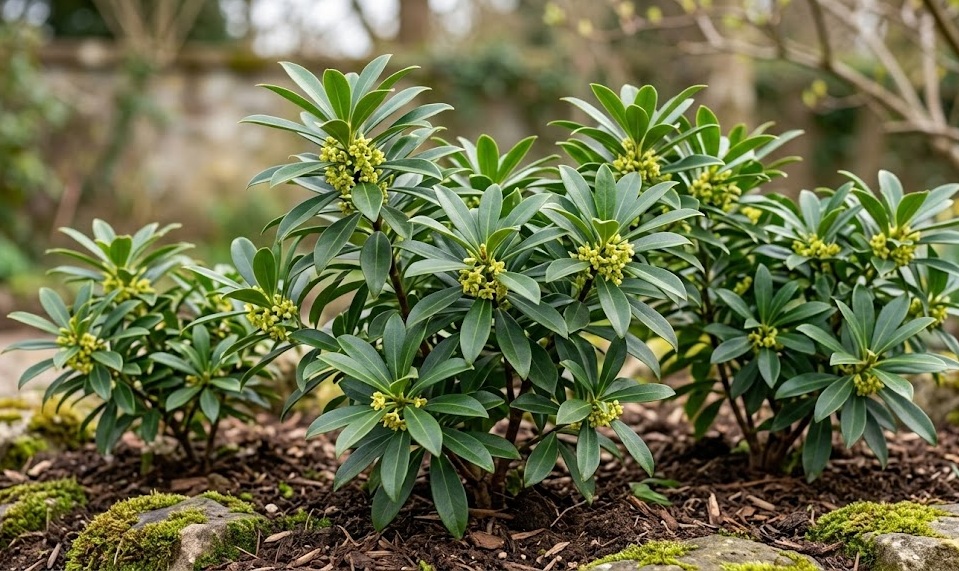
Establishing a new addition to the garden requires a deep understanding of the specific conditions that allow a plant to transition from a nursery pot to the open ground. Planting spurge-laurel is a task that rewards patience and careful preparation of the site to match its native woodland habitat. Because this shrub is sensitive to root disturbance, the initial planting process is perhaps the most critical moment in its entire life cycle. Successful propagation and planting will ensure that this evergreen shrub becomes a long-lasting and healthy feature of your landscape.
The first step in any planting project is the thorough preparation of the site to receive the new specimen. You should clear the area of any competing weeds and loosen the soil to a depth that allows for easy root penetration. Incorporating organic matter during this stage will improve the soil’s structure and provide a rich environment for the young plant to thrive. It is better to spend extra time on preparation than to rush the planting and face problems with establishment later.
Choosing the right time of year to plant is equally important for the survival of the young shrub. Early spring or mid-autumn are the ideal windows because the temperatures are moderate and the soil is usually naturally moist. These conditions allow the roots to begin growing into the surrounding earth without the stress of extreme heat or frozen ground. Avoid planting during the peak of summer, as the high evaporation rates can quickly dehydrate a plant that has not yet developed a functional root system.
Once the shrub is in the ground, consistent aftercare is necessary to help it settle into its new home. You should provide regular watering during the first growing season to ensure the soil remains evenly moist but not saturated. Applying a layer of mulch around the base will help retain this moisture and keep the roots cool as the temperatures rise. Monitoring the plant for any signs of transplant shock, such as drooping leaves, will allow you to intervene quickly if the shrub needs extra support.
Site selection and soil preparation
Finding the perfect location for your shrub involves assessing both the light levels and the soil characteristics of the area. This species naturally grows in the understory of deciduous forests, so it prefers a spot that offers partial to full shade throughout the day. Direct afternoon sun can be too intense, leading to leaf damage and increased water stress for the plant. Look for a location under the canopy of larger trees or on the north side of a building where the light is soft and diffused.
More articles on this topic
The soil at the chosen site should be alkaline or neutral, as this shrub does not tolerate highly acidic conditions very well. If your soil is naturally sandy or poor, you will need to amend it with significant amounts of compost or aged manure to improve its water-holding capacity. Heavy clay soils also need modification to ensure that drainage is adequate, as waterlogged roots will quickly rot. A well-prepared site acts as a buffer against environmental extremes and provides the stability the plant needs to grow slowly and steadily.
Before you dig the planting hole, consider the ultimate size of the shrub and its relationship to neighboring plants. You should provide at least one to two meters of space around the plant to allow for proper air circulation and future growth. Crowding the shrub can lead to increased humidity levels, which might encourage fungal diseases to develop in the dense foliage. Planning the layout of your garden with the mature dimensions of each plant in mind is a hallmark of professional landscape design.
The physical preparation of the planting hole should be done with care to avoid compacting the sides of the pit. Dig a hole that is twice as wide as the root ball but no deeper than the container the plant is currently growing in. Roughening the edges of the hole with a garden fork will make it easier for the new roots to penetrate the surrounding soil. This simple step prevents the roots from becoming “pot-bound” within the planting hole and encourages them to spread out horizontally for better stability.
The planting process step by step
When you are ready to move the plant into the ground, handle the root ball with extreme care to avoid breaking the delicate fine roots. Carefully remove the shrub from its container and check for any roots that are circling the bottom of the pot. If you find circling roots, gently tease them outward so they can grow away from the center of the plant. Place the shrub in the center of the hole, making sure that the top of the root ball is level with the surrounding soil surface.
More articles on this topic
Filling the hole with soil should be done in stages to eliminate air pockets that could dry out the roots. Backfill with the original soil mixed with a small amount of organic compost, tamping it down lightly with your hands as you go. Avoid using your feet to pack the soil, as this can cause excessive compaction and limit the amount of oxygen available to the root system. Once the hole is full, create a small depression or “saucer” around the base to help direct water toward the roots during future irrigations.
The immediate watering after planting is perhaps the most important drink the shrub will ever receive. Use a slow, gentle stream of water to settle the soil around the roots and ensure that any remaining air gaps are filled. This initial soaking also helps the plant recover from the stress of being handled and moved from its nursery environment. If the soil settles significantly after watering, you may need to add a small amount of additional soil to maintain the correct level.
Finishing the task with a high-quality mulch will provide the final layer of protection for the new planting. Spread a five-centimeter layer of wood chips or leaf mold around the base, keeping the material a few centimeters away from the actual stem of the shrub. This gap prevents the bark from staying too wet, which could lead to collar rot or other fungal infections. The mulch will slowly break down over time, continuously improving the soil quality while suppressing the growth of competing weeds.
Propagation from seeds
Growing spurge-laurel from seeds is a rewarding process for patient gardeners who enjoy watching the full development of a plant. The seeds are typically found within the black berries that appear on the shrub after the flowering season has ended. You must collect the berries when they are fully ripe but before they fall to the ground or are eaten by birds. Wear gloves during this process to protect your skin from the irritating juices found within the fleshy part of the fruit.
Before the seeds can be sown, the fleshy outer layer of the berry must be completely removed to prevent decay and improve germination rates. You can do this by gently rubbing the berries in a sieve under running water until the clean seeds are revealed. These seeds often require a period of cold stratification to break their natural dormancy and trigger growth. Placing the cleaned seeds in a bag of damp sand in the refrigerator for several months mimics the natural winter conditions they would experience outdoors.
Once the stratification period is complete, the seeds can be sown in pots filled with a well-draining seed-starting mix. Place the pots in a cold frame or a sheltered spot outdoors where they can experience the natural fluctuations of spring temperatures. Germination can be slow and irregular, sometimes taking several months or even a full year for the first sprouts to appear. It is essential to keep the soil consistently moist but never soggy during this long waiting period.
The young seedlings are quite delicate and should be protected from harsh sunlight and drying winds during their first year of growth. Once they have developed a few sets of true leaves, they can be transplanted into individual pots to allow their root systems more space to expand. You should wait until the plants are at least two or three years old before moving them to their permanent positions in the garden. This extra time in a controlled environment ensures they are strong enough to survive the challenges of the open landscape.
Success with semi-ripe cuttings
Propagation by cuttings is a faster way to create new plants that are genetically identical to the parent shrub. The best time to take cuttings is in late summer or early autumn when the new growth has started to harden but is still flexible. Look for healthy, non-flowering shoots that are free from any signs of pests or disease. Using a sharp, clean knife, take a cutting about ten to fifteen centimeters long, making the cut just below a leaf node.
Preparation of the cutting involves removing the lower leaves to reduce moisture loss and expose the stem for root development. You can dip the base of the cutting into a rooting hormone powder to encourage faster and more reliable root formation. Insert the cutting into a pot filled with a mixture of peat and perlite or coarse sand to ensure excellent drainage and aeration. Firm the media around the stem and water lightly to settle everything in place.
Creating a humid environment is crucial for the survival of the cuttings until they develop their own roots. You can place the pots in a propagation chamber or simply cover them with a clear plastic bag held up by small sticks. Place the cuttings in a bright spot that is out of direct sunlight, which could cause the temperature inside the plastic to rise too high. Check the moisture levels regularly and mist the foliage occasionally to keep the humidity high and the leaves hydrated.
Rooting can take several months, and you can check for progress by gently tugging on the cuttings to see if there is any resistance. Once the roots are well-established, gradually acclimate the young plants to the open air by removing the plastic covering for longer periods each day. These new shrubs should be grown in pots for at least one full season before they are ready to be planted out in the garden. This method allows you to expand your collection of evergreens with minimal cost and high success rates.