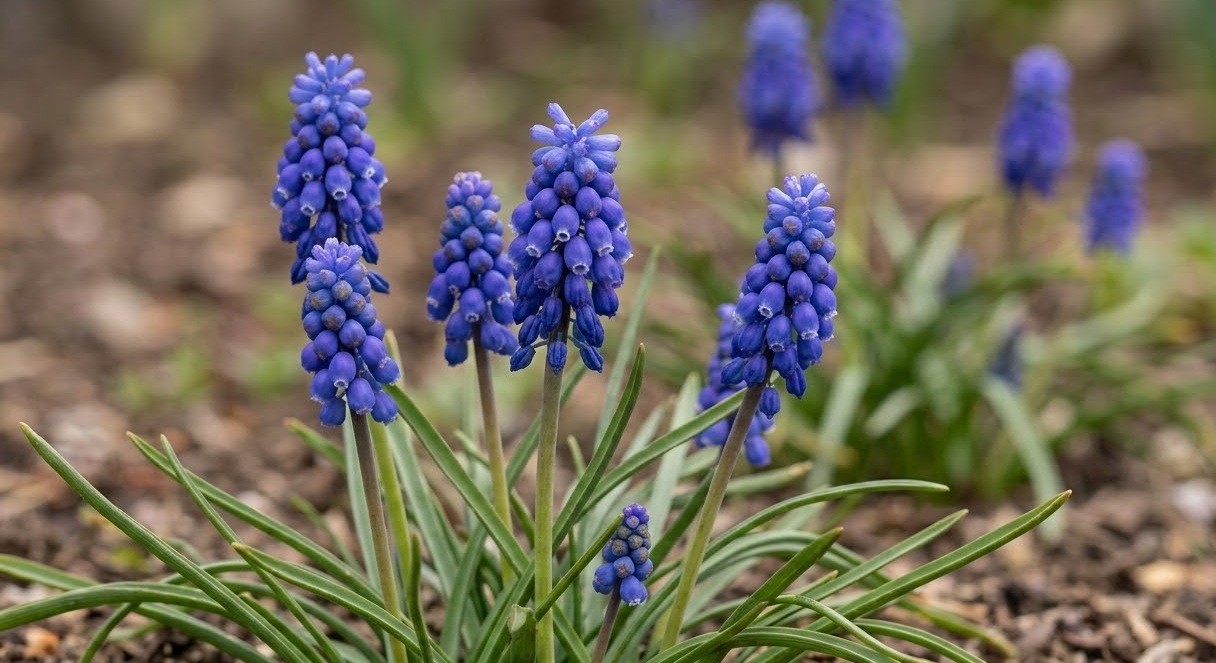
Planting grape hyacinth is an investment in the future beauty of your garden that requires careful planning and precise execution. These bulbs are remarkably resilient, but providing them with the best start possible ensures a more vibrant and healthy display in the spring. You should consider the overall layout of your landscape before you begin, as these plants look best when allowed to naturalize in groups. By following a professional approach to planting, you can create a lasting horticultural feature that requires minimal effort once established.
The timing of planting is crucial for the internal development of the bulb before the first hard freeze of winter. Ideally, you should aim to get them into the ground in the mid to late autumn, when the soil temperature has started to drop. This period of cool soil allows the bulbs to initiate root growth without being triggered to send up leaves prematurely. A well-established root system is the foundation for the rapid expansion and flowering that will occur a few months later.
Site selection involves balancing the aesthetic goals of your garden with the biological needs of the plant species. These bulbs prefer a location that receives full sun during the early spring, but they can also tolerate partial shade. Since they often bloom before many deciduous trees have fully leafed out, they can be successfully planted under the canopy of large shrubs. Choosing a spot with excellent drainage is non-negotiable, as stagnant water will quickly lead to bulb decay.
Preparation of the planting site should be thorough to ensure the soil is loose and rich in necessary minerals. You should remove any perennial weeds and break up large clumps of earth to a depth of at least fifteen centimeters. Incorporating a small amount of organic compost can help improve the texture and nutrient profile of the soil bed. Taking the time to prepare the ground properly will pay dividends in the vigor and longevity of the resulting flower display.
Soil preparation and planting depth
The physical characteristics of the soil significantly influence the success of the planting process and the subsequent growth of the bulbs. You should aim for a loamy texture that allows water to pass through freely while retaining a slight amount of moisture for the roots. If you are dealing with heavy clay, you must incorporate soil conditioners to prevent the bulbs from becoming trapped in a waterlogged environment. Proper aeration is essential for the metabolic processes that occur within the bulb during its active phases.
More articles on this topic
Professional planting techniques involve placing the bulbs at a specific depth to protect them from temperature fluctuations and physical damage. As a general rule, you should plant the bulbs about two to three times as deep as their own height. This usually equates to a depth of approximately eight to ten centimeters from the base of the bulb to the soil surface. Planting too shallow can expose the bulbs to frost heave, while planting too deep may prevent the shoots from reaching the surface.
Spacing between the bulbs determines the immediate visual impact and the long-term density of the colony. For a lush and established look right away, you can space them about five to eight centimeters apart in all directions. If you prefer a more naturalized appearance over time, you can leave more room for the bulbs to produce offsets and fill in the gaps. Whichever spacing you choose, ensure that the bulbs are not physically touching each other to prevent the spread of localized rot.
The orientation of the bulb in the planting hole is a small but important detail that professional gardeners always get right. The pointed end of the bulb should always face upwards, as this is where the new leaves and flower spikes will emerge. The flatter base, which often has dried root remnants, should be placed firmly against the bottom of the hole. If you accidentally plant them sideways, they will usually find their way up, but it will cost the plant valuable energy.
Advanced propagation techniques
Propagating these plants is an excellent way to expand your collection and share specimens with fellow gardening enthusiasts. The most common and easiest method is through the natural process of bulb division, which occurs as the plant matures. Over several seasons, a single bulb will produce several smaller “daughter” bulbs around its base, forming a dense cluster. Separating these offsets allows you to spread the population across different areas of your garden with very little cost.
More articles on this topic
The best time to divide the bulbs is during their dormant period, typically in the late summer or very early autumn. You should carefully lift the entire clump using a garden fork, being careful not to slice through the delicate bulbs. Once lifted, the individual bulbs should pull apart easily with minimal force or use of a sharp tool. Replanting the larger bulbs immediately ensures they have enough time to re-establish their root systems before the winter sets in.
Seed propagation is another method, though it requires significantly more patience and a different set of horticultural skills. After the flowers have finished blooming, the plant will produce small green seed pods that eventually turn brown and split open. You can collect these seeds and sow them in a cold frame or a dedicated nursery bed with very fine soil. Keep in mind that plants grown from seed may take three to four years to reach a size capable of producing flowers.
If you choose to use seeds, you should mimic natural conditions by providing a period of cold stratification to break their dormancy. Sowing the seeds in the autumn and allowing them to experience the winter temperatures outdoors is usually the most effective approach. The seedlings will look like thin blades of grass during their first year and should be left undisturbed to build up their bulb reserves. This method is ideal for those who wish to produce large quantities of plants for a meadow or woodland garden.
Naturalization and colony expansion
Naturalization is the process where a plant establishes itself so well that it begins to spread and maintain its population without human intervention. These bulbs are particularly well-suited for this, as they are hardy and produce both seeds and offsets quite prolifically. To encourage this, you should select an area of the garden that will remain relatively undisturbed for several years. Woodland edges, rock gardens, and low-maintenance borders are ideal locations for a naturalized grape hyacinth colony.
The key to successful naturalization is to avoid the urge to tidy up the garden too early in the spring. You must allow the seeds to mature on the stalks and fall naturally to the ground if you want the colony to expand through seeding. Additionally, the foliage must be allowed to yellow and decompose in place to return nutrients to the soil. A slightly more relaxed approach to garden maintenance in these specific areas will yield the best long-term results for plant spread.
Competition from other plants can be a limiting factor in how quickly your colony expands over time. While these bulbs can grow through thin grass, they may struggle if forced to compete with aggressive, mat-forming groundcovers. You can help them by occasionally thinning out surrounding vegetation to ensure the young seedlings have access to light and space. Creating a “niche” for the bulbs helps them establish a foothold from which they can then spread more easily.
Monitoring the health of a naturalized colony involves observing the density of the flowers and the vigor of the leaves. If a particular area becomes too crowded, the bulbs may start to compete with each other for nutrients, leading to smaller blooms. In such cases, you can selectively thin the colony and move some bulbs to a new location to start the process over again. This active management ensures that the naturalized display remains healthy and visually impressive for decades.
Planting in containers and pots
Growing these bulbs in containers is an excellent option for those with limited garden space or for creating mobile floral displays. You should choose a pot with multiple drainage holes to ensure that excess water can escape quickly after rain or irrigation. A high-quality potting mix that includes perlite or grit will provide the necessary aeration and drainage for container-grown bulbs. Planting them in pots allows you to bring the scent and color of spring onto patios, balconies, or even indoor windowsills.
In a container, you can plant the bulbs much closer together than you would in the open ground for a more concentrated burst of color. Some gardeners use the “pot-in-pot” method, where the bulbs are grown in plastic nursery pots that are then tucked into more decorative ceramic containers. This allows you to easily swap out the display once the flowers have faded without disturbing the bulbs. Ensure that the bulbs are planted at the same depth as they would be in the garden to provide adequate insulation.
Watering requirements for container-grown bulbs are different from those planted in the ground, as pots dry out much faster. You should check the soil moisture regularly, especially during dry spells in the early spring when the leaves are actively growing. However, you must be careful not to overwater, as the restricted environment of a pot can easily become swampy. A professional tip is to water only when the top centimeter of soil feels dry to the touch.
After the container display has finished, you have the option of either keeping the bulbs in the pot or transplanting them into the garden. If you keep them in the pot, you should continue to provide light and occasional water until the foliage dies back completely. Once dormant, the pot can be moved to a cool, dry place until the following autumn when the cycle begins again. Many gardeners prefer to plant them out in the garden after one year to ensure they continue to receive the full range of natural nutrients.