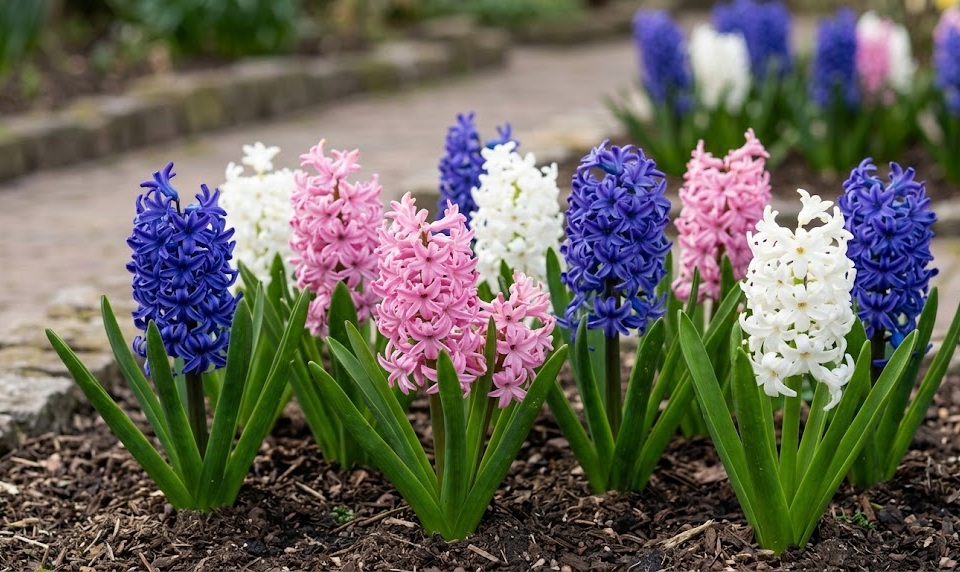
The ability of the hyacinth to withstand the rigors of winter is a fundamental aspect of its biology as a temperate-zone bulb. While these plants are naturally cold-hardy, professional overwintering techniques can significantly enhance their survival rates and the quality of the subsequent spring bloom. The winter dormant period is not a time of complete inactivity, but rather a phase of essential physiological preparation and biochemical transformation. By providing the correct level of protection and managing soil conditions during the frost, you ensure that your bulbs remain healthy and ready for their spring debut. Successful overwintering is a combination of site preparation, environmental monitoring, and specialized storage techniques.
In the late autumn, the first step in a professional overwintering routine is to ensure the bulbs are settled in a well-draining environment. Cold, wet soil is the greatest enemy of the hyacinth during the winter, as it can lead to devastating fungal infections and bulb rot. If your garden is prone to standing water, you may need to take proactive steps like creating small drainage channels or adding a layer of grit to the soil surface. This structural preparation is far more effective than any surface treatment for ensuring the long-term health of the collection.
A protective layer of mulch can provide a vital thermal buffer against the extreme temperature fluctuations of the winter months. You should apply a three to five-centimeter layer of organic material, such as straw, evergreen boughs, or shredded bark, after the ground has initially frozen. This timing is important because it prevents the mulch from providing a warm nesting site for rodents before the deep cold sets in. The mulch acts as an insulator, keeping the soil temperature more stable and preventing the “heaving” that can push bulbs out of the ground.
During winters with very little snow cover, the risk of desiccation or “freeze-drying” becomes a significant concern for the dormant bulbs. Snow is an excellent natural insulator, but in its absence, the dry winter winds can pull moisture from the upper layers of the soil. You should check the moisture level of your garden beds during any extended thaws and provide a light watering if the earth feels exceptionally dry. This small intervention can prevent the embryonic flower tissues from being damaged by dehydration during their winter sleep.
Monitoring the garden for signs of animal activity is also an essential part of the overwintering process. As mentioned previously, rodents are particularly active in the winter and may tunnel into your bulb beds to find a reliable food source. You can check for small entry holes or disturbed mulch and take corrective action, such as re-securing wire mesh covers or applying non-toxic repellents. A vigilant gardener remains active even when the plants themselves appear to be resting beneath the snow.
More articles on this topic
Strategies for indoor overwintering and forcing
For those living in extremely cold climates or for those who wish to enjoy flowers early, indoor overwintering is a professional alternative. This process, often called “forcing,” involves mimicking the winter cold period in a controlled environment like a cellar or a refrigerator. The bulbs are planted in pots with a well-draining medium and kept at a constant temperature of about five to nine degrees Celsius for at least ten to twelve weeks. This cold treatment is essential for developing a strong root system and triggering the subsequent growth of the flower spike.
While the bulbs are in their cold storage, they must be kept dark and slightly moist to prevent them from drying out completely. You should check the pots every few weeks and add a small amount of water if the soil feels dusty or dry to the touch. Avoid over-watering during this phase, as the low temperatures and lack of foliage mean the plant’s water usage is extremely minimal. Professional growers often use a specialized thermometer to monitor the storage area and ensure the temperature stays within the optimal range.
Once the cold period is complete and you see about five centimeters of green growth, the pots can be moved into a warmer, bright location. This transition should be gradual, as sudden exposure to heat and direct sunlight can shock the tender new growth. Start by placing them in a cool room with filtered light for a few days before moving them to their final display position. The rapid development that follows is one of the most exciting sights for a winter-weary gardener, bringing a touch of spring indoors.
After the forced bulbs have finished blooming indoors, they can be kept in their pots and allowed to die back naturally as they would in the garden. While forced bulbs are often weakened by the process, they can sometimes be successfully transitioned back to the garden in the autumn. However, professional results are more reliably achieved by starting with fresh bulbs for each year’s indoor display. This commitment to quality ensures that your indoor arrangements are always as impressive as those in your outdoor garden beds.
More articles on this topic
Managing the transition to spring
As the temperatures begin to rise in the late winter, the process of “de-mulching” must be handled with professional care. You should gradually remove the protective layers of straw or bark as the risk of deep frost passes, allowing the soil to warm up slowly. Removing all the mulch too early can expose the tender emerging shoots to a sudden late freeze, which can damage the flower buds. Conversely, leaving it on too long can cause the shoots to become elongated and weak as they struggle to reach the light.
This transitional period is also the ideal time to apply a light top-dressing of a balanced, slow-release fertilizer. As the spring rains begin to fall, they will carry the nutrients down into the root zone just as the bulbs are waking up. This proactive feeding provides the immediate energy needed for the rapid expansion of the flower spike and the surrounding leaves. Professional timing ensures that the nutrients are available exactly when the plant’s metabolic demands are at their highest level.
If you have bulbs in pots outdoors, you must be particularly careful about drainage during the spring thaw. Pots can often trap water if their drainage holes are blocked by ice or debris, leading to a saturated environment that quickly rots the bulbs. Elevating the pots on “pot feet” or bricks can help ensure that excess water can escape freely even during periods of heavy rain or melting snow. This simple structural adjustment can save a valuable collection of container-grown hyacinths from a disappointing end.
Keeping a garden journal of the spring emergence dates for different varieties is a professional habit that helps with future planning. You will notice that some cultivars are naturally “early” while others are “late,” allowing you to stagger your planting for a longer-lasting display. This data is invaluable for designing garden layouts that remain vibrant for many weeks rather than just a few days. Professional horticulture is built on this foundation of careful observation and long-term record-keeping.
Lifting and storing bulbs for the summer
In some professional contexts, hyacinth bulbs are lifted every year after the foliage has died back to ensure they remain in peak condition. This is particularly common in areas with very wet summers or where the garden beds are replanted with summer annuals. The bulbs are carefully dug up, the soil is brushed off, and they are allowed to dry in a shaded, well-ventilated area for several days. Once the outer scales are dry and “papery,” the bulbs can be stored in mesh bags or trays until the autumn.
The storage environment during the summer must be cool, dry, and dark to prevent the bulbs from sprouting or rotting. A temperature of around twenty degrees Celsius is ideal for maintaining the health of the dormant tissue without triggering premature growth. You should periodically inspect the stored bulbs and remove any that show signs of soft spots, mold, or unusual discoloration. This rigorous selection process ensures that only the best quality material is returned to the garden in the following season.
Storing bulbs in this manner also gives you the opportunity to treat them with a preventative fungicide if you have had issues in the past. While not always necessary, this extra step can provide a layer of protection against the common rots that affect hyacinths in certain climates. Always use professional-grade products and follow all safety guidelines when handling horticultural chemicals. A clean storage environment is just as important as a clean garden bed for the long-term health of your collection.
Finally, remember that the goal of overwintering and storage is to preserve the life and energy within the bulb. Every decision you make, from the depth of the mulch to the temperature of the storage area, should support this central objective. By treating your hyacinths with professional care during their dormant phases, you are investing in the beauty and success of your future garden. A well-rested and well-protected bulb is the only true foundation for a spectacular spring display.