Preparing Cambridge cranesbill for the winter months is a straightforward task that ensures the plant returns with vigor when the spring warmth arrives. While this hybrid is remarkably hardy and can withstand significant freezing temperatures, a few proactive steps can provide extra security. The goal of overwintering is to protect the crown and root system from extreme fluctuations in temperature and moisture levels. A well-prepared garden bed in the autumn leads to a much easier and more successful transition in the following year.
As the days grow shorter and the temperatures begin to drop, the plant will naturally start to slow its growth and enter a state of dormancy. You will notice the foliage changing color, often turning vibrant shades of red, orange, or bronze before eventually withering. This is a natural part of the plant’s lifecycle and is not a cause for concern for the attentive gardener. Leaving some of this spent foliage in place can actually provide a natural layer of insulation for the more sensitive parts of the plant.
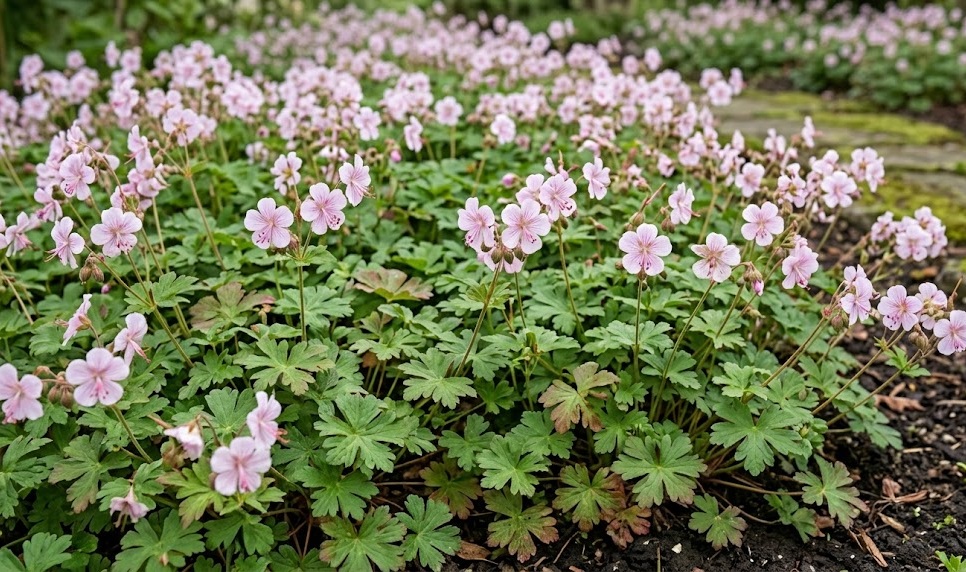
In regions with very mild winters, the Cambridge cranesbill may remain semi-evergreen, retaining some of its green leaves throughout the entire cold season. This provides a welcome bit of structure and color in an otherwise dormant landscape, but it still requires some basic attention. Ensuring the soil doesn’t become excessively waterlogged during the rainy winter months is perhaps the most important factor for survival. Good drainage is the plant’s best friend during the time when it is not actively taking up much water.
Before the first hard freeze, it is a good idea to clear away any large pieces of fallen debris from trees that might trap too much moisture against the plant’s crown. While a little bit of leaf cover is beneficial, a thick, soggy mat of maple or oak leaves can lead to fungal issues or rot. Finding the right balance between protection and airflow is the key to a successful overwintering strategy. Once these simple preparations are complete, you can rest easy knowing your geraniums are ready for the cold.
Mulching and providing insulation in colder climates
In areas where winters are particularly harsh or where the soil is prone to deep freezing, applying a layer of mulch is a highly recommended practice. A two to three-inch layer of organic material, such as wood chips, straw, or pine needles, acts as a thermal blanket for the roots. This insulation helps to stabilize the soil temperature, preventing the harmful “heaving” that can occur when the ground repeatedly freezes and thaws. Heaving can push plants out of the ground, exposing their delicate roots to the drying winter winds.
More articles on this topic
When applying mulch, be careful to keep it away from the direct center of the plant where the stems emerge from the ground. Piling mulch too high against the crown can trap moisture and encourage rot, which is one of the few things that can kill an otherwise healthy cranesbill. Think of the mulch as a protective ring that surrounds the plant rather than a heavy blanket that smothers it completely. This localized approach provides the necessary protection while still allowing the plant to breathe during the dormant months.
If you are growing your geraniums in containers, they will require a bit more attention because the roots are much more exposed to the cold than those in the ground. You might consider moving the pots to a more sheltered location, such as against a south-facing wall or into an unheated garage or shed. Alternatively, wrapping the containers in burlap or bubble wrap can provide the extra insulation needed to keep the root balls from freezing solid. Potted plants should still be checked occasionally to ensure they haven’t dried out completely, though they will need very little water.
For those in extremely cold zones, a temporary cover of evergreen boughs can provide an additional layer of protection against the most biting winds. These branches trap a layer of snow, which is one of nature’s best insulators, while still allowing for excellent air circulation once the snow melts. This traditional method is both effective and aesthetically pleasing, fitting perfectly into a winter garden aesthetic. By taking these extra steps, you are giving your plants the best possible chance to emerge in the spring without any setback.
Dormancy signs and environmental stressors
Understanding the signs of dormancy will help you avoid unnecessary worry or interventions that could actually harm the plant. During the peak of winter, the Cambridge cranesbill may look almost completely dead, with only a few brown, shriveled stems visible above the soil. This is a perfectly normal and healthy state for a deciduous or semi-evergreen perennial to be in during the cold season. The plant is focusing all its energy on protecting its underground structures and preparing for the next growing cycle.
More articles on this topic
One of the biggest stressors during the winter is actually the sun rather than the cold, especially in regions with many bright, clear days. Intense winter sunlight can cause the foliage to lose moisture while the ground is still frozen, leading to a condition known as winter desiccation. This is another reason why a light cover or some afternoon shade can be beneficial even during the dormant period. The plant cannot replace the lost moisture through its frozen roots, so reducing the rate of evaporation is a key part of winter care.
Another environmental factor to consider is the use of de-icing salts on nearby pathways or driveways. While the Cambridge cranesbill is generally tough, a high concentration of salt runoff can damage the soil structure and harm the plant’s roots. If you must use these products, try to choose “plant-safe” alternatives or ensure that the runoff is directed away from your garden beds. If you suspect salt contamination, a deep watering in the early spring can help to flush the excess minerals out of the root zone.
Keeping a garden journal can be a helpful way to track how your plants respond to different winter conditions over the years. You may notice that certain cultivars are more resilient to the cold or that specific areas of your garden provide a better microclimate for overwintering. This knowledge allows you to refine your care routines and make more informed decisions when adding new plants to your collection. Observation is a fundamental part of being a successful and professional gardener in any climate.
Transitioning back into spring growth and recovery
As the days begin to lengthen and the soil temperature rises, your Cambridge cranesbill will start to show the first signs of life. You may see tiny, bright green buds appearing at the base of the plant or along the low-growing stems. This is an exciting time in the garden, but it is also a period where a little bit of patience is required. Avoid the urge to remove all the protective mulch or debris too early, as late-season frosts can still damage the tender new growth.
Once the danger of serious frost has passed, you can begin the process of spring cleaning to prepare the plants for the upcoming season. Gently pull back the mulch and remove any dead or withered leaves from the previous year to allow light and air to reach the center of the plant. This cleanup not only improves the appearance of the garden but also removes potential hiding spots for early-season pests like slugs. A light application of compost at this stage will provide a gentle nutrient boost to support the rapid spring growth.
If you notice that a plant has been pushed up by the frost (heaving), carefully firm it back into the soil with your hands. You may need to add a little fresh soil around the exposed roots to ensure they are properly covered and protected. Watering the plant after doing this will help settle the soil and ensure good root-to-earth contact. This quick intervention can save a plant that might otherwise struggle to establish itself as the weather becomes warmer and drier.
Finally, keep an eye on the weather forecast and be prepared to provide some temporary protection if a sudden cold snap is predicted. A simple overturned bucket or a piece of frost cloth can protect the delicate new shoots from being scorched by the cold. Once the plant has fully leafed out and the main flowering stems begin to emerge, your overwintering tasks are officially complete. The cycle begins again, and you can look forward to another season of beautiful flowers and lush foliage.