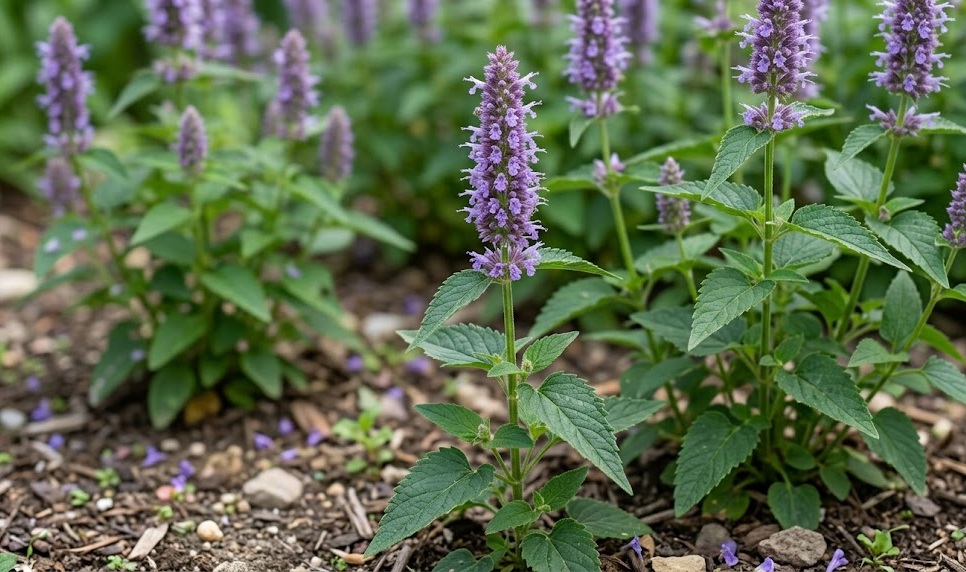
Preparing anise hyssop for the challenges of the winter months is a critical task for any gardener wishing to maintain a vibrant perennial border. While this species is hardy in many temperate climates, its survival often depends on the specific conditions of the soil and the timing of autumn maintenance. Professional overwintering strategies focus on protecting the crown and root system from the damaging effects of cold and excessive moisture. By taking the right steps in late autumn, you ensure that your plants emerge from dormancy with vigor and readiness for the new growing season.
Assessing hardiness and microclimate factors
Anise hyssop is generally classified as hardy in USDA zones 4 through 8, making it a resilient choice for a wide range of climates. However, the official hardiness rating is only a general guide and doesn’t account for the unique conditions of your specific garden. Factors like wind exposure, soil drainage, and the duration of snow cover all play a role in how well a plant survives the winter. Understanding these microclimate variables allows you to provide the targeted protection that your plants might need.
Plants located in open, windswept areas are at higher risk of desiccation during periods of extreme cold when the ground is frozen. Without the ability to draw moisture from the soil, the stems can dry out and die back more severely than they would in a sheltered spot. Creating temporary windbreaks or placing plants near structures can offer a significant advantage during the harshest months. Observing where snow naturally drifts or where frost lingers longest can give you clues about the safest places for your perennials.
Soil moisture during the winter is often a bigger threat to anise hyssop than the actual temperature of the air. Like many members of the mint family, its roots are susceptible to rot if they sit in cold, saturated ground for extended periods. This is why excellent drainage is frequently mentioned as the most important factor for successful overwintering. If your soil tends to stay wet in the winter, you may need to take extra precautions to protect the sensitive root zones.
The age and health of the plant at the end of the growing season also influence its ability to survive the dormant period. Young seedlings or recently divided plants may not have established enough of a root system to withstand significant environmental stress. Similarly, plants that have been weakened by pests or diseases during the summer will be more vulnerable to winter kill. Providing optimal care throughout the year is the first and most important step in a successful overwintering program.
More articles on this topic
Autumn cleanup and pruning strategies
Deciding when and how much to prune your anise hyssop in the autumn is a choice that involves both aesthetic and ecological considerations. Some gardeners prefer a tidy look and choose to cut the stems back to within a few inches of the ground after the first hard frost. This can help prevent snow and ice from breaking the stems and makes spring cleanup much easier. It also removes potential overwintering sites for pests and diseases that may have affected the plant during the summer.
Alternatively, leaving the stems and seed heads intact through the winter provides valuable architectural interest and benefits for local wildlife. The sturdy stalks look beautiful when covered in frost and provide a source of food for birds during the coldest months. Many beneficial insects also use the hollow stems of perennials as a safe place to hibernate until spring arrives. If you choose this path, you can simply wait until early spring to perform your final cleanup before new growth begins.
If you do decide to prune in the autumn, be careful not to cut too deeply into the crown of the plant. Leaving about 10 to 15 centimeters of stem can help trap snow, which acts as a natural insulator for the roots. This stubble also serves as a visible marker so you don’t accidentally step on or dig up the plant during the dormant season. A clean cut with sharp shears prevents the tissue from tearing and reduces the risk of decay during the wet winter months.
Regardless of your pruning choice, removing any diseased foliage from the base of the plant is always a good idea. This sanitation step prevents fungal spores from surviving on the surface of the soil and infecting the new growth in the spring. Disposing of this material in the trash rather than the compost pile is the safest way to break the cycle of infection. A clean start in the autumn leads to a much healthier and more manageable garden when the weather warms up again.
More articles on this topic
Mulching for insulation and protection
Applying a layer of mulch in late autumn is one of the most effective ways to protect the root system from temperature fluctuations. The goal is not necessarily to keep the ground warm, but to keep it at a consistent temperature once it has frozen. This prevents the “heaving” effect where the soil expands and contracts during freeze-thaw cycles, potentially pushing the plant out of the ground. A thickness of about 5 to 7 centimeters of organic mulch is usually sufficient for most garden environments.
Common mulching materials like shredded bark, wood chips, or pine needles all work well for this purpose. Avoid using heavy, wet materials like whole leaves that can mat down and suffocate the crown of the plant. If you use fallen leaves from your garden, it is best to shred them first with a lawnmower to create a lighter and more porous layer. This ensures that air can still reach the soil surface while providing the necessary insulation for the roots below.
Be careful to keep the mulch a few centimeters away from the direct base of the stems to avoid trapping excess moisture. Direct contact between damp mulch and the plant’s crown can lead to rot during the winter, even in well-draining soil. This “donut” style of mulching provides protection for the expansive root system without putting the main part of the plant at risk. Timing your mulch application is also important; wait until the ground has started to freeze to avoid trapping warm, moist air.
In regions with extremely cold winters and little snow cover, you might consider using evergreen boughs or a light covering of straw for extra protection. These materials provide a loftier layer of insulation that can be easily removed in the spring as soon as the weather begins to break. Monitoring your mulch throughout the winter and replenishing it if it blows away is a small task that can yield big results. Protective mulching is a simple yet powerful tool in the professional gardener’s winter kit.
Monitoring and spring transition
The work of overwintering doesn’t end once the snow falls; it involves occasional checks to ensure your protection strategies are still in place. After a heavy storm, check to see if any plants have been uncovered or if heavy ice is weighing down any remaining stems. If you notice a plant has been “heaved” out of the soil, gently press it back down or add more mulch to cover the exposed roots. These quick interventions can prevent a minor issue from becoming a fatal one for your perennials.
As the days begin to lengthen and the temperatures rise in late February or March, it is time to start thinking about the transition to spring. You should gradually remove any extra winter protection like evergreen boughs or heavy straw as the danger of extreme cold passes. This allows the soil to begin warming up and signals to the plant that it is time to break dormancy. Be careful not to remove the base layer of mulch too early, as late-season frosts can still be quite damaging.
The first signs of new growth for anise hyssop usually appear as small, purple-tinged clusters of leaves at the base of the plant. This is an exciting moment in the garden calendar and indicates that your overwintering efforts have been successful. Once you see these shoots, you can perform any final pruning of old stems and tidy up the area around the plant. A light application of compost at this stage will provide the nutrients needed for the rapid growth of the coming weeks.
Remember that some plants may be slower to emerge than others depending on their location and individual health. Don’t be too quick to give up on a specimen that hasn’t shown signs of life by the time its neighbors have started to grow. Sometimes all it needs is a little more warmth and a few more weeks of patience from the gardener. Successful overwintering is a testament to the resilience of nature and the careful stewardship of the human hand in the garden.