Overwintering grape hyacinth is a straightforward process because these bulbs are incredibly cold-hardy and well-adapted to temperate climates. However, taking a professional approach to winter care ensures that the bulbs remain protected and ready to burst into growth at the first sign of spring. You should consider the specific needs of the bulbs during their dormant period to prevent common issues like frost heave or excessive winter moisture. A little preparation in the late autumn can make a significant difference in the quality of the following year’s display.
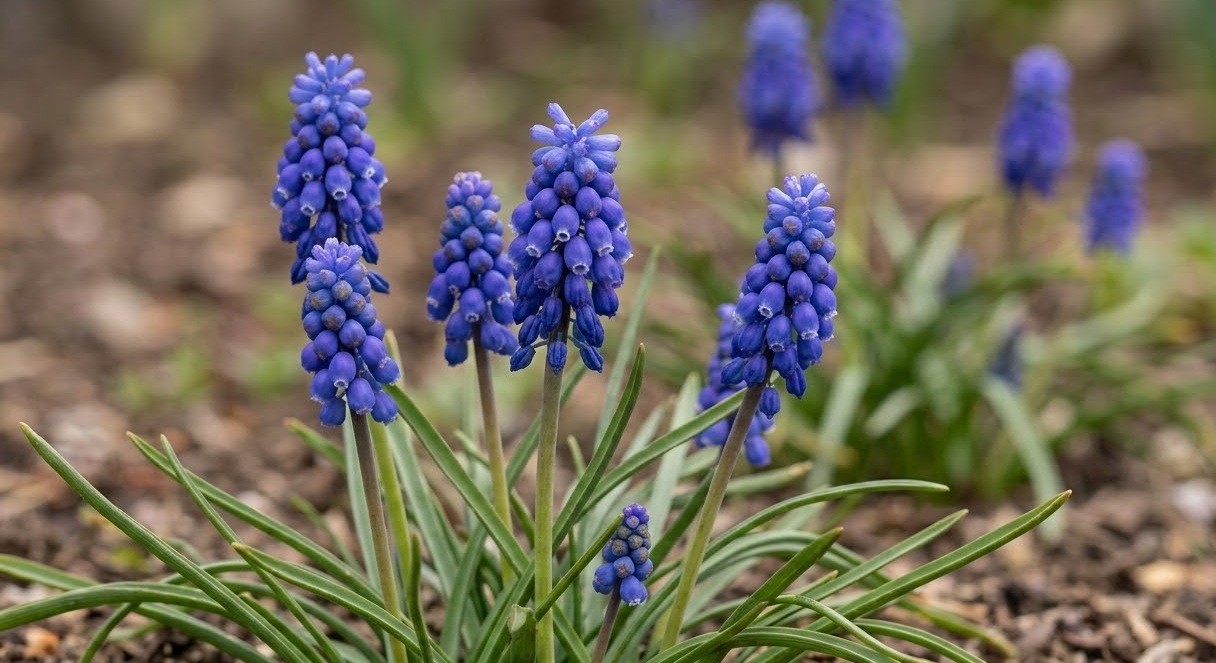
The natural lifecycle of the bulb includes a mandatory period of cold temperatures, known as vernalization, which triggers the flowering process. Without this exposure to winter chill, the bulbs may produce foliage but fail to develop the iconic blue flower spikes that make them so popular. This means that in most regions, the best way to overwinter them is simply to leave them in the ground where they were planted. The soil provides a natural insulation that protects the bulbs from the most extreme temperature fluctuations.
One of the few risks during the winter is the combination of cold temperatures and saturated soil, which can lead to bulb rot. If the ground remains waterlogged throughout the winter months, the bulbs may suffocate and decay before they ever have a chance to grow. To prevent this, you should ensure that the planting area has excellent drainage and is not located in a low spot where meltwater might collect. A professional gardener always considers the winter hydrology of the garden when selecting a site for spring-flowering bulbs.
While the bulbs are dormant, they are still living organisms that are slowly preparing for the next season. The internal tissues are protected by several layers of papery scales that act as a barrier against the cold and prevent moisture loss. Maintaining a stable environment during this period of rest is the key to ensuring a high survival rate for your bulb colony. By understanding the science of overwintering, you can provide the subtle care that leads to a spectacular and reliable spring garden.
Protecting bulbs in the ground
In regions with very harsh winters or frequent freeze-thaw cycles, providing a light layer of mulch can be highly beneficial. A two-centimeter layer of shredded leaves, straw, or evergreen boughs can help insulate the soil and keep the temperature more consistent. This prevents the “heaving” of the soil that occurs when it freezes and thaws rapidly, which can sometimes push smaller bulbs to the surface. You should apply this mulch only after the ground has started to freeze to avoid providing a cozy home for nesting rodents.
More articles on this topic
If you are gardening in an area where the snow cover is inconsistent, you might need to be more proactive with your insulation strategies. Snow is actually an excellent natural insulator that protects the ground from deep freezing, so its absence can lead to much colder soil temperatures. In these cases, using a thicker layer of organic mulch can mimic the protective effects of a snow blanket. A professional tip is to use materials that are airy and won’t pack down into a heavy, suffocating mat over the dormant bulbs.
Autumn cleanup should be handled with care to ensure you don’t accidentally disturb the soil where the bulbs are resting. While it is good to remove any diseased foliage, leaving some natural litter on the ground can actually provide additional protection for the bulbs. You should avoid heavy tilling or deep digging in these areas once the bulbs have been planted for the season. Marking the location of your bulbs with small stakes or labels can prevent accidental damage during late-season garden maintenance.
Moisture management in the winter is mostly a matter of site selection, but you can also make minor adjustments to the landscape. If you notice that water is pooling over your bulb beds during winter rains or thaws, you might need to create small diversion channels to lead the water away. Ensuring that the soil remains “moist but not wet” is the ideal condition for overwintering any bulbous species. A proactive approach to winter drainage is often the difference between a thriving colony and a disappearing one.
Managing container-grown bulbs in winter
Overwintering grape hyacinths in pots requires more attention because the soil in a container can freeze much more solid than the ground. The limited volume of earth provides very little insulation, leaving the bulbs vulnerable to extreme cold that could damage their internal tissues. You should move your containers to a sheltered location, such as an unheated garage, a cold frame, or against the foundation of the house. This protects the pots from the worst of the wind and the most severe temperature drops while still providing the necessary cold period.
More articles on this topic
If you must leave your pots outdoors, you can wrap them in insulating materials like bubble wrap, burlap, or even old blankets to provide a thermal buffer. Grouping several pots together also helps them retain a small amount of heat and reduces the surface area exposed to the cold air. Another professional technique is to bury the entire pot in a pile of mulch or even in a temporary trench in the garden for the winter. These methods help mimic the more stable temperature profile found deep within the earth.
Watering requirements for dormant bulbs in containers are minimal but should not be completely ignored, especially if the pots are under cover. If the soil becomes completely bone-dry, the bulbs may desiccate and fail to sprout in the spring. You should check the moisture level once a month and provide a very small amount of water if the soil feels dusty. However, you must be extremely careful not to overwater, as dormant bulbs in cold pots are very susceptible to rot.
As the weather begins to warm in late winter, you should gradually reintroduce your container-grown bulbs to the light. If they have been kept in a dark garage, start by moving them to a brighter spot or outside during the day when temperatures are above freezing. This gradual transition helps the plants “wake up” naturally and prevents the shoots from becoming elongated and weak. Managing this spring transition is just as important as the winter protection itself for achieving a beautiful display.
Physiological changes during dormancy
Inside the bulb, a complex series of chemical and biological changes occur throughout the winter months. Even though there is no visible growth, the plant is monitoring the ambient temperature and keeping track of the “chill units” it has received. This internal clock ensures that the plant doesn’t start growing during a mid-winter thaw, only to be killed by a subsequent frost. Nature has designed these bulbs with a sophisticated timing mechanism that is truly a wonder of the plant world.
During the coldest parts of the winter, the sugars within the bulb act as a kind of natural antifreeze, lowering the freezing point of the cellular fluids. This prevents the formation of ice crystals that would otherwise rupture the cell walls and destroy the tissue. The health and nutrient status of the bulb when it entered dormancy determines how effective this internal protection will be. This is why proper care during the previous growing season is so vital for winter survival.
As the soil begins to warm in late winter, the bulbs initiate the process of breaking down stored starches into usable sugars for growth. This metabolic shift is what powers the rapid emergence of the leaves and the subsequent flower spikes. You can sometimes see the results of this internal activity even before the first shoots appear, as the bulbs may begin to swell slightly. Understanding these hidden processes allows you to appreciate the resilience and complexity of these seemingly simple garden plants.
The length of the dormancy period varies depending on the specific climate and the depth at which the bulbs were planted. Bulbs planted deeper will experience a more delayed and stable warming, while those closer to the surface will react more quickly to the sun’s heat. You can use these depth variations to slightly stagger the blooming time in your garden if you wish. This professional level of observation helps you understand why some plants emerge earlier than others in the same bed.
Preparing for the spring emergence
The final stage of overwintering is preparing the garden for the moment the first green tips break through the surface. As the snow melts and the ground softens, you should gently remove any heavy winter mulches that might obstruct the new growth. Doing this too late can result in the shoots becoming blanched and twisted as they struggle to find the light. A professional gardener watches the weather closely and times this cleanup to coincide with the first consistent warming of the soil.
Once the mulch is removed, you can take the opportunity to inspect the soil surface for any signs of frost heave or rodent damage. If you see any bulbs that have been pushed out of the ground, gently press them back into the soil and cover them with a fresh layer of earth. This is also a good time to apply a very light top-dressing of compost to provide a boost of nutrients for the coming season. Taking these small steps in late winter sets the stage for a successful and healthy spring display.
If you have used temporary winter protection like burlap or wire cages, these should be removed and stored for the following year. Cleaning up the garden beds early ensures that the focus remains on the beautiful emerging flowers rather than on the remnants of winter care. A clean and well-maintained bed also allows you to see the progress of your bulbs more clearly and enjoy the very first signs of spring. The transition from winter protection to spring growth is one of the most exciting times in the horticultural calendar.
In conclusion, successful overwintering is a combination of choosing the right location, providing appropriate protection, and understanding the plant’s internal needs. These bulbs are remarkably self-sufficient, but a little expert guidance ensures they perform at their absolute best. By following these professional strategies, you can rest easy knowing that your grape hyacinths are safe and sound beneath the winter soil. The reward for your care will be a spectacular and reliable burst of blue color every single spring.