Planting and propagating the hart’s tongue fern is a rewarding endeavor that allows you to expand your garden collection or share these beautiful plants with friends. This process requires a delicate touch and a good understanding of the plant’s natural life cycle to ensure the highest success rates. Whether you are starting with a young nursery plant or attempting to grow new ferns from spores, the steps you take now will define the future health of your garden. It is a journey that connects you deeply with the rhythmic patterns of the natural world and the fascinating biology of ferns.
Selecting the right site and soil
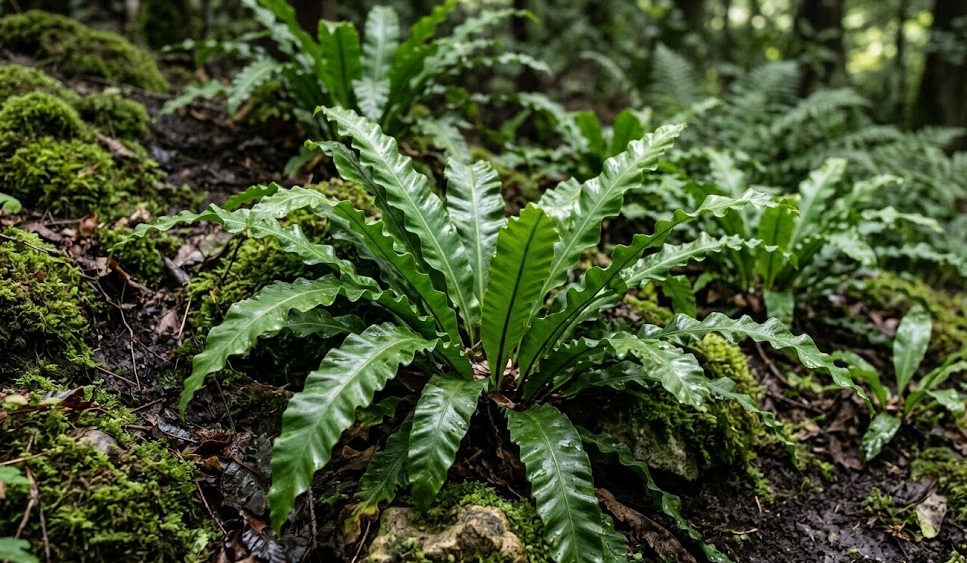
Before you begin the planting process, it is vital to select a location that mirrors the cool, damp, and shaded forest floors where these ferns naturally occur. You should look for a spot that receives bright but indirect light, as the intense midday sun will quickly damage the sensitive evergreen fronds. North-facing walls or the shaded side of a garden building are often perfect locations for establishing a new colony. Ensuring the site is protected from strong winds will also help maintain the high humidity levels that this species requires.
The soil at your chosen site must be prepared with care to provide the best possible start for your new fern. You should incorporate plenty of well-rotted leaf mold or organic compost to create a substrate that is rich in nutrients and holds moisture well. Because this fern is a calcicole, adding some lime or crushed chalk to the planting hole is highly recommended if your soil is naturally acidic. The goal is to create a friable, well-draining medium that allows the delicate roots to spread easily without becoming waterlogged.
When you are ready to plant, dig a hole that is twice as wide as the root ball but no deeper than the container the plant is currently in. You should gently loosen the roots if they have become tightly wound around the base of the pot before placing the fern in the ground. Positioning the crown at the soil surface is crucial, as planting it too deeply can lead to crown rot and the eventual death of the plant. Firm the soil gently around the roots with your hands to remove any large air pockets.
After planting is complete, you need to water the area thoroughly to settle the soil and provide immediate hydration to the roots. You should apply a layer of organic mulch around the base, taking care not to cover the central crown where the new fronds emerge. This mulch will help retain moisture, suppress weeds, and provide a slow release of nutrients as it decomposes over the coming months. Regular monitoring during the first few weeks is essential to ensure the plant settles into its new home without undue stress.
More articles on this topic
Propagation through division
Dividing established plants is the most straightforward way to create new ferns that are genetically identical to the parent. You should perform this task in early spring just as the new growth is beginning to emerge but before the fronds have fully unfurled. Choosing a healthy, mature specimen with multiple crowns will give you the best chance of producing several strong new plants. This method is also a great way to rejuvenate an older fern that may have become overcrowded or less vigorous over time.
To begin the division, carefully lift the entire plant from the ground or its container using a garden fork or a sharp spade. You should shake off excess soil to get a clear view of the rhizomes and the points where the different crowns are joined. Using a clean, sharp knife or a specialized garden saw, carefully cut through the rhizome to separate the individual sections. Each new division must have at least one healthy crown and a substantial portion of the root system attached to ensure its survival.
Once you have separated the divisions, you should plant them immediately into their new locations or into individual pots filled with a suitable growing medium. You need to treat these new plants with extra care, ensuring they are kept consistently moist and shaded as they recover from the shock of division. Avoid fertilizing the new divisions for the first few months, as their roots need time to establish before they can handle concentrated nutrients. Most divisions will show signs of new growth within a few weeks if they are kept in the right conditions.
Success with division depends largely on the timing and the care taken during the physical separation of the plant parts. You should always use sterilized tools to prevent the spread of soil-borne diseases between the parent and the new offspring. If you notice any signs of decay on the rhizomes during the process, trim them back to healthy tissue before replanting. This technique allows you to rapidly increase your stock of hart’s tongue ferns while maintaining the specific characteristics of your favorite specimens.
More articles on this topic
Growing from spores
Propagating ferns from spores is a more technical and time-consuming process, but it is incredibly fascinating for those interested in plant biology. You should begin by identifying mature fronds that have dark, ripe spore cases, known as sori, on their underside during the late summer months. Collect these fronds and place them between two sheets of clean white paper in a dry, draft-free room for a few days. As the fronds dry, the spores will be released and appear as a fine brown dust on the surface of the paper.
Prepare a sterile growing medium by using a mixture of peat and sand that has been treated with boiling water to kill any competing fungi or mosses. You should carefully sow the fine spores over the surface of the cooled medium, ensuring they are spread as evenly as possible. Place the container in a clear plastic bag or cover it with a piece of glass to maintain 100% humidity and keep out contaminants. This mini-greenhouse environment must be kept in a warm, brightly lit spot but away from direct sunlight.
The first sign of success will be the appearance of a thin green film on the surface of the soil, which is the prothallus or gametophyte stage. You should mist this surface occasionally with sterile water to facilitate fertilization, as ferns require a film of water for their reproductive cells to move. Eventually, small fern fronds will begin to emerge from the prothalli, signaling the start of the sporophyte stage that we recognize as the adult plant. This process requires great patience, as it can take several months or even a year to see recognizable fernlets.
Once the young ferns have grown large enough to handle, you can carefully transplant them into small individual pots to continue their development. You need to harden them off gradually by slowly increasing their exposure to lower humidity levels over several weeks. Growing from spores allows you to produce a large number of plants and can reveal interesting natural variations within the species. It is a deeply satisfying way to participate in the entire life cycle of this ancient and beautiful group of plants.
Establishing young plants
The final stage of planting and propagation is the careful nurturing of young plants until they are strong enough to survive in the general garden environment. You should provide these youngsters with a very stable and protected setting, such as a cold frame or a shaded corner of a greenhouse. Keeping them in containers for the first year or two allows you to move them around to find the perfect light and temperature balance. Regular, gentle watering is the most important task during this phase of their development.
You should pay close attention to the development of the root system, which is a good indicator of the plant’s overall health and readiness for permanent planting. If the roots are growing vigorously and the foliage is a healthy green, the plant is likely ready to be moved to its final home. Avoid the temptation to plant them out too early, especially if extreme weather conditions are expected in the near future. A well-established young plant has a much higher chance of long-term success once it is placed in the ground.
Gradually introducing the young ferns to the specific soil and water conditions of your garden will help prevent transplant shock. You can do this by using a small amount of garden soil in their final potting mix or by using the same water source they will have later. This “acclimatization” period prepares the plant for the realities of life outside a controlled environment. Successful establishment is the result of many small, careful steps taken over a long period of time.
Watching a plant you have propagated yourself grow into a mature, thriving specimen is one of the greatest joys of gardening. You should take pride in the fact that you have successfully navigated the complexities of fern reproduction and establishment. These plants will continue to beautify your garden for many years, serving as a living testament to your skill and dedication as a grower. Sharing your knowledge and extra plants with others continues the cycle of learning and growth within the gardening community.