
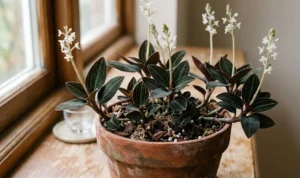
Successfully establishing striped squill in the garden begins with proper planting techniques, which are crucial for the long-term health and vitality of these charming spring bulbs. The ideal time for planting is in the autumn, typically from September to November, before the ground freezes solid. This period allows the bulbs sufficient time to develop a strong root system throughout the winter, preparing them for vigorous growth and flowering come early spring. Selecting high-quality, firm bulbs from a reputable supplier is the first step toward a stunning display. Avoid any bulbs that are soft, shriveled, or show signs of mold, as these are unlikely to thrive. The planting process itself is straightforward, but attention to a few key details, such as depth and spacing, will make a significant difference in the overall effect and health of the colony.
The chosen planting location should be one that receives full sun to partial shade, especially during the early spring months. The soil must be well-draining to prevent the bulbs from rotting in wet conditions. If you are working with heavy clay soil, it is essential to amend it with organic matter like compost or grit to improve its structure and drainage. A soil pH that is neutral to slightly acidic is preferred. Proper site preparation not only ensures the survival of the bulbs but also encourages them to naturalize and spread over time, creating the beautiful, dense carpets of color for which striped squill is known.
Propagation of striped squill is a rewarding process that can be achieved through two primary methods: division of established clumps and growing from seed. Division is the most common and quickest way to increase your stock, while growing from seed is a longer process that can be used to generate large numbers of new plants. Understanding both methods allows a gardener to choose the best approach based on their goals and timeline. Each technique has its own set of procedures and optimal timings that should be followed for the best results.
Whether you are planting bulbs for the first time or propagating an existing collection, the principles remain the same: provide the right conditions and handle the plant material with care. Striped squill is a resilient plant, but thoughtful cultivation practices will be rewarded with an ever-expanding display of delicate blue and white flowers that herald the end of winter. This initial investment of effort in planting and propagation is what leads to a sustainable and self-perpetuating feature in the garden for many years to come.
Proper bulb planting techniques
When it comes to planting striped squill bulbs, achieving the correct depth is a critical factor for success. A general rule of thumb for most bulbs is to plant them at a depth that is two to three times their own height. For striped squill, which has relatively small bulbs, this translates to a planting depth of approximately 8 to 10 centimeters (about 3 to 4 inches). This depth provides adequate insulation from temperature fluctuations and protects the bulbs from being accidentally dislodged by garden activities or foraging animals.
More articles on this topic
Proper spacing is also important to consider, as it allows each bulb enough room to grow and multiply without becoming overly crowded too quickly. Space the individual bulbs about 5 to 8 centimeters (2 to 3 inches) apart. This spacing is close enough to create a full, dense appearance once the plants mature, but it also gives them room to produce offset bulbs for a few years before they might require division. For a more naturalistic look, it is often recommended to plant them in informal drifts or clusters rather than in rigid rows. A simple way to achieve this is to gently toss a handful of bulbs onto the prepared soil and plant them where they land.
The orientation of the bulb in the planting hole is another detail to note. Each bulb has a pointed end, from which the shoot will emerge, and a flatter, broader end where the roots will grow. It is essential to plant the bulb with the pointed end facing upwards. If you are unsure which end is which, planting the bulb on its side is a safe alternative; the plant’s natural geotropism will ensure the shoot grows up towards the sun and the roots grow down into the soil.
After placing the bulbs in their holes at the correct depth and orientation, carefully backfill the holes with the prepared soil. Gently firm the soil over the bulbs to eliminate any large air pockets. Once planting is complete, it is highly beneficial to water the area thoroughly. This watering helps to settle the soil around the bulbs and provides the necessary moisture to encourage the initiation of root growth before the onset of winter.
Propagation through division
Propagation by division is the most straightforward and reliable method for increasing your stock of striped squill. This technique involves separating the offset bulbs, or bulblets, that form around the parent bulb over time. As a clump matures, it can become congested, leading to reduced flowering. Division not only provides new plants but also reinvigorates the original clump, ensuring it remains healthy and productive. The process is best carried out when the bulbs are dormant, typically in late summer or early autumn after the foliage has completely died back.
More articles on this topic
To begin the process, use a garden fork or spade to carefully lift the entire clump from the ground. It is important to dig deeply and widely around the clump to avoid slicing into the bulbs. Once the clump is free from the soil, gently shake or crumble the excess soil away so that the individual bulbs are visible. You will notice a cluster of bulbs of various sizes, with smaller offsets attached to the larger, original bulbs.
The next step is to carefully separate these bulbs. Often, they can be gently teased apart with your fingers. If they are tightly joined, you may need to carefully twist them apart. The goal is to separate them into individual bulbs without causing damage. It is a good practice to discard any bulbs that feel soft or show any signs of disease or rot. Retain only the healthy, firm bulbs for replanting.
Once separated, the bulbs should be replanted as soon as possible to prevent them from drying out. They can be planted back into the original location after enriching the soil with some fresh compost, or they can be used to establish new colonies elsewhere in the garden. Plant them at the recommended depth of 8-10 centimeters and space them adequately to allow for future growth. Water them well after planting to help them settle in. Division every three to four years is a great way to maintain the vigor of your striped squill and generously expand their presence in your garden.
Propagation from seed
Growing striped squill from seed is a less common method of propagation, primarily because it is a much slower process than division, but it can be a very rewarding experience. It is an excellent way to produce a large number of plants from a single source. After the flowers fade in the spring, they will, if pollinated, develop small seed pods. It is important to monitor these pods and collect the seeds just as the pods begin to split open, as they can disperse their seeds quickly.
The seeds of striped squill, like those of many other spring bulbs, benefit from a period of cold, moist stratification to break their dormancy. The easiest way to achieve this is to sow the seeds directly into the garden in late summer or early autumn. Prepare a seedbed in a suitable location with well-draining, fertile soil. Sow the seeds thinly on the surface and cover them with a fine layer of soil or horticultural grit. The natural winter cold will provide the necessary stratification.
Alternatively, the seeds can be sown in pots or trays. Fill the containers with a well-draining seed-starting mix. Sow the seeds on the surface and cover lightly. Water the container and place it in a cold frame, an unheated greenhouse, or simply outdoors in a protected spot over the winter. The key is to expose them to the cold winter temperatures while protecting them from being washed away by heavy rain or disturbed by animals.
Patience is essential when growing striped squill from seed. Germination can be slow and sporadic, often occurring the following spring. The young seedlings will resemble small blades of grass. It is crucial to keep the seedbed or pots moist but not waterlogged during their first year of growth. The seedlings will take several years—typically three to four—to develop into bulbs that are large enough to produce flowers. During this time, allow their foliage to grow and die back naturally each year to build up energy in the developing bulb.

Striped squill, or Puschkinia scilloides, is such an underrated spring bulb for naturalizing under deciduous trees. I’ve found that planting them slightly deeper than the standard three inches helps protect them from being dug up by curious squirrels. The soil in my garden is quite loamy, and they seem to spread very effectively through both bulb offsets and self-seeding. Last spring, I had a literal carpet of pale blue and white that lasted for nearly three weeks. Do you recommend adding any bone meal to the planting hole, or is a general-purpose fertilizer enough? I want to ensure they have enough nutrients to build up their bulbs for the following year.
Maria here, I’ve had great success with just a small amount of bone meal mixed into the bottom of the trench. It provides that slow-release phosphorus that bulbs really crave for root development and future flowering. As for the squirrels, I’ve started laying a piece of chicken wire over the planting area and then covering it with mulch. The squill can easily grow through the gaps in the wire, but the squirrels can’t get down to the bulbs. It’s been a total game-changer for my garden.
I’ve been experimenting with naturalizing striped squill directly into my lawn, similar to how people do with crocuses. The key is to make sure you don’t mow the grass until the squill foliage has completely died back and turned yellow. This allows the bulbs to pull all those essential sugars back down for next year’s growth. They are one of the earliest bloomers, so they usually finish up long before the grass starts growing vigorously. It creates such a magical, woodland feel in the early spring before the rest of the garden wakes up. I highly recommend it for anyone with a less-than-perfect lawn.